Damsel Top (PDF Pattern)
This ROBERTS | WOOD KiT project is provided as a PDF pattern with step-by-step sewing instructions.
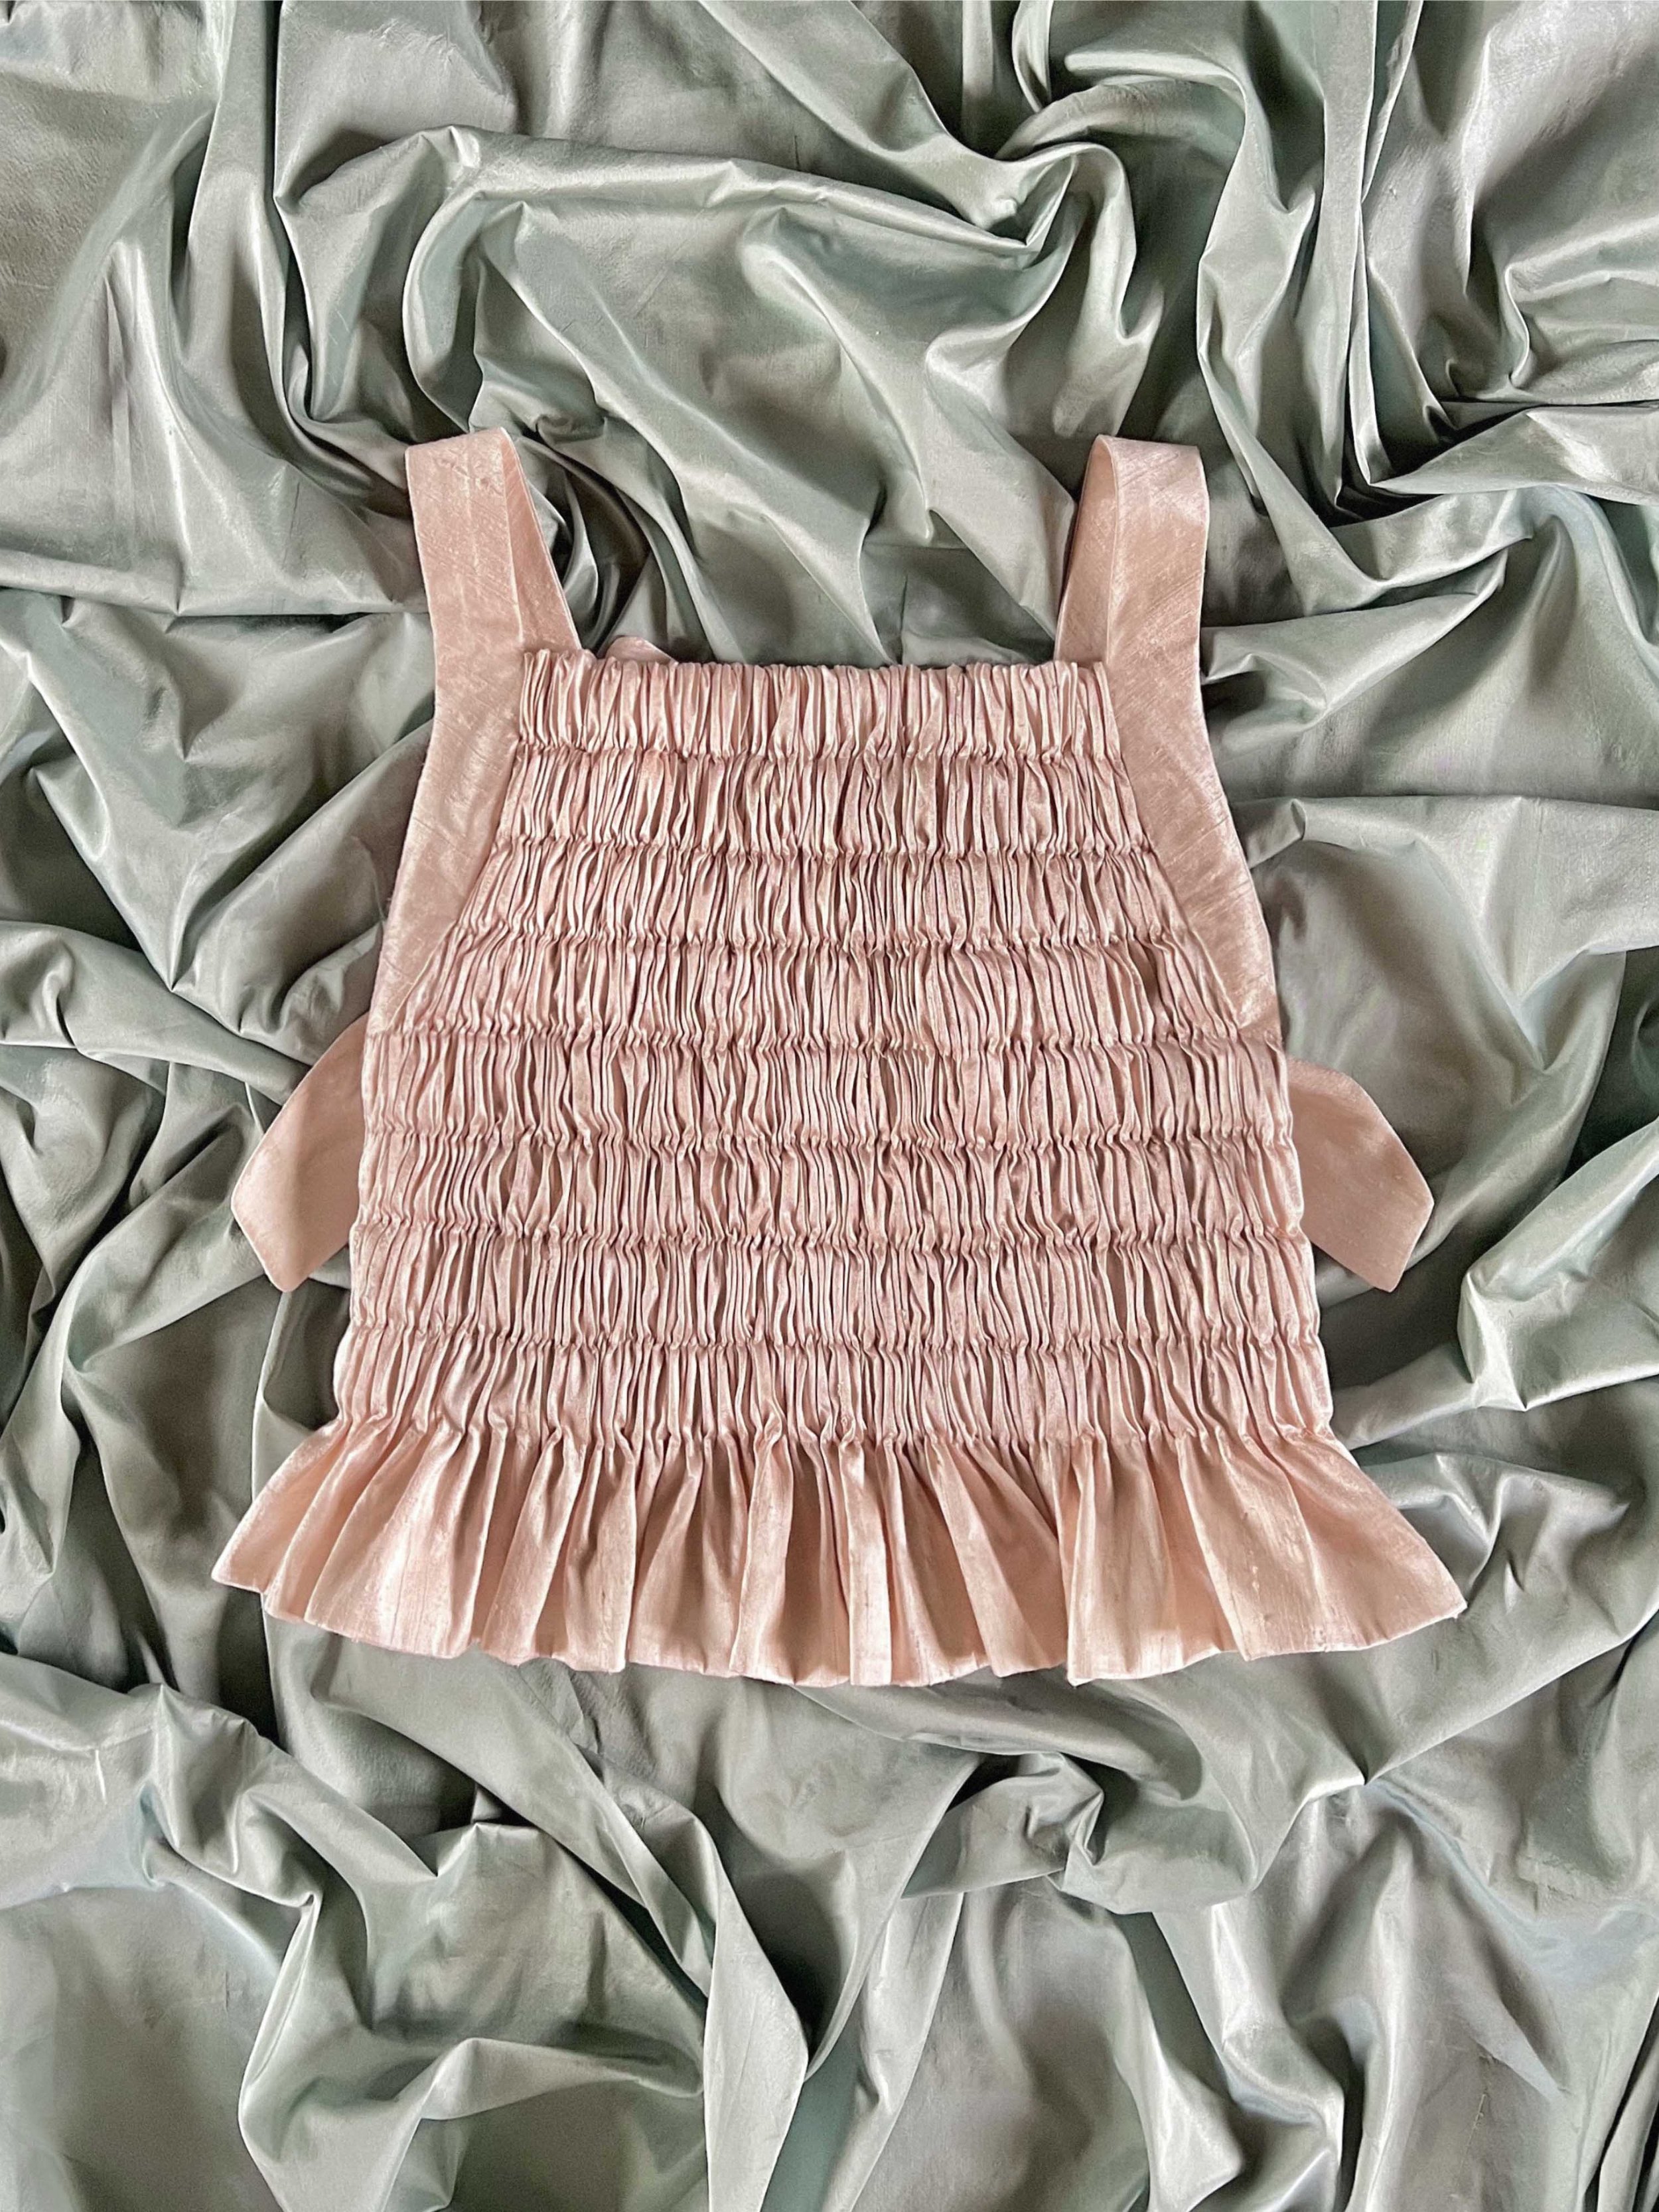
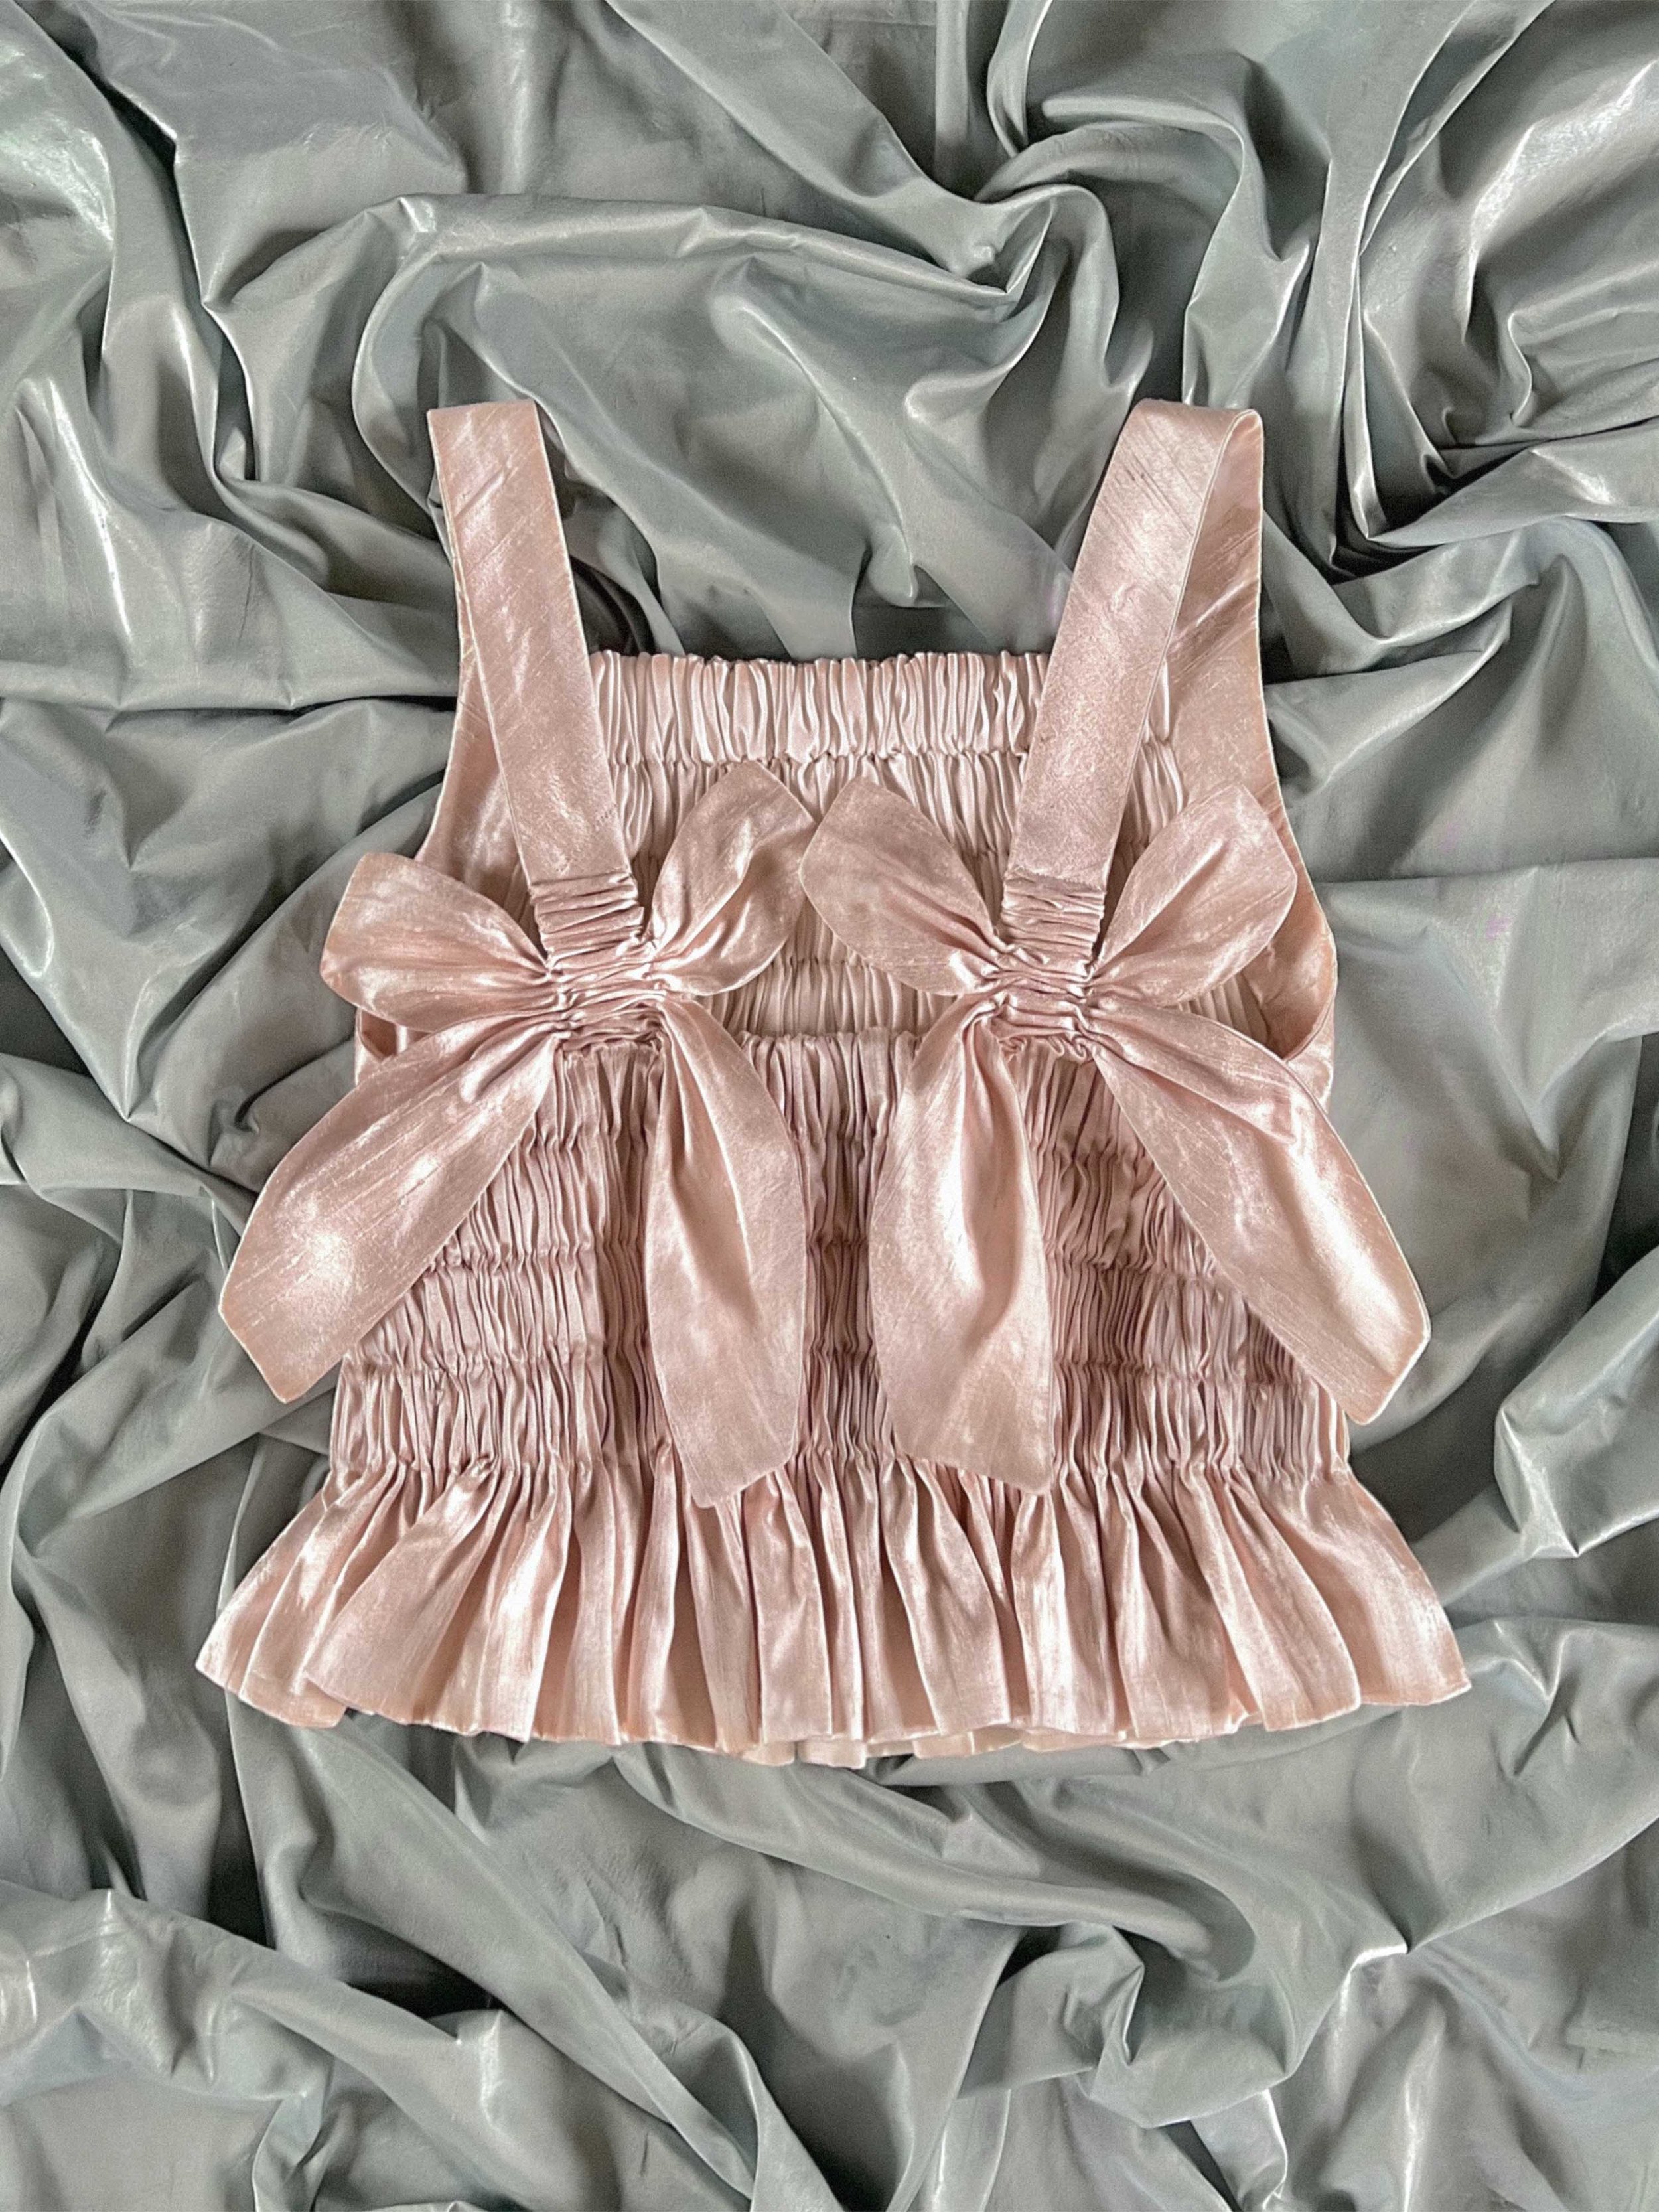
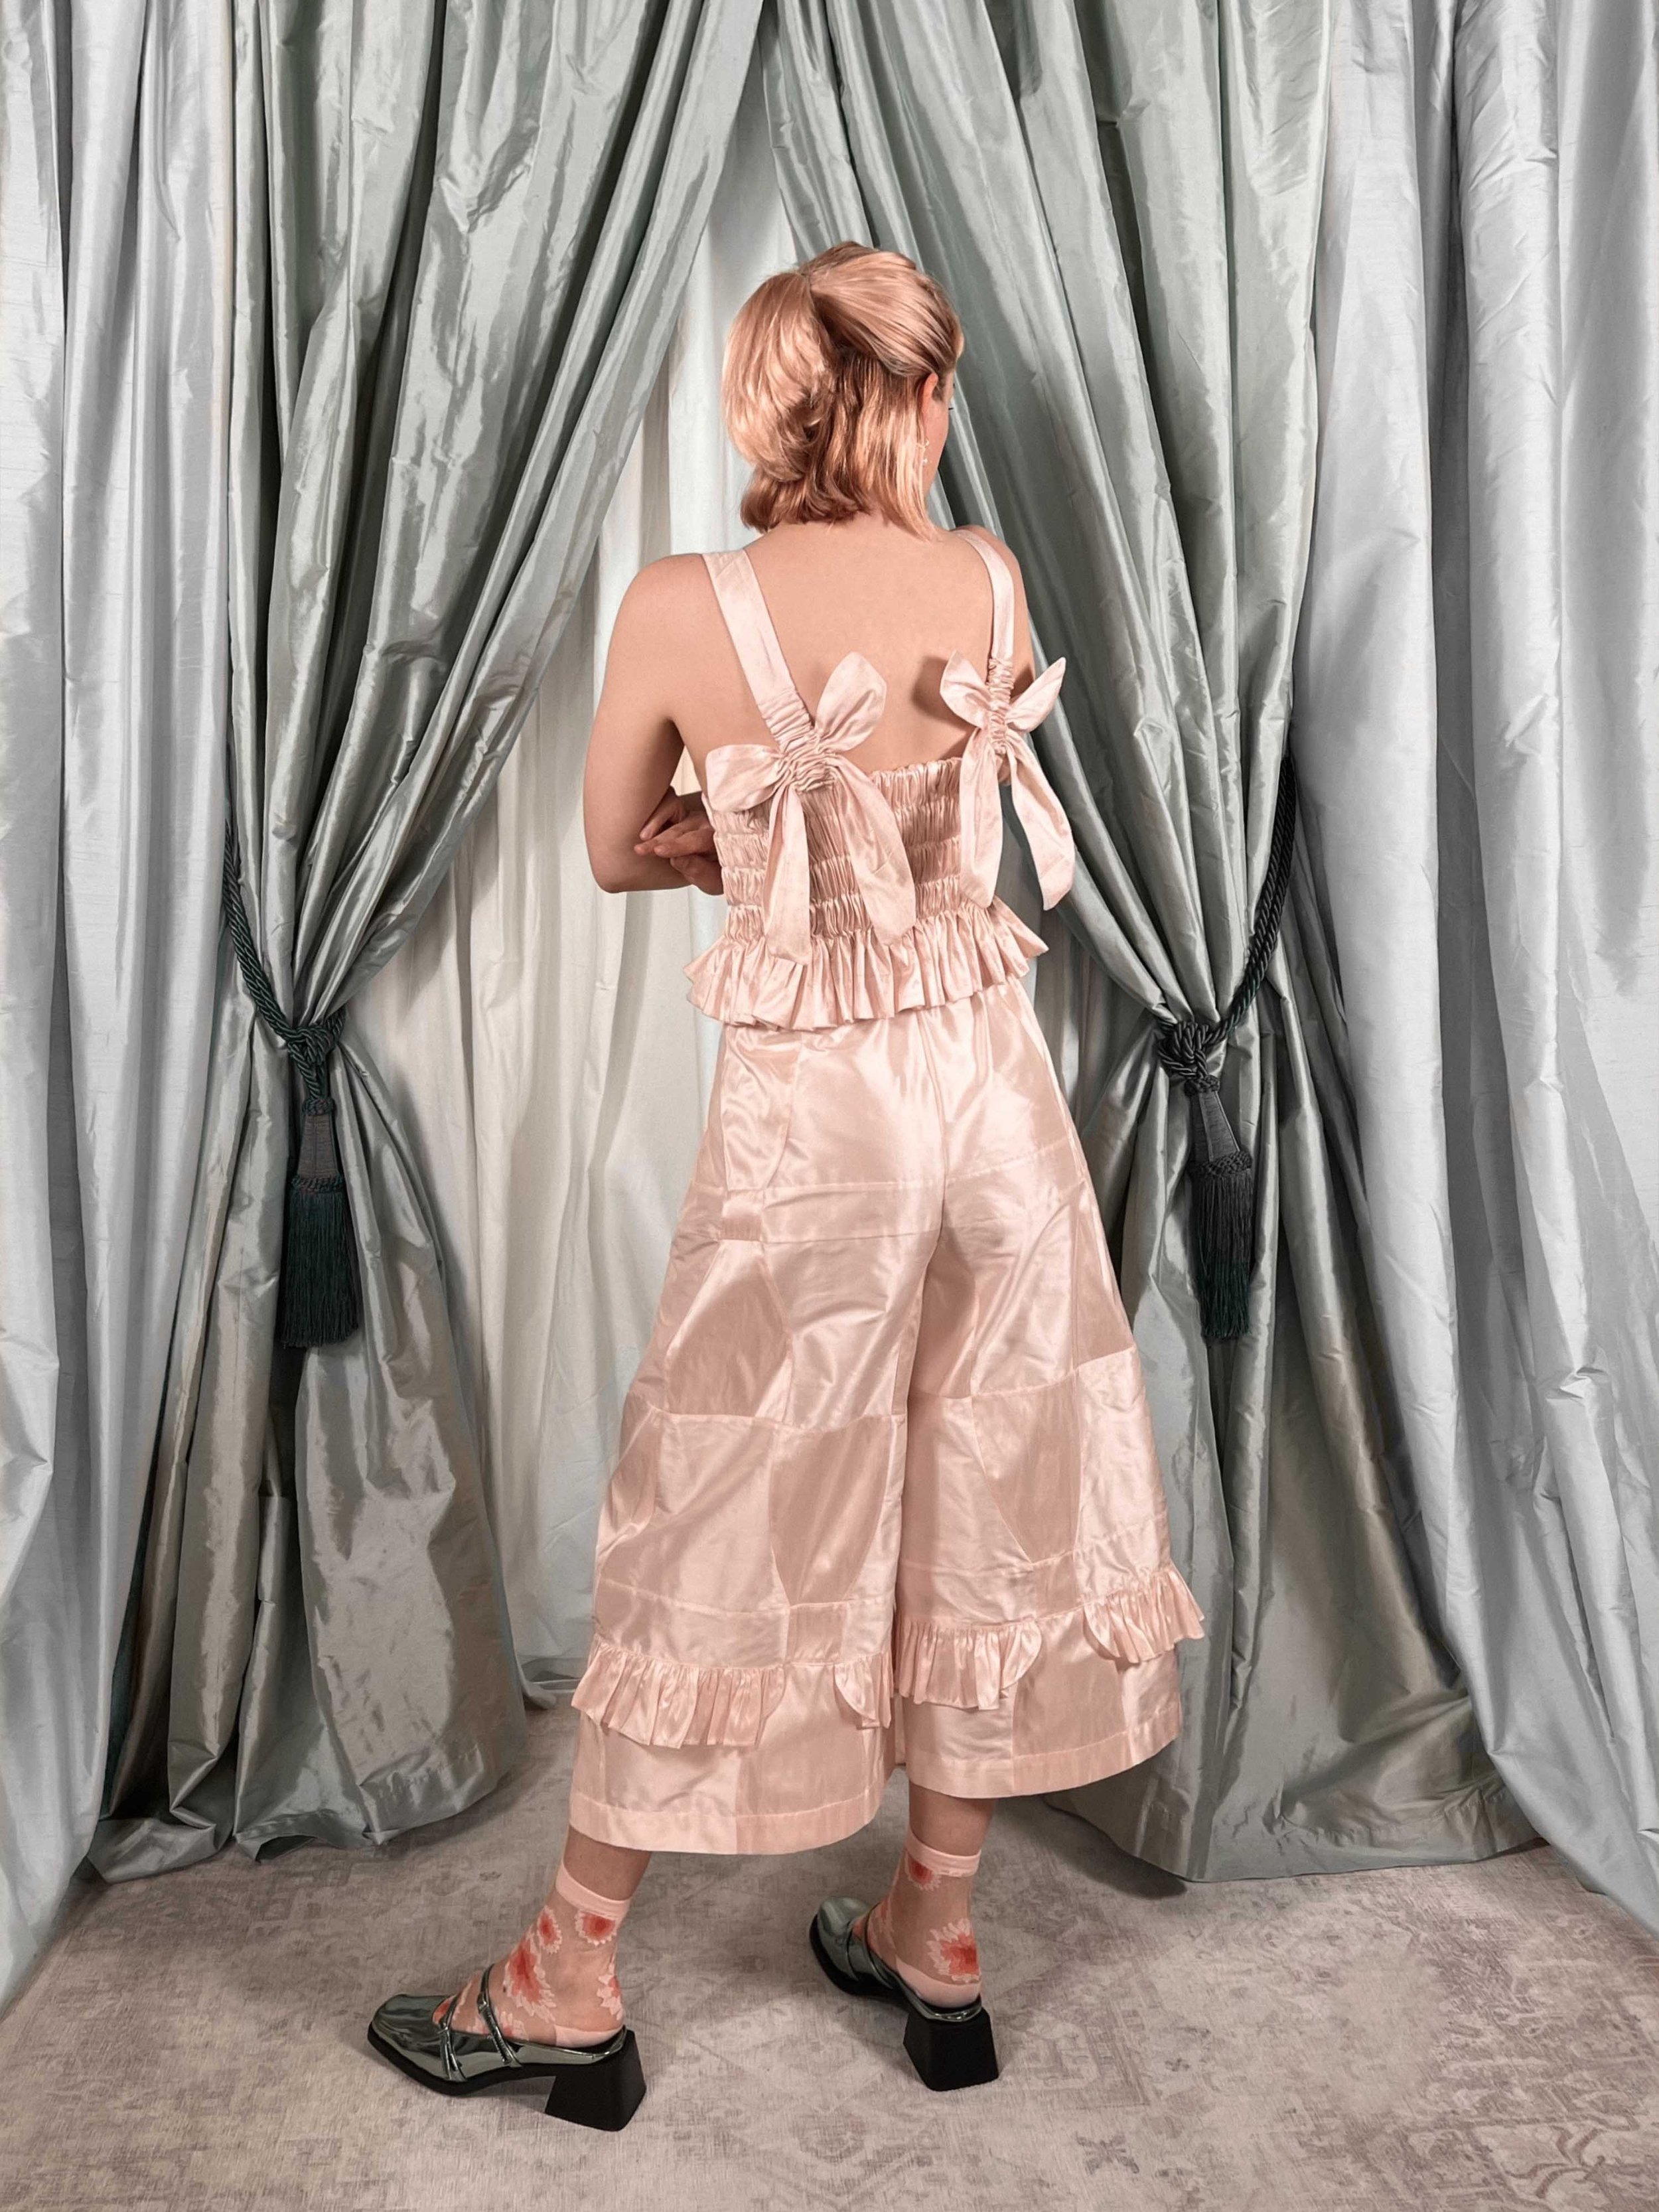
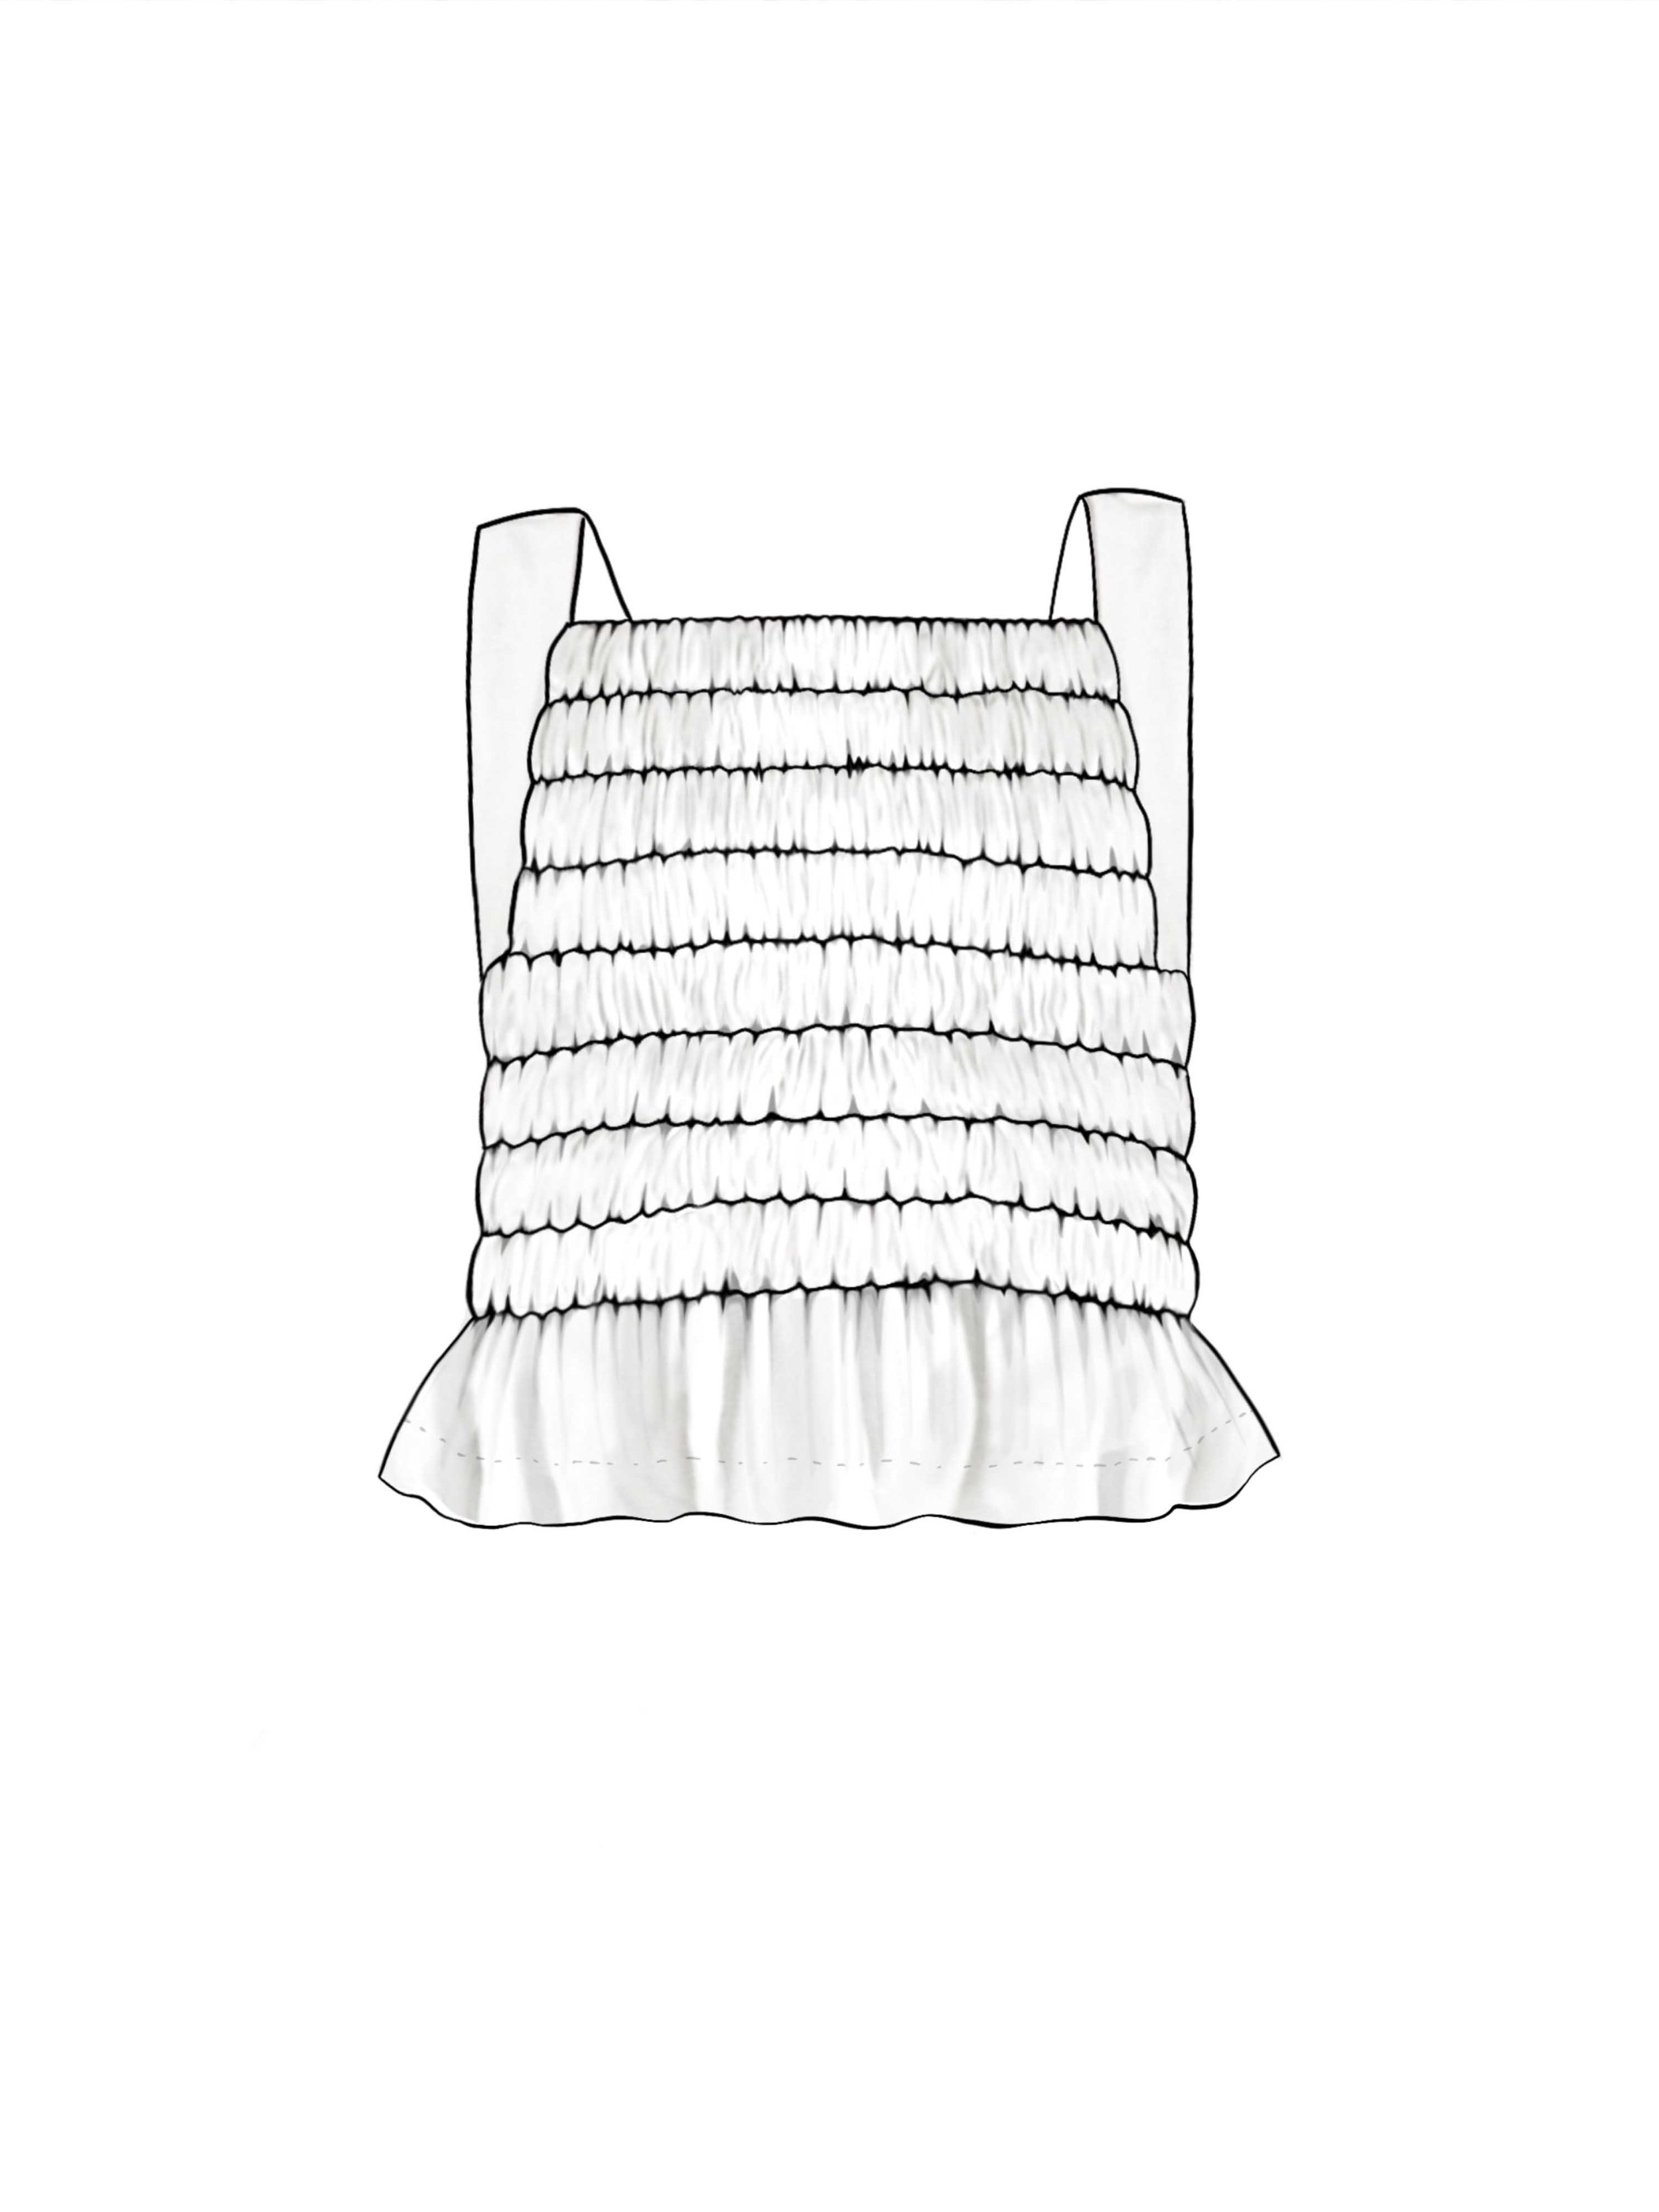
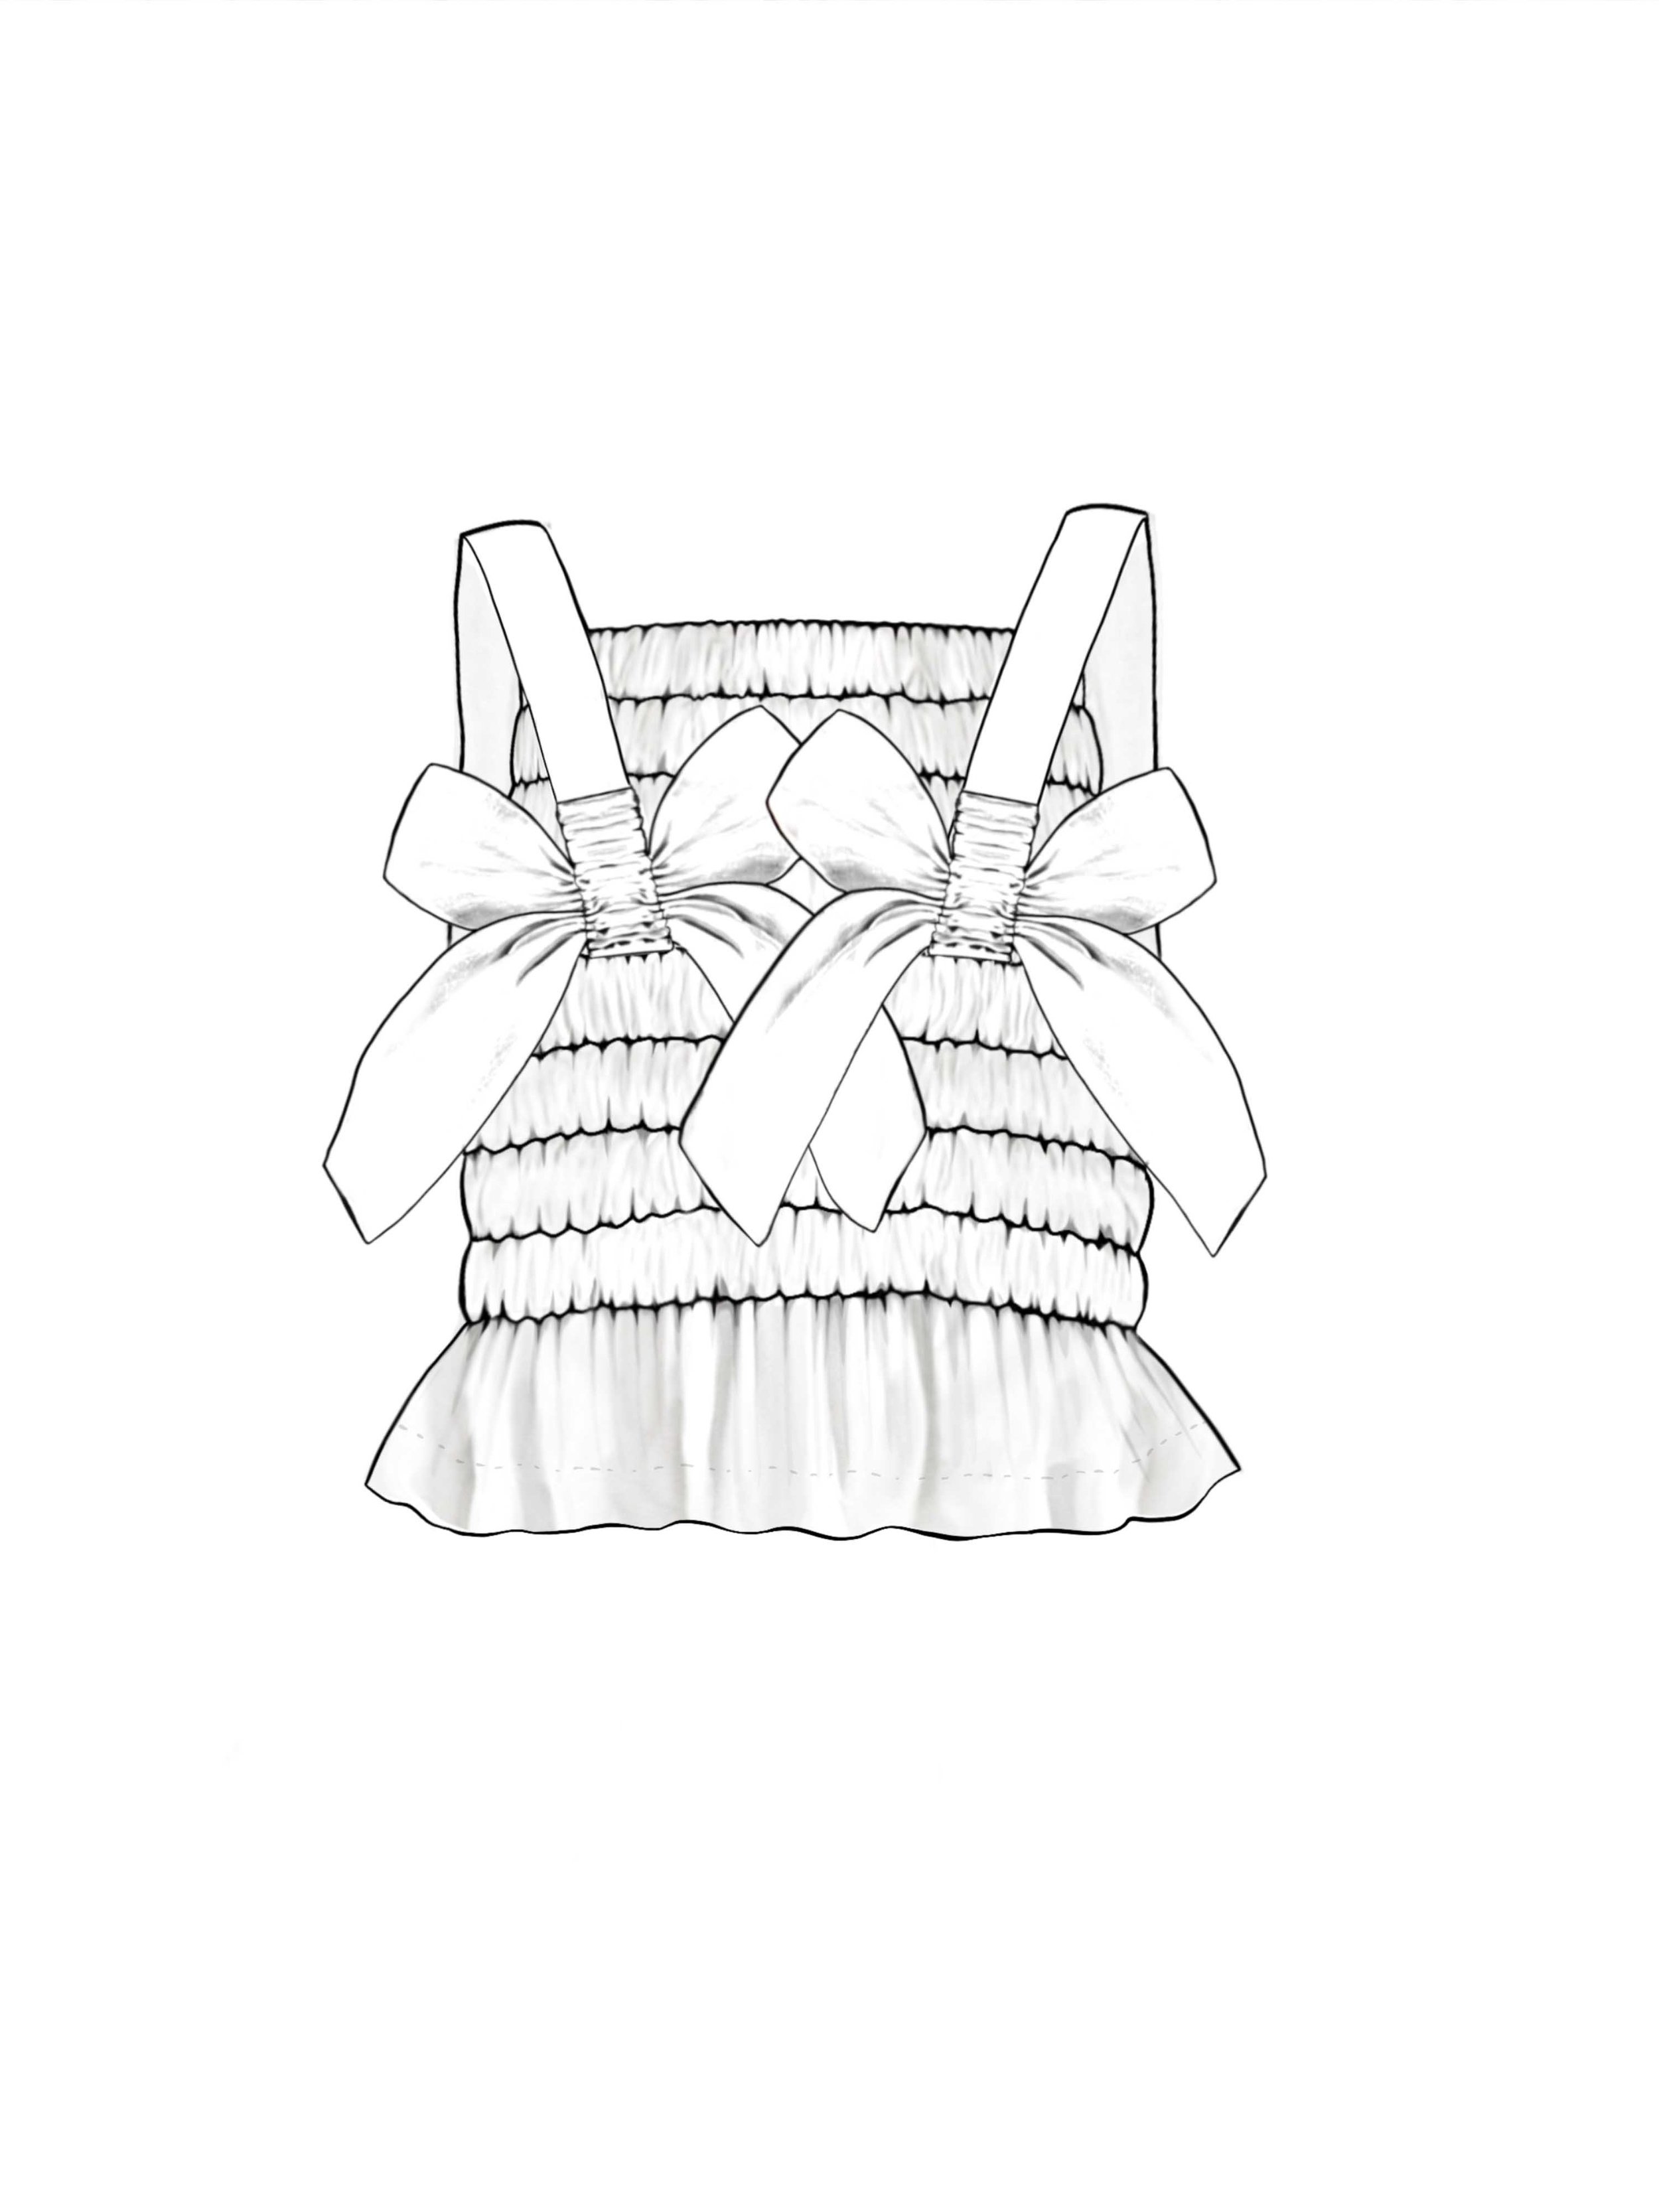
This ROBERTS | WOOD KiT design explores a construction method, where multiple fabric channels are created through parallel stitch lines, and then, lengths of 2.5cm-wide elastic are threaded through. This creates a structured bodice, that can be as corseted (or not) as you like. By gathering fabric channels cut in special shapes, 3D bows are created on back straps. NOTE - this design does not use a shirring or smocking technique.
The Damsel Top is part of a new mini-collection of non-patchwork designs, designed to be cut from repurposed fabric, and explores unique and interesting construction methods
This design allows the maker to fully customise the fit of the garment to create a piece to their exact specifications, through a process outlined in the instructions (included)
The name of the dress originated due to the shapes of the bow pattern pieces, reminiscent of dragonflies / damselflies.
This pattern is ideal for Intermediate level sewists and above.
Price - £ 18.00
Each download is a bundle which includes 2 sizes of the pattern. Note the two sizes in each bundle are supplied as separate patterns / separate files (i.e the patterns are not nested together on the same file). See the Sizing and Fit tab for more details of the final garment measurements for each size.
-
The sizing on this top is based on your body circumference measurement, taken at the bust and waist.
If your bust and waist measurements fall within different sizes, don’t worry, just pick the size that aligns with the bigger of your 2 measurements. The dress is elasticated and fully adjustable and your smaller measurement will be accommodated by adjusting the elastic during the fitting stage.
The instructions included with the product provide clear explanations of how to properly fit your top.
Please see the below table to help you to select your preferred size
-
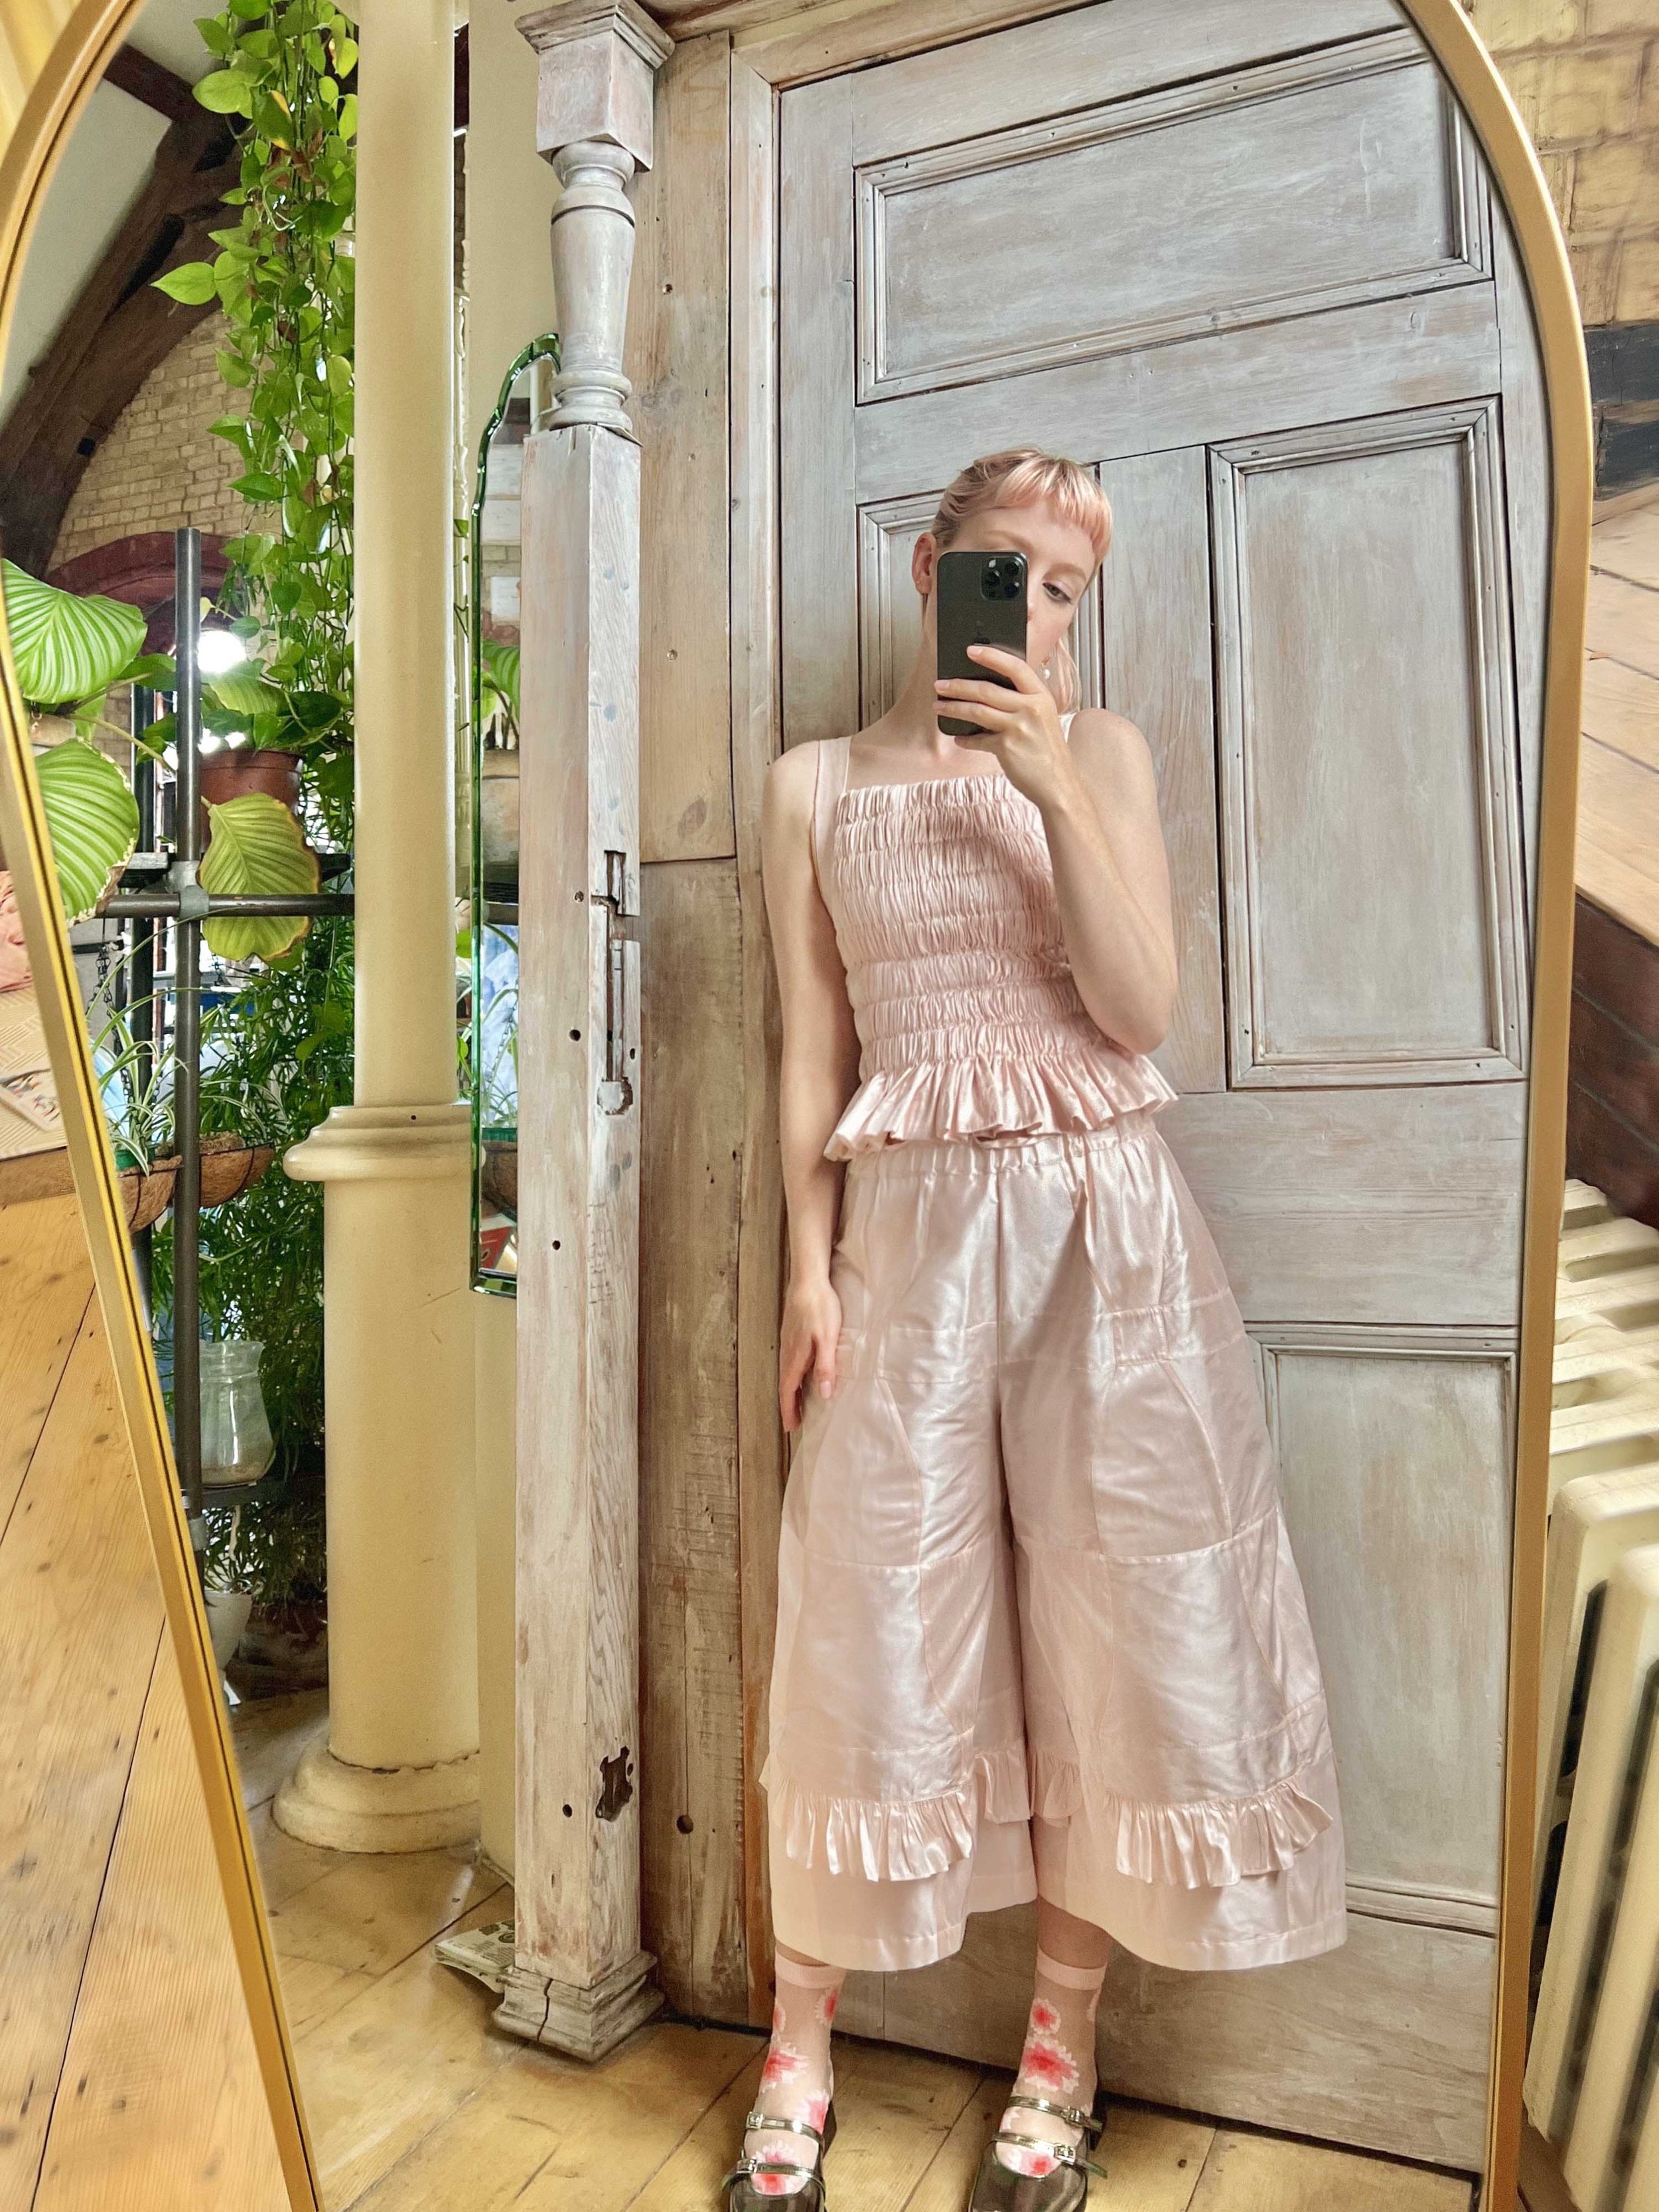
The top features a structured, fitted, elasticated bodice with a frill below the waist. The design features 3D bows that sit on the back straps, at the shoulder blades.
The top is made up of just two main pieces (front and back), two lining pieces. There are separate pattern pieces featuring specially cut shapes for the straps.
All shaping of the top is achieved through the process of gathering the fabric onto multiple elastic lengths. By gathering fabric channels, pattern-cut in specific shapes, 3D bows are created on the back parts of the shoulder straps.
This design does not use a shirring or smocking technique, but rather the insertion of elastic into multiple sewn channels to achieve an elasticated corset-like structured effect.
There is a 20cm concealed zip inserted in the side seam.
Making a toile of your garment is always best practice before making your final version, however the instructions include a method for adjusting the main elements of fit throughout the construction process, should you choose to not make a toile
-
The design has been developed specifically with repurposing fabric in mind. The large pattern-pieces are designed to be cut cross-grain, from repurposed fabric such as silk curtains / cotton sheets; lightweight fabrics with a bit of body are great for this top.
Recommended fabrics for this design include lightweight dupion, taffeta, cotton and linen. Ideal fabric weight is between 30gsm and 150gsm. This recommendation is to ensure the fabric around the elastic, gathers nicely. A thick or heavy fabric may bunch or cause more problems with twisting of the elastic. Remember to remove any curtain lining from your repurposed curtains before use!
We recommend using 2.5cm wide elastic for inserting into the bodice channels / back straps.
We recommend a lining fabric that is as lightweight as possible, to avoid bunching in the elastic channels.
-
If sourcing fabric from (for example) repurposed curtains, you need to ensure that you will have sufficient fabric to cut the front and back main pieces and the smaller pattern pieces too. Because curtain widths and lengths can vary so much, the provided fabric usages are based on a 140cm width fabric. Suggested cutting lays are also provided in the instructions - these are also based on a 140 width. Remember that that large front / back pieces and linings are cut cross-grain.
You will need approximately 6m - 8.5m of 2.5cm width elastic for this style (depending on your size). Full details are provided in the instruction booklet.
Fabric usage is show below:
-
This ROBERTS | WOOD KiT project is provided as a PDF pattern with full sewing instructions. It includes an A4/US letter printable PDF pattern, which can be printed and assembled at home using any standard home printer. Also included is an A0 pattern that can be printed at a print shop. All our projects include detailed instructions, showing you step by step how to make the project.
The instructions also include appendices containing guides on how to make basic amendments to the pattern (length, volume and strap shape)
-
Materials required:
Lightweight fabrics for cutting the pattern pieces.
Lightweight lining fabric for the lining pieces
Roll of 2.5cm wide elastic for inserting into the strap / channels
There is an option to fuse the Front Straps, which is recommended if your fabric is very unstructured, so you will need some small pieces of fusible interfacing if you want to do this.
You will need a 20cm concealed zip.
Equipment required:
Paper scissors, sellotape (for assembling A4 pattern), Iron, fabric scissors, measuring tape, chalk pencil for marking fabric, lots of safety pins, lots of pins, sewing machine.
-
Intermediate sewist level and beyond
This project assumes knowledge of basic sewing techniques and terminology, although most of the processes are very straightforward and easy to follow. It is a fun project for anyone who wants to learn new textile and sewing skills.
The project also provides detailed instructions, broken down for each step, so don’t worry if you don’t know where to start with assembling the design.
This project will likely take 1-2 or more days to construct. As with all our projects, this one is designed to be enjoyed at leisure, embracing the joys of slow-fashion and hand-crafting your own special designer garment.