Rabbit Bag (PDF Pattern)
This ROBERTS | WOOD KiT project is provided as a PDF pattern with sewing instructions.
The Rabbit Bag is a playful accessory project, that enables the maker to explore 3D object-making, whilst injecting their creativity though combining different colours, fabrics and textures in this patchwork design.
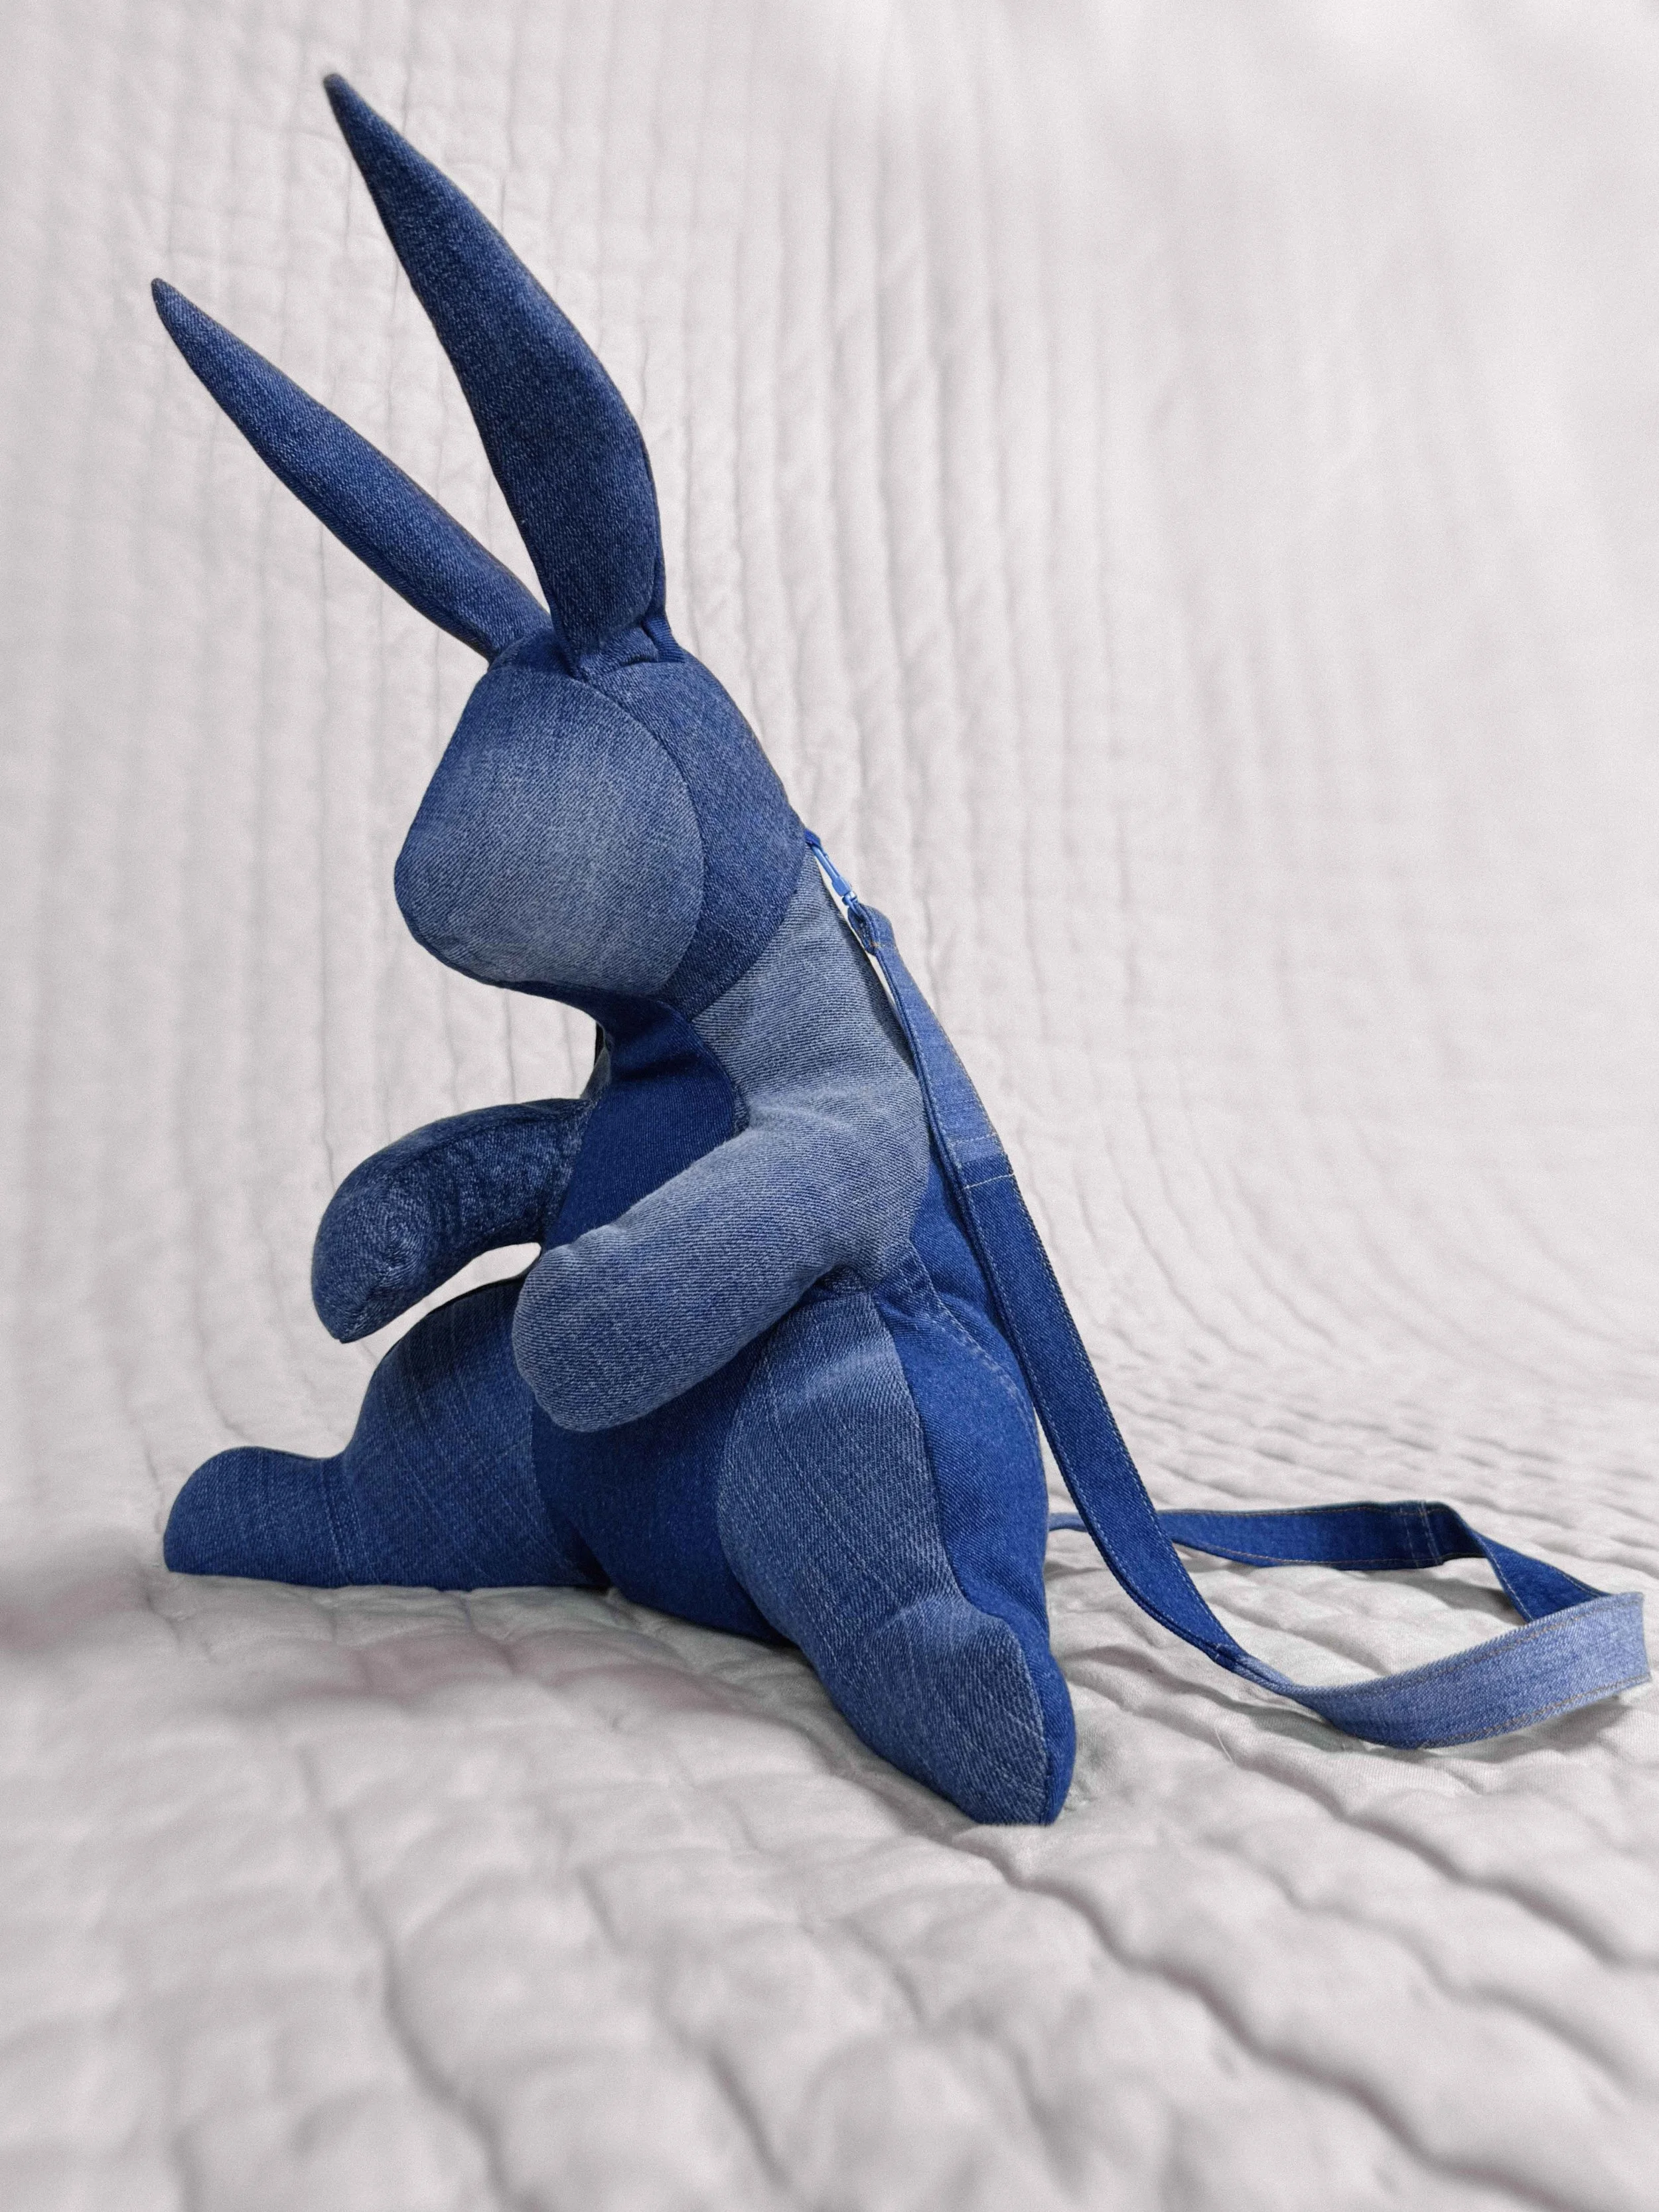
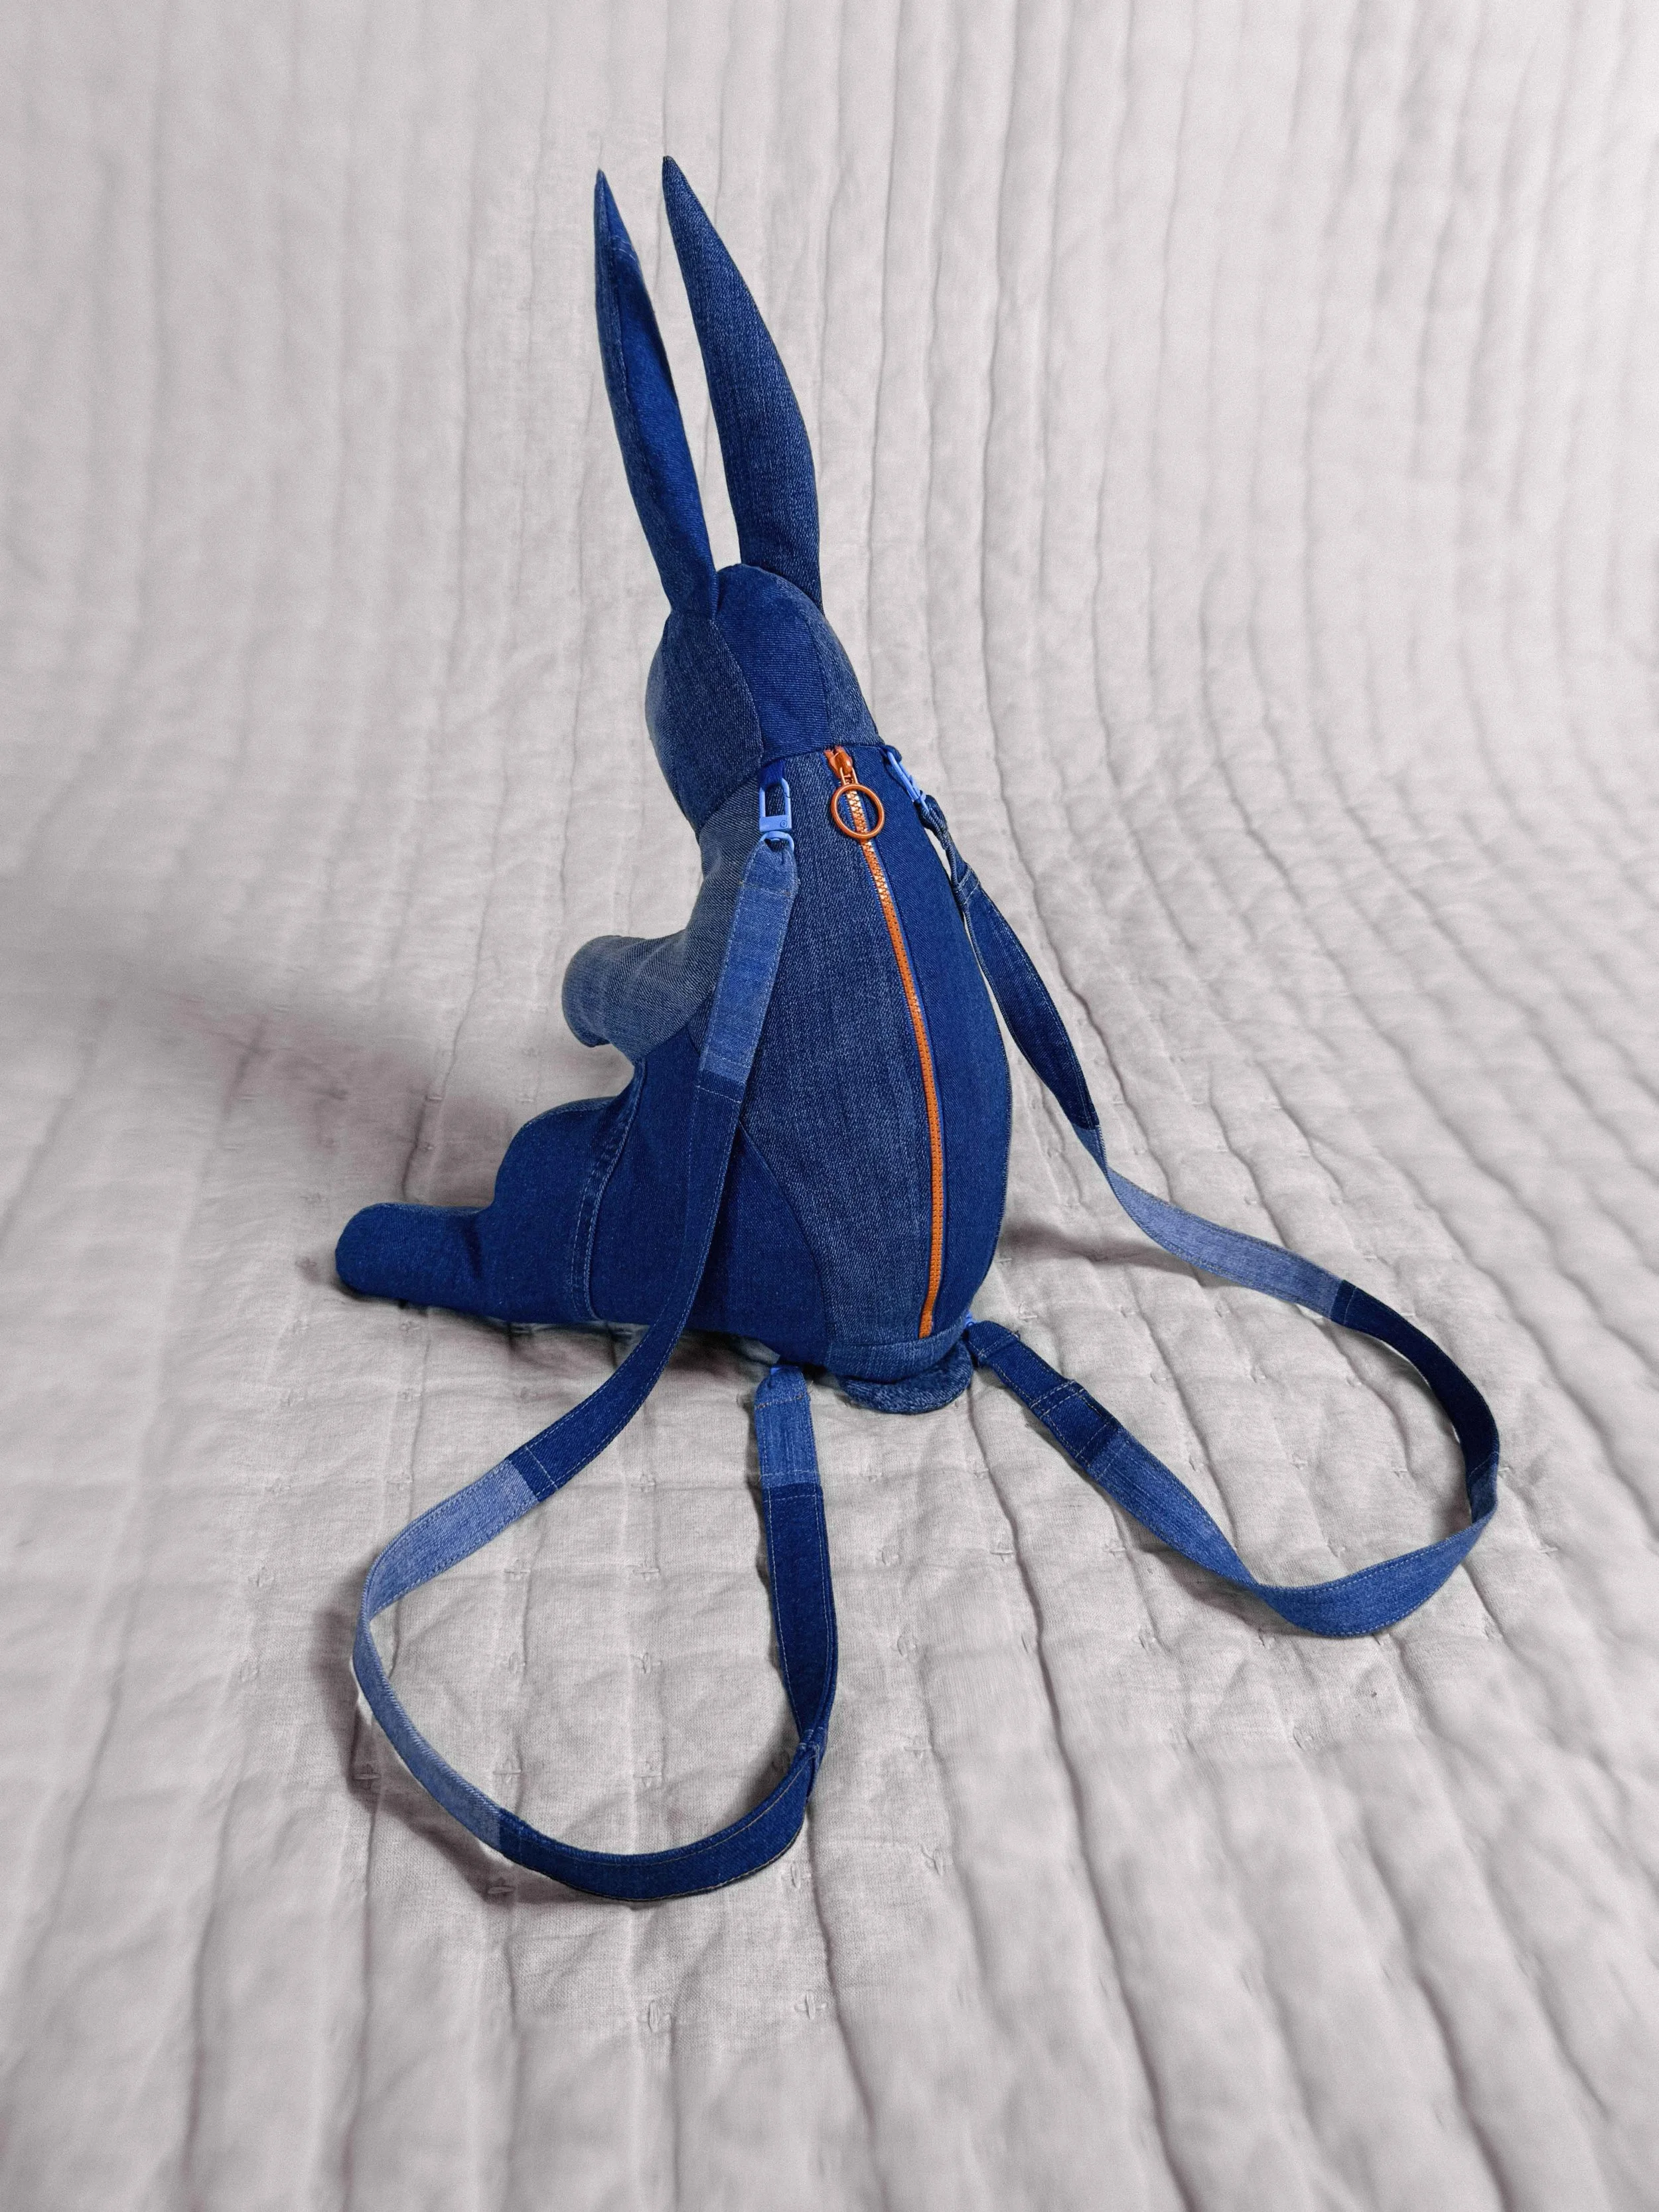
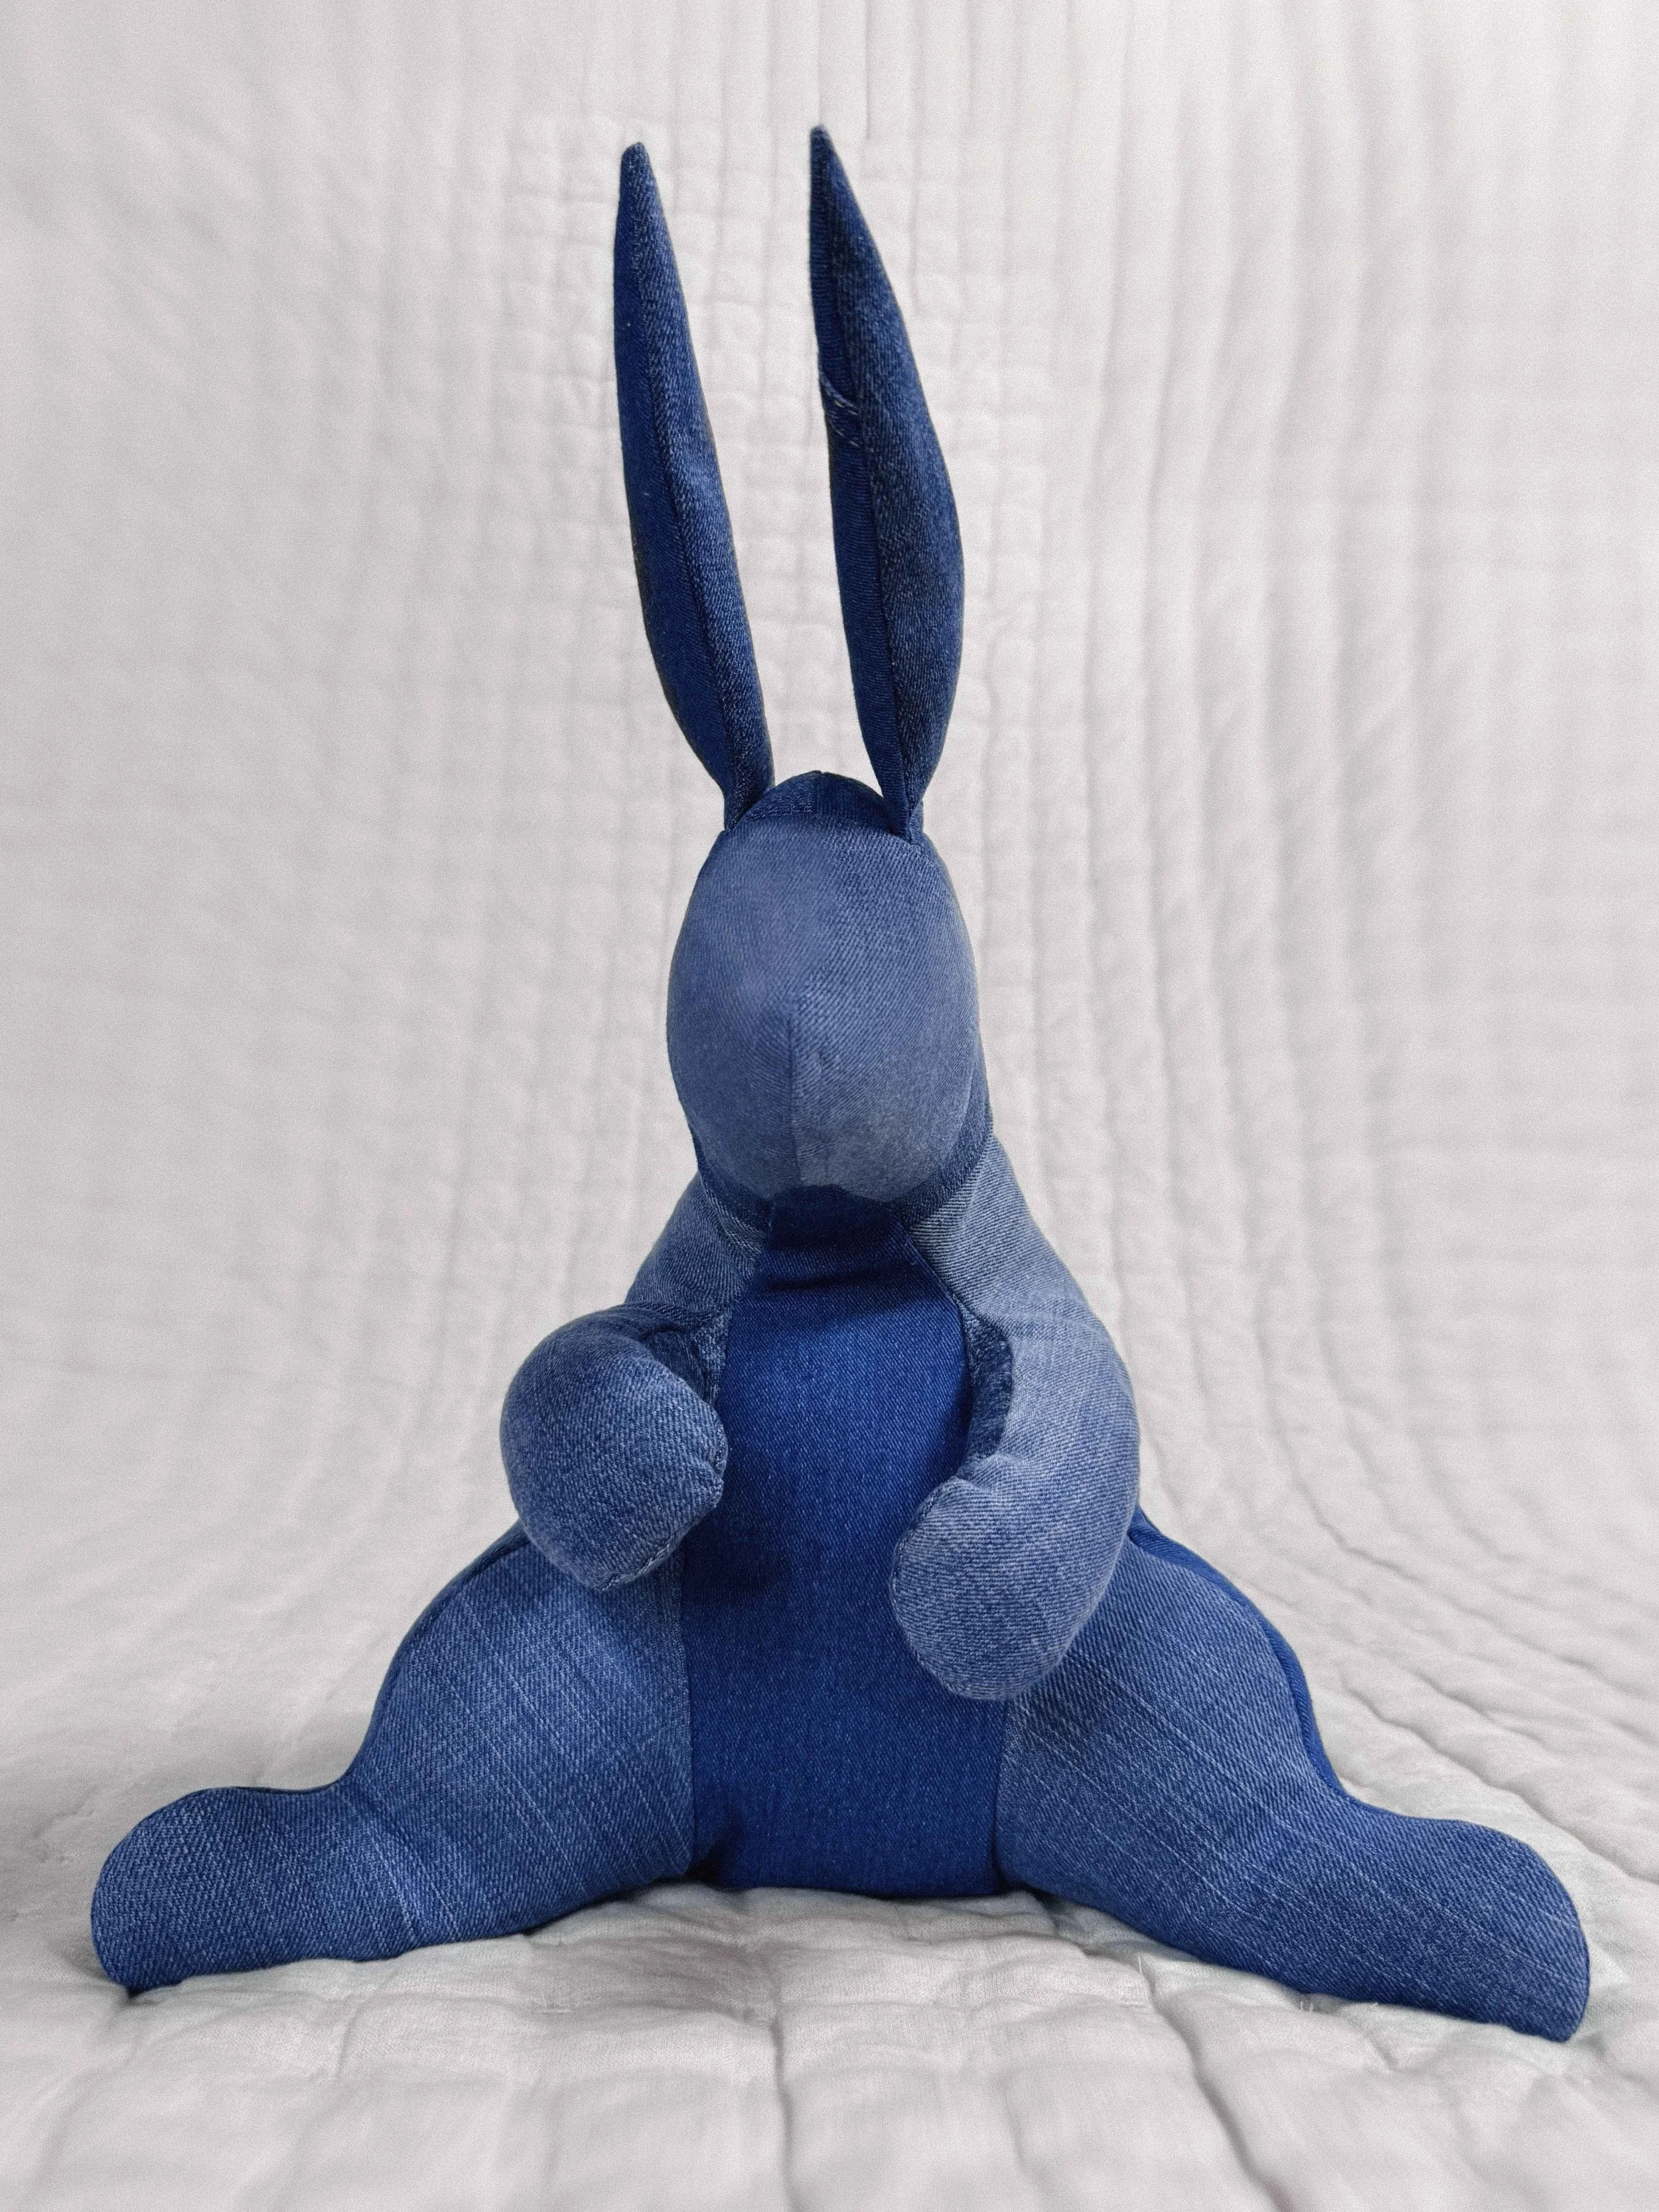
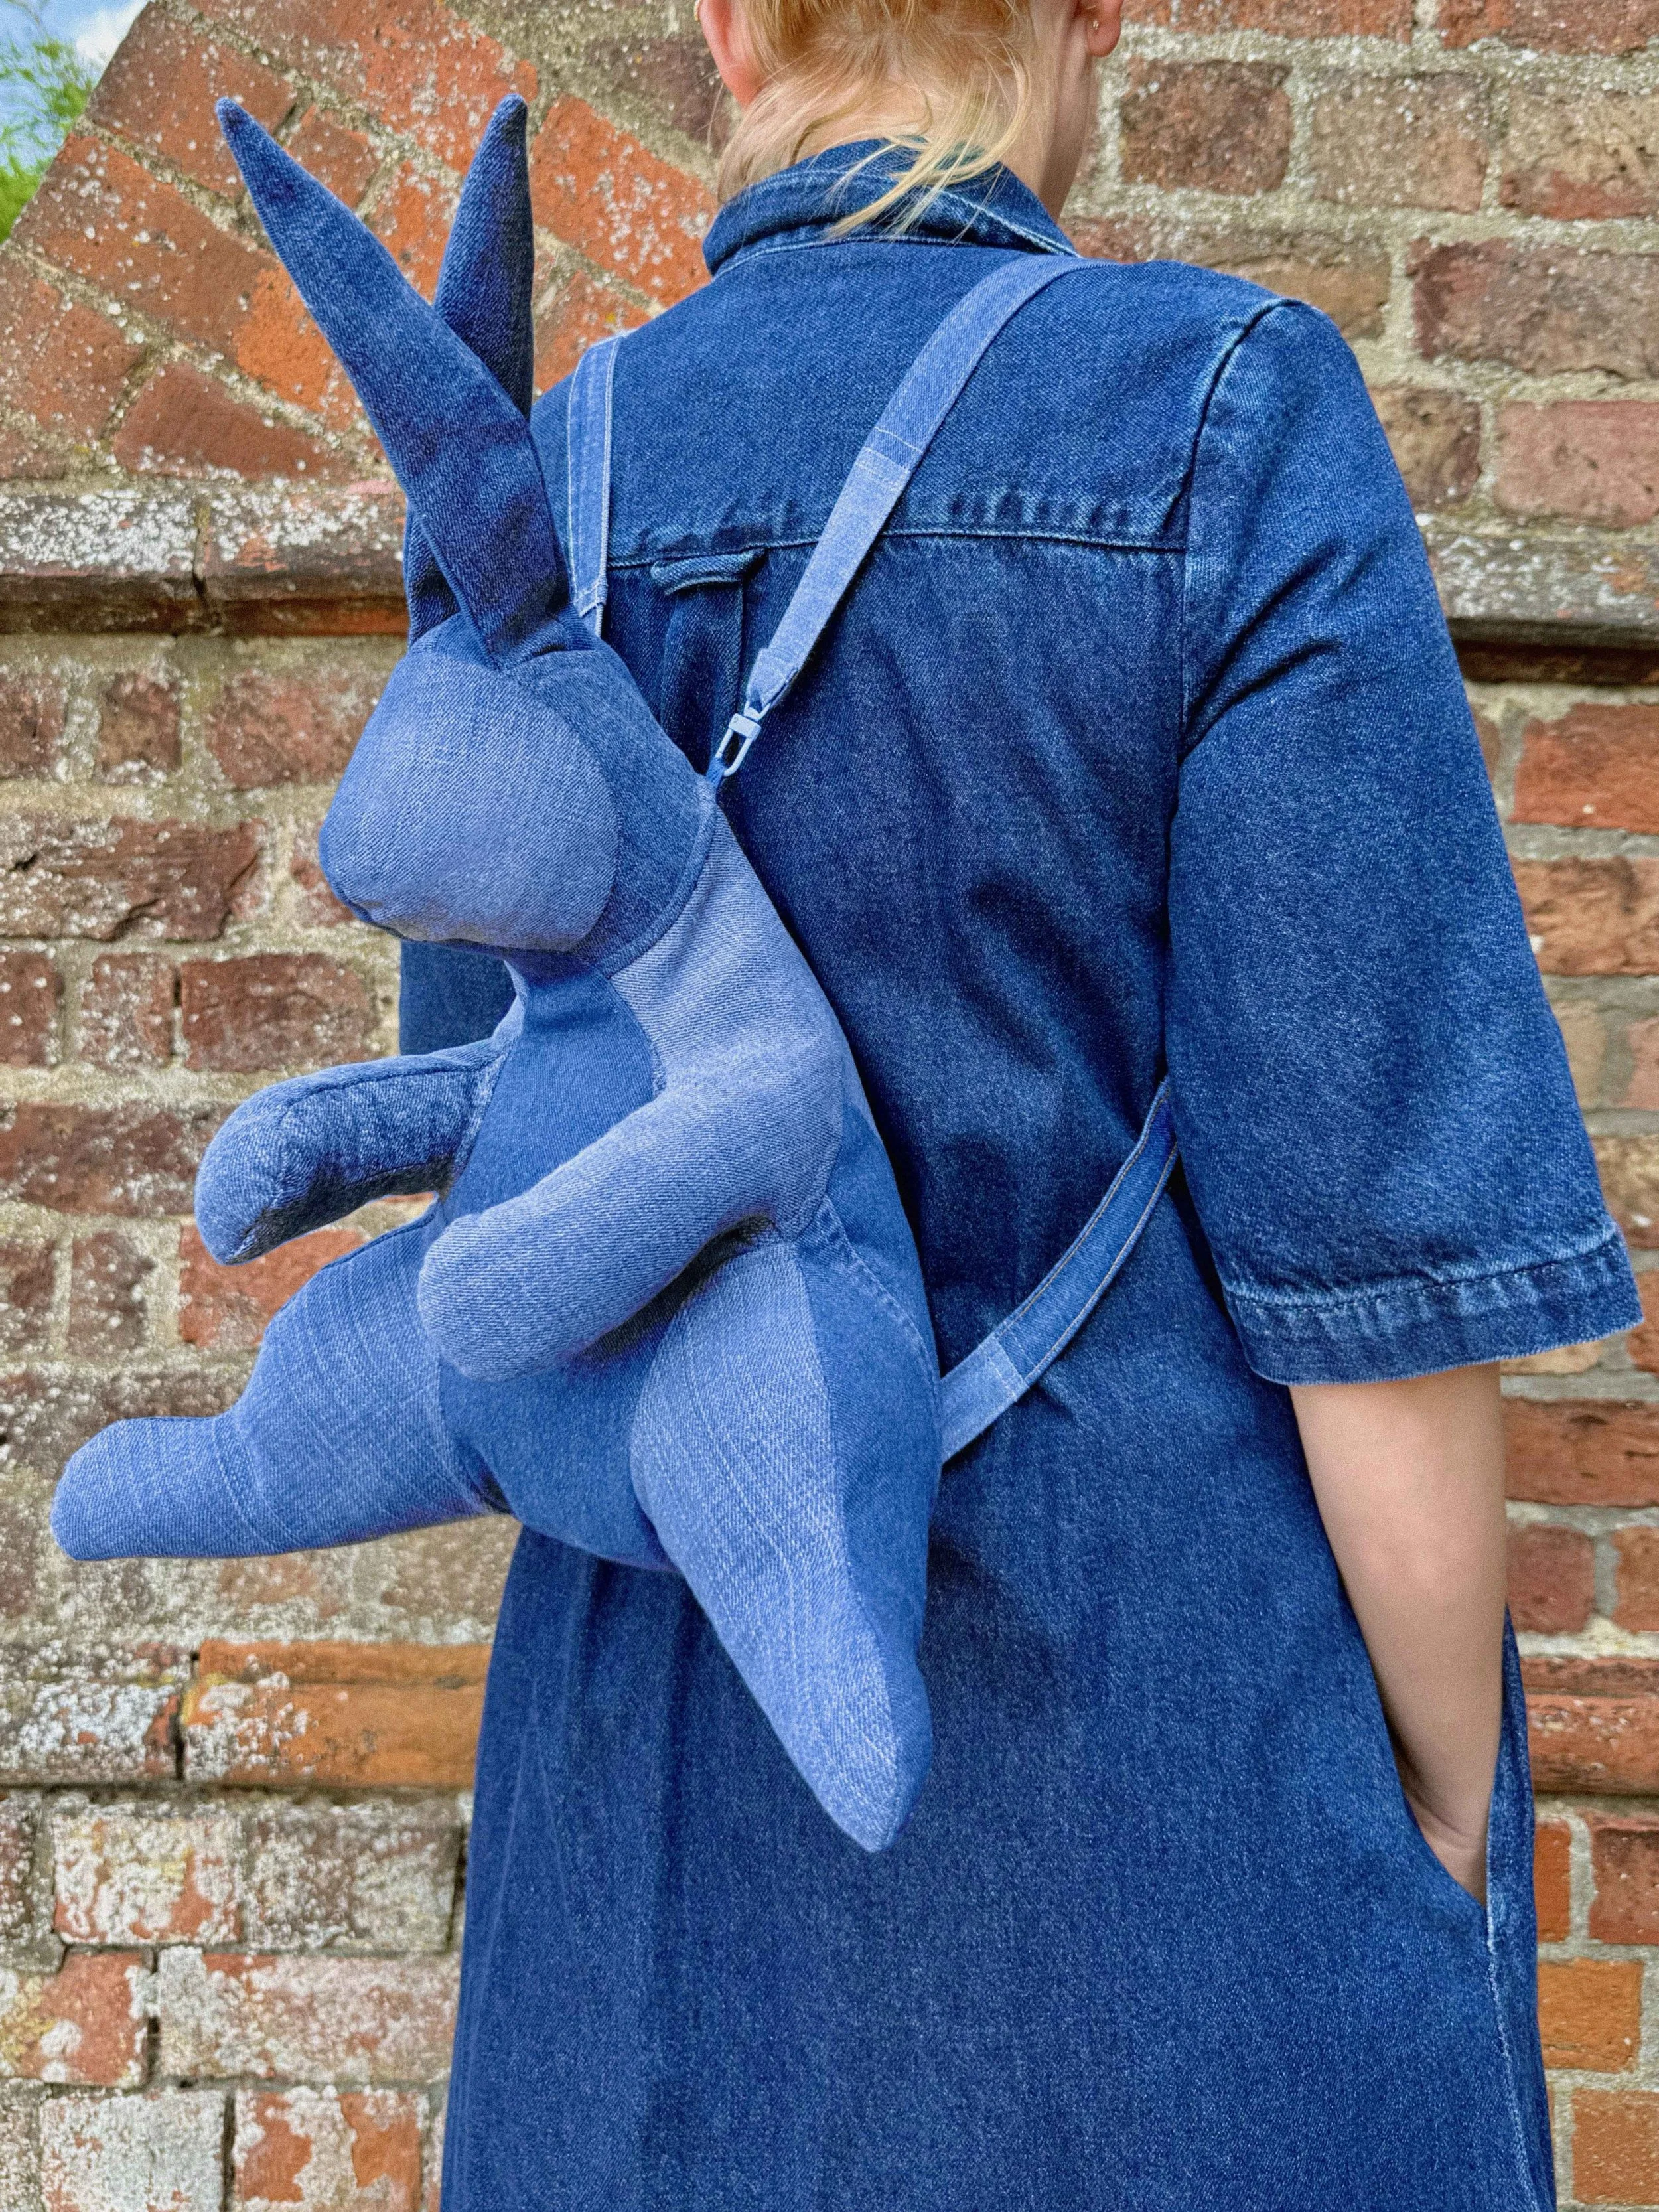
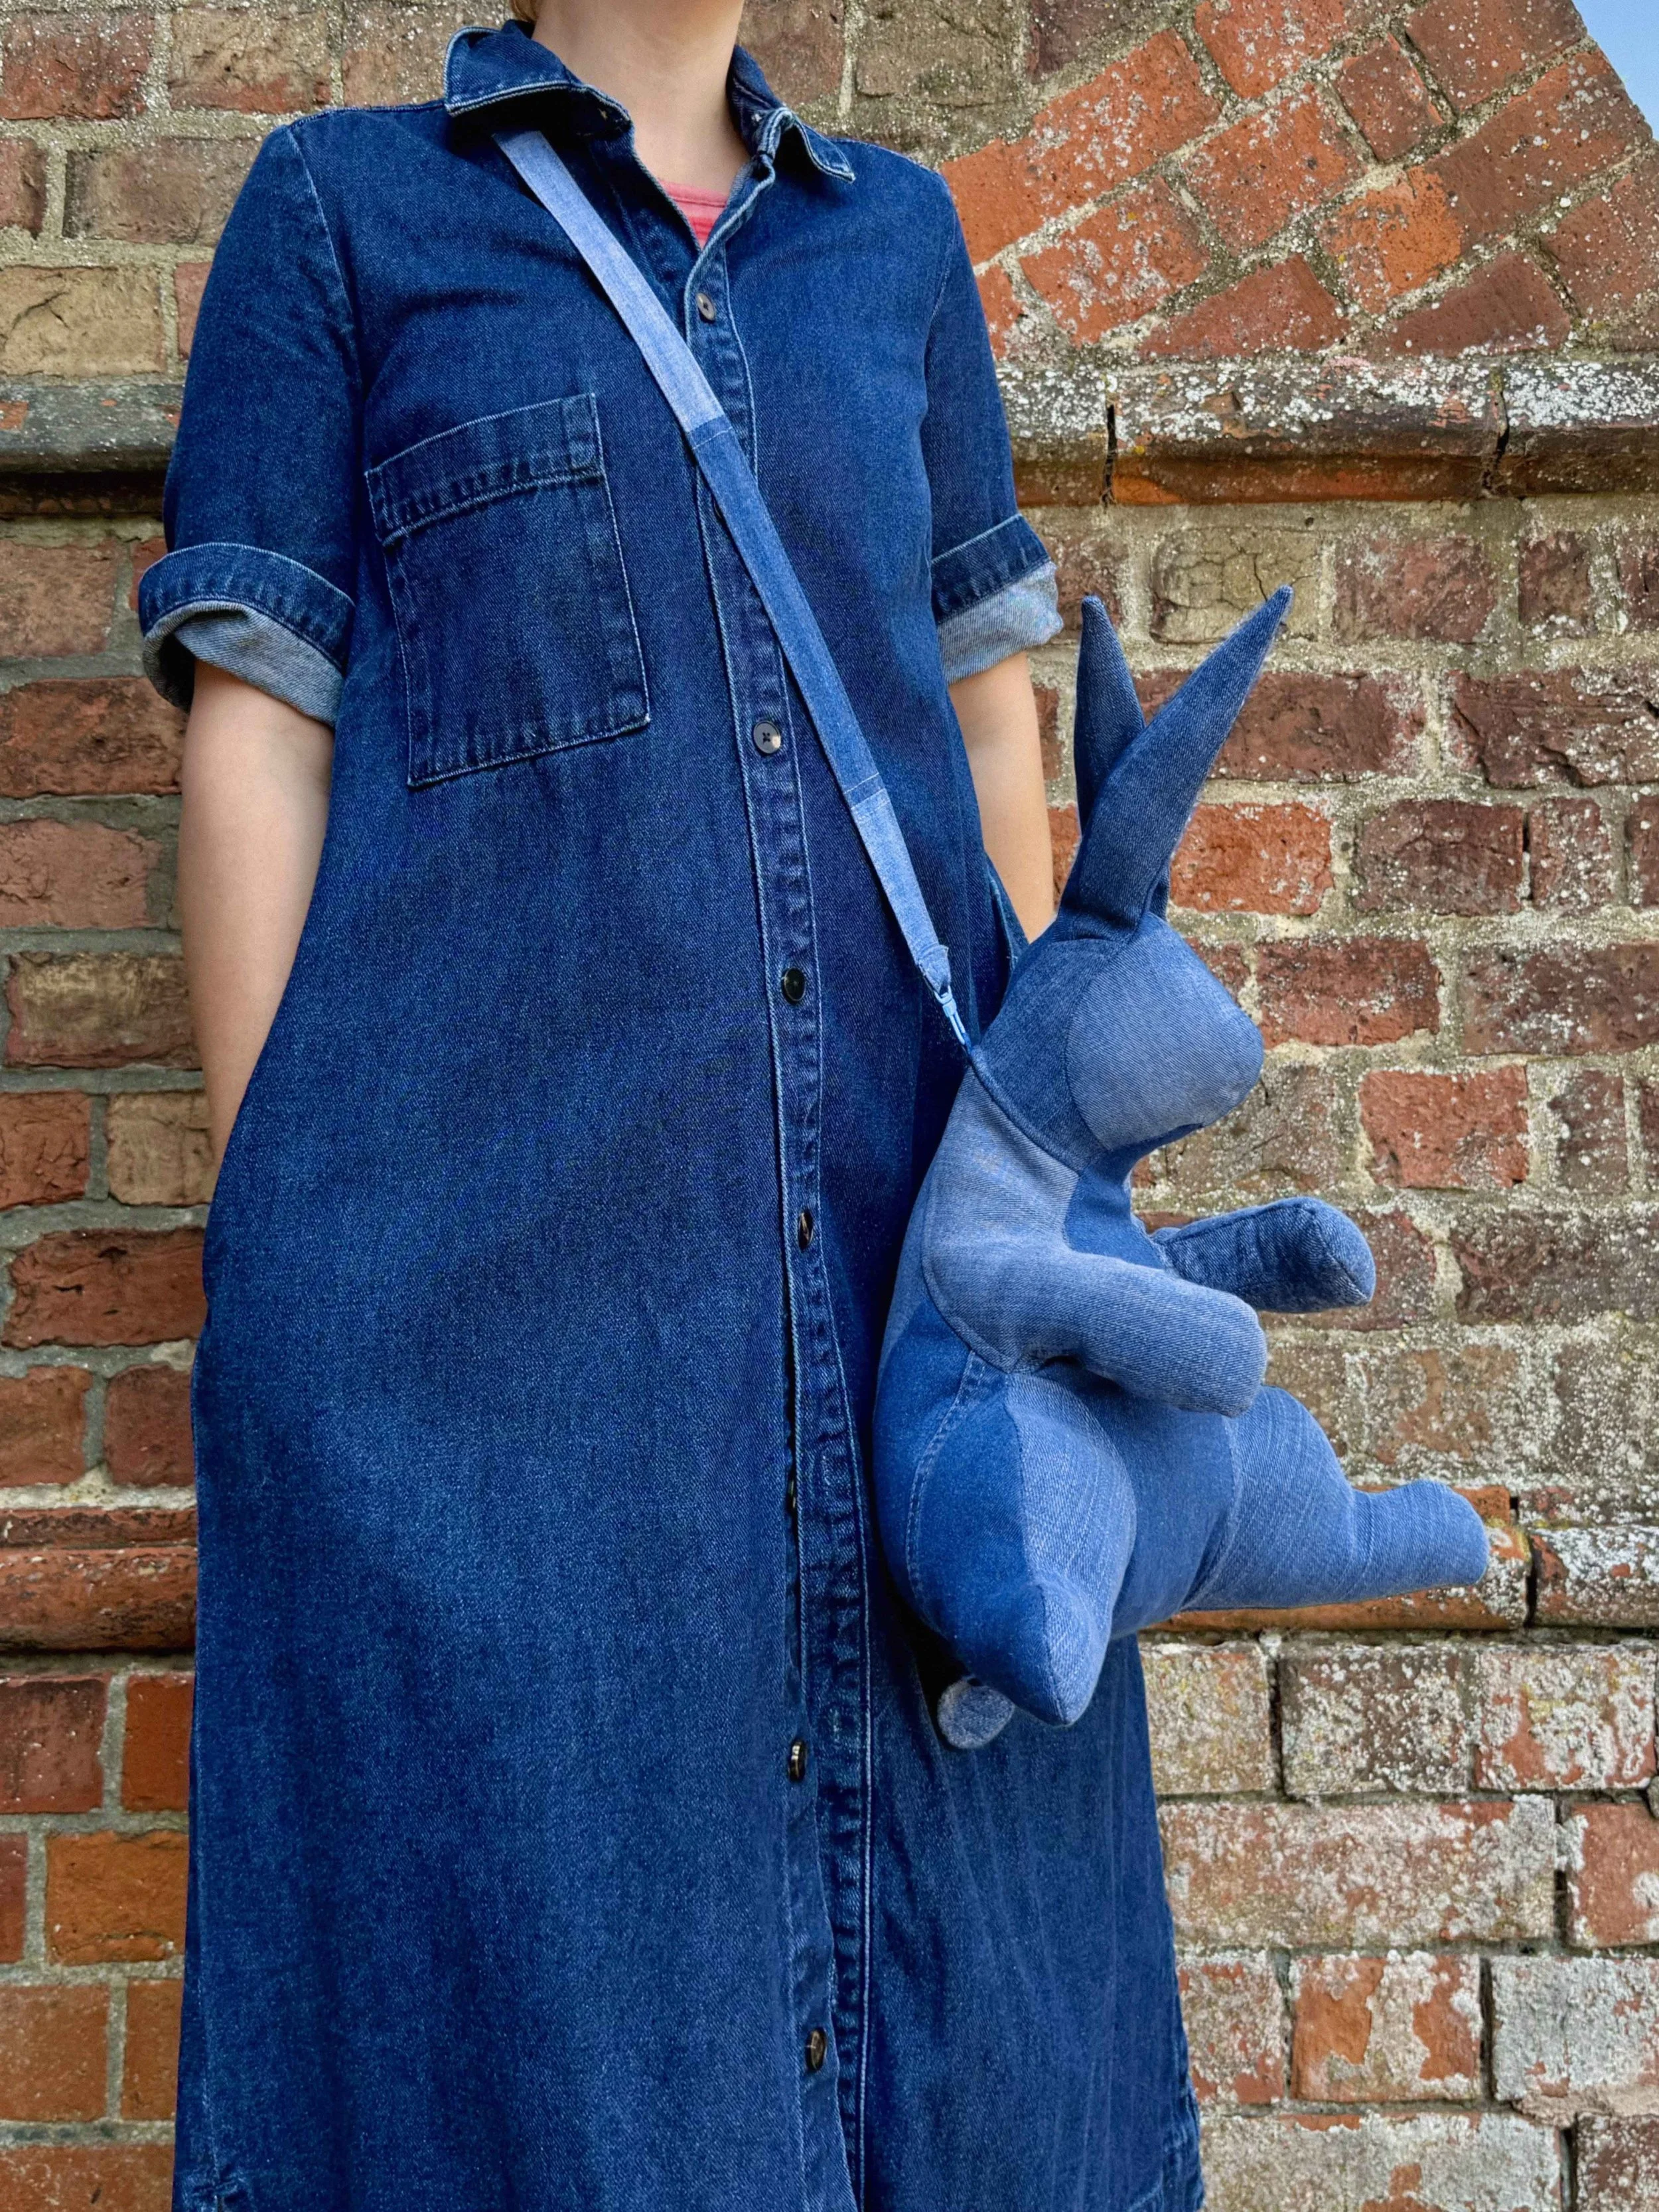
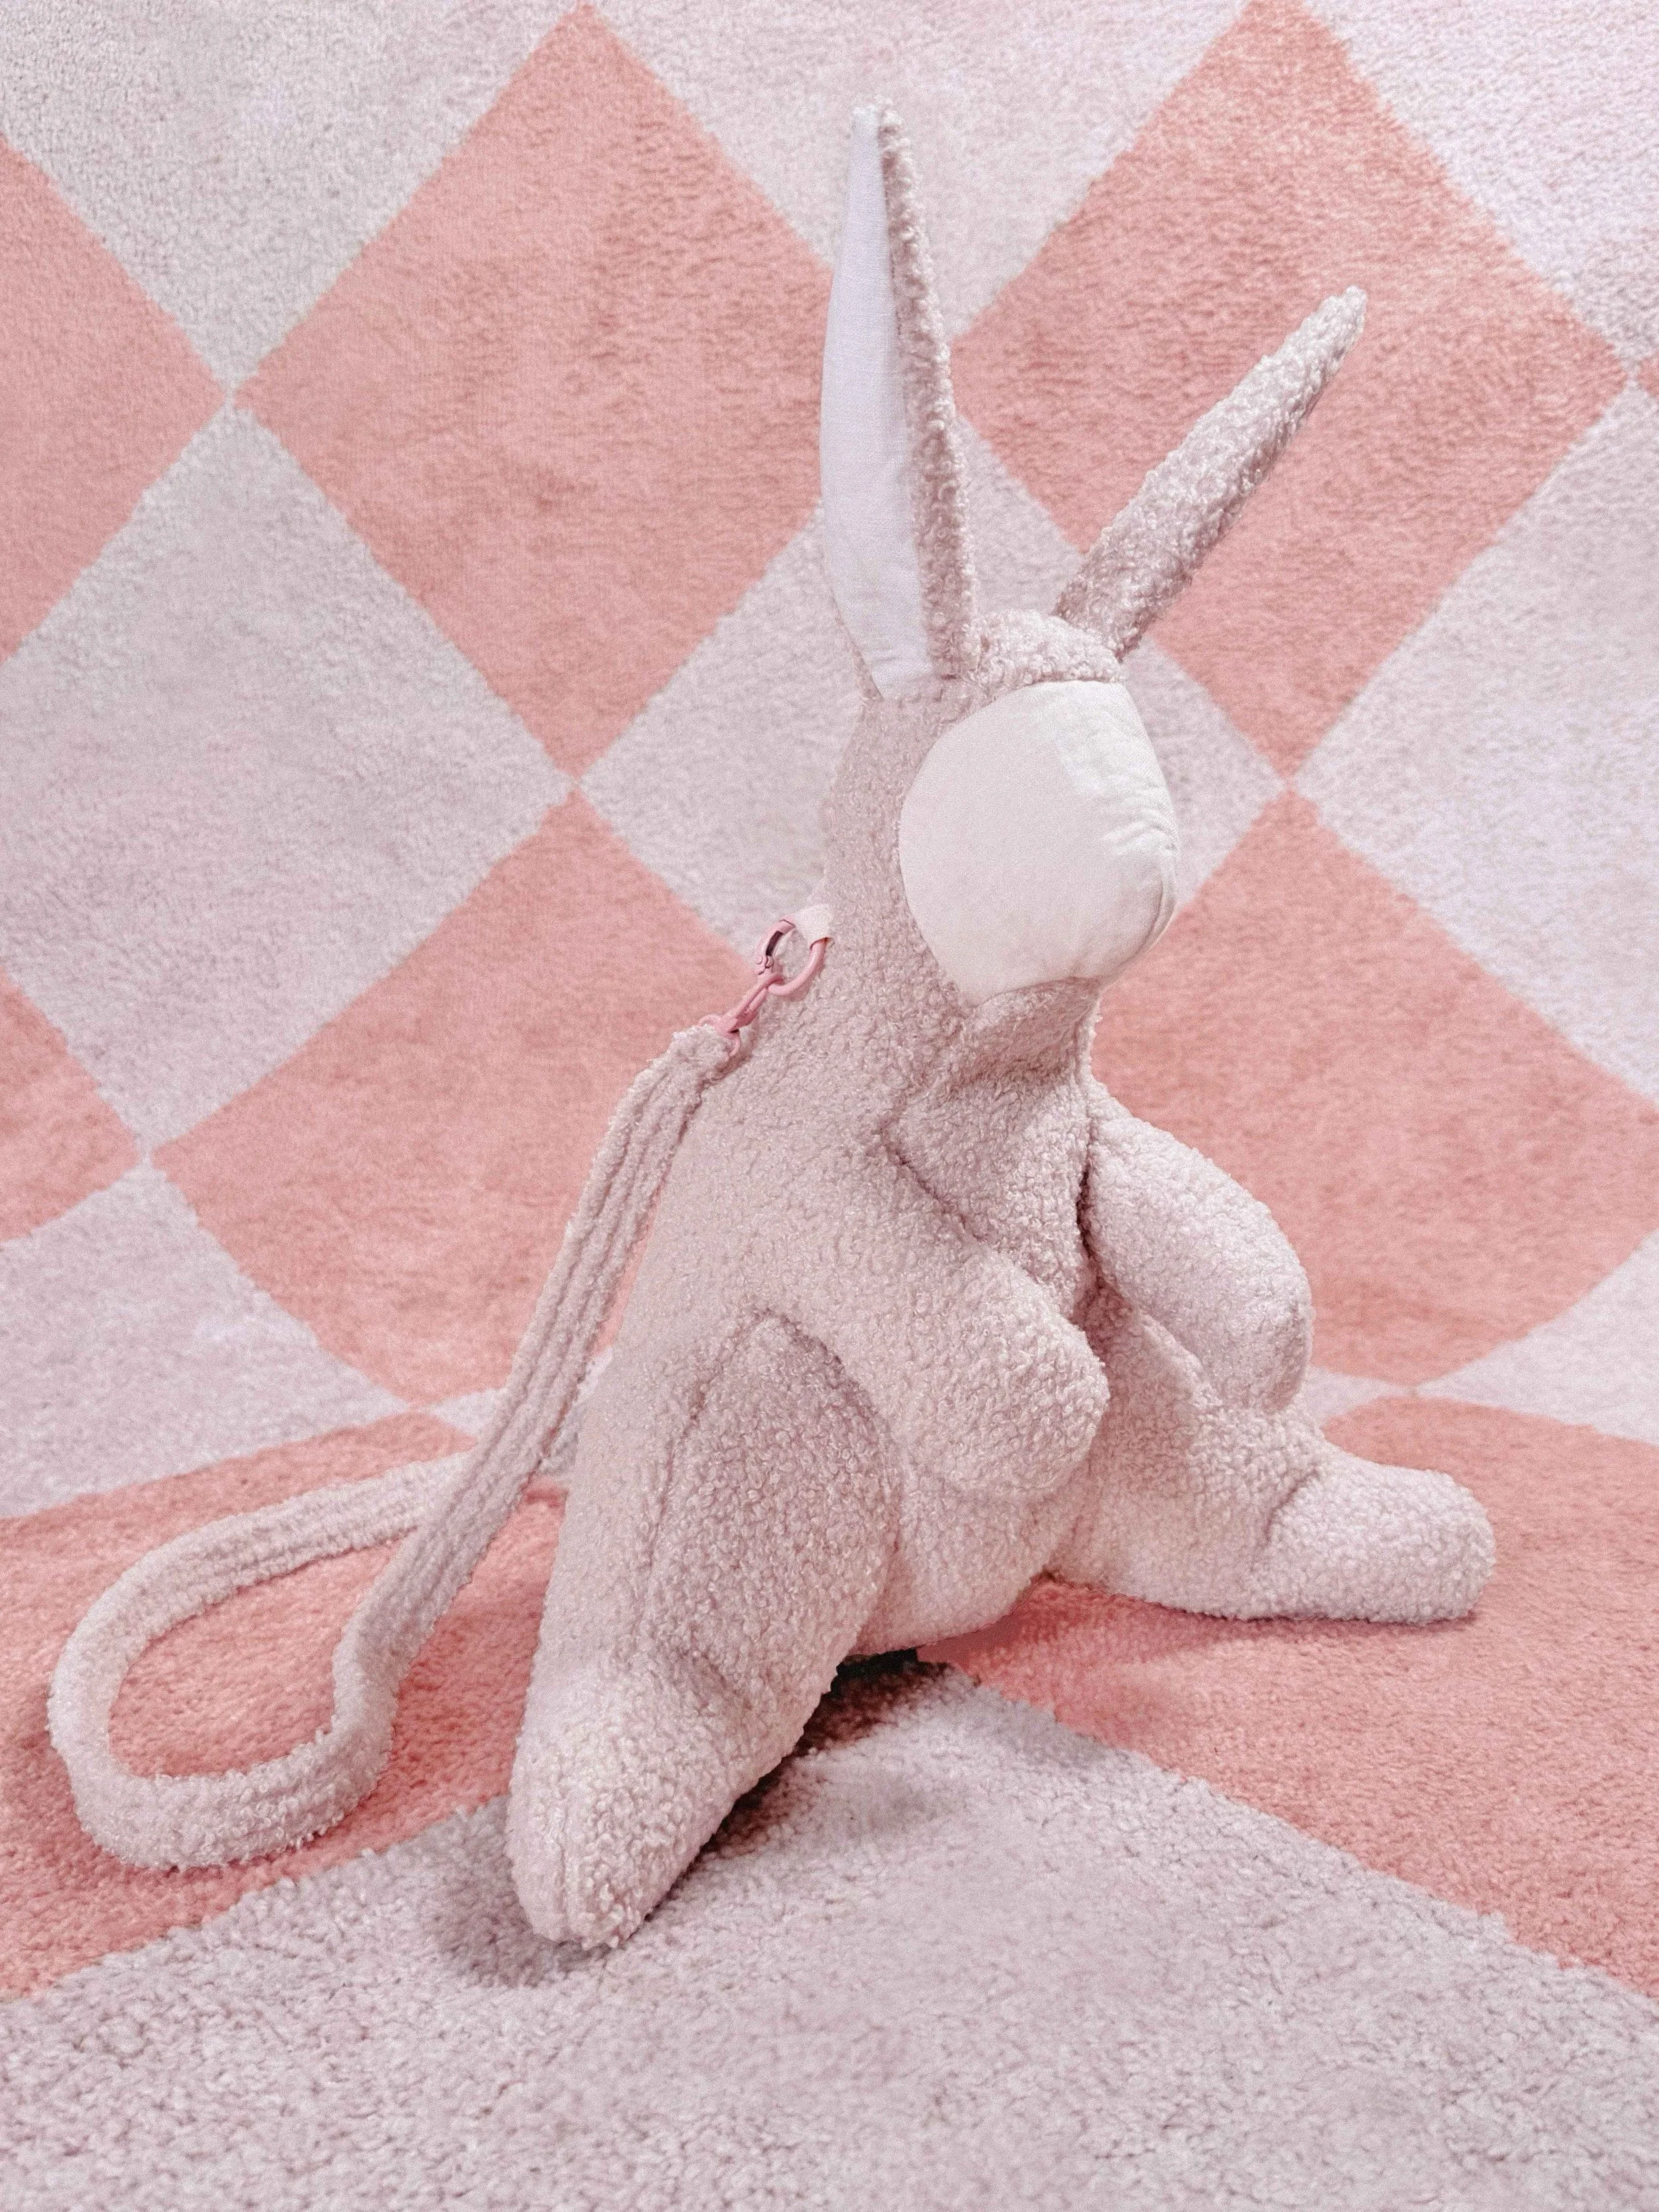
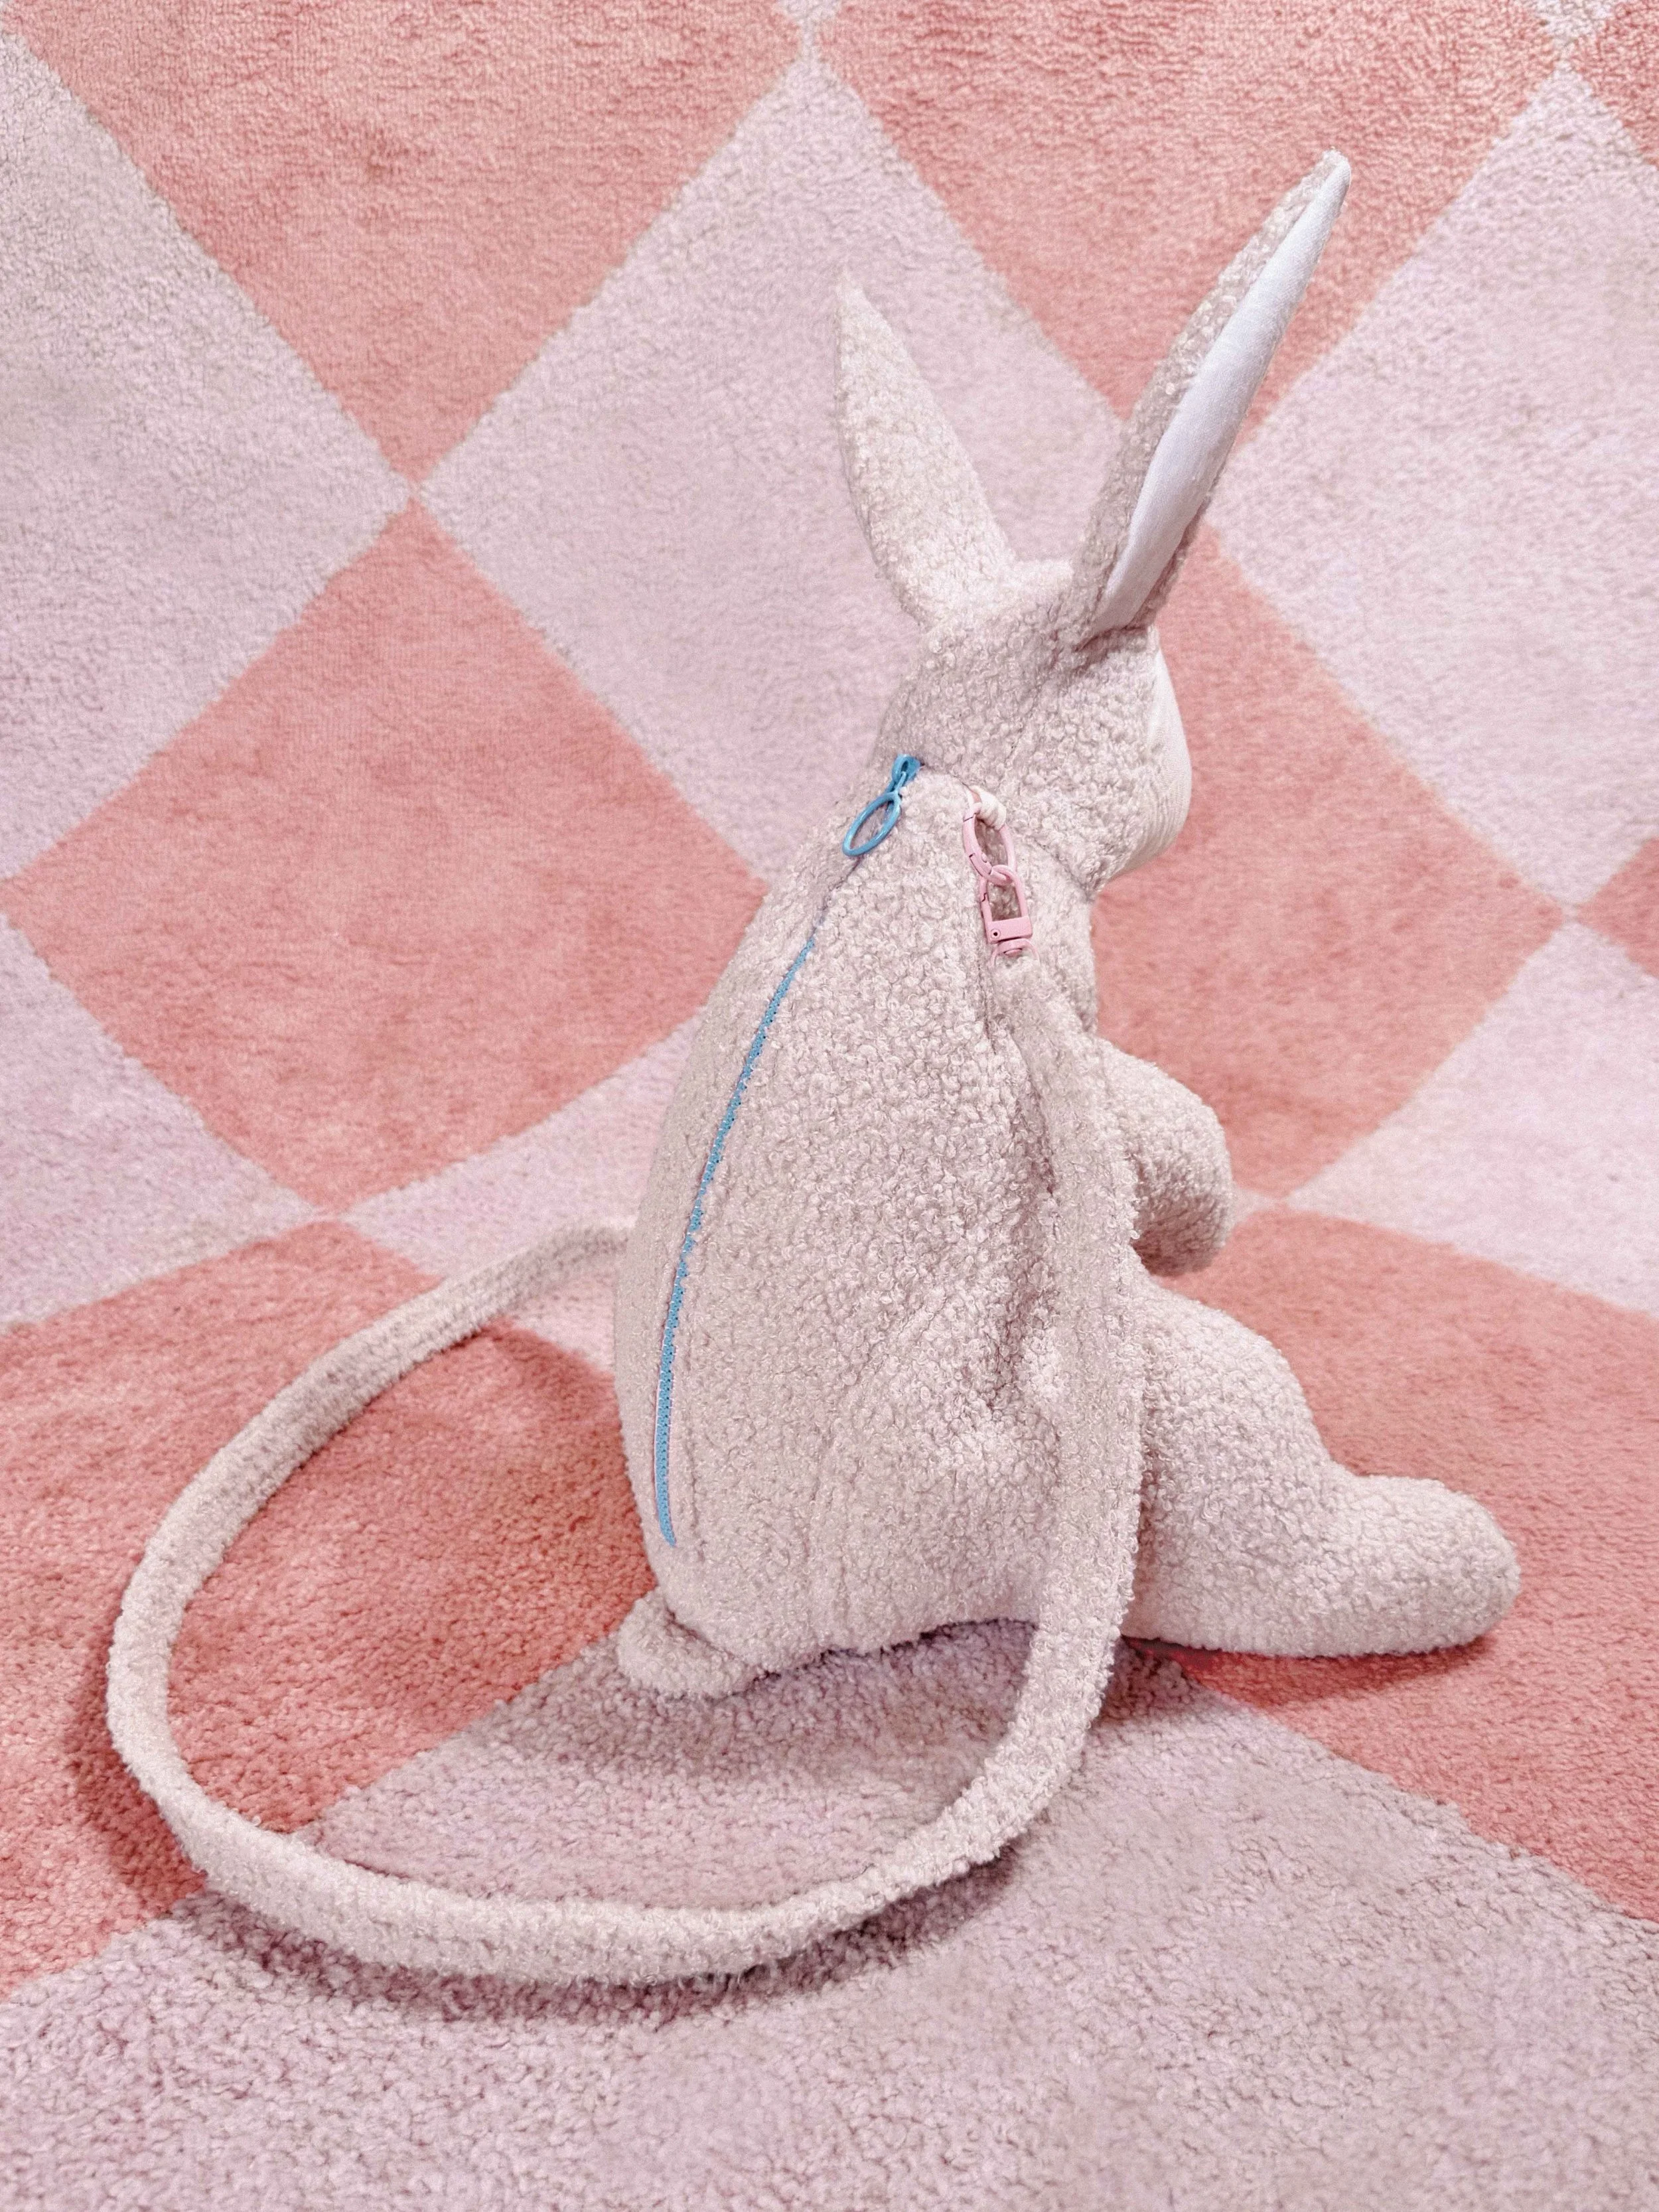
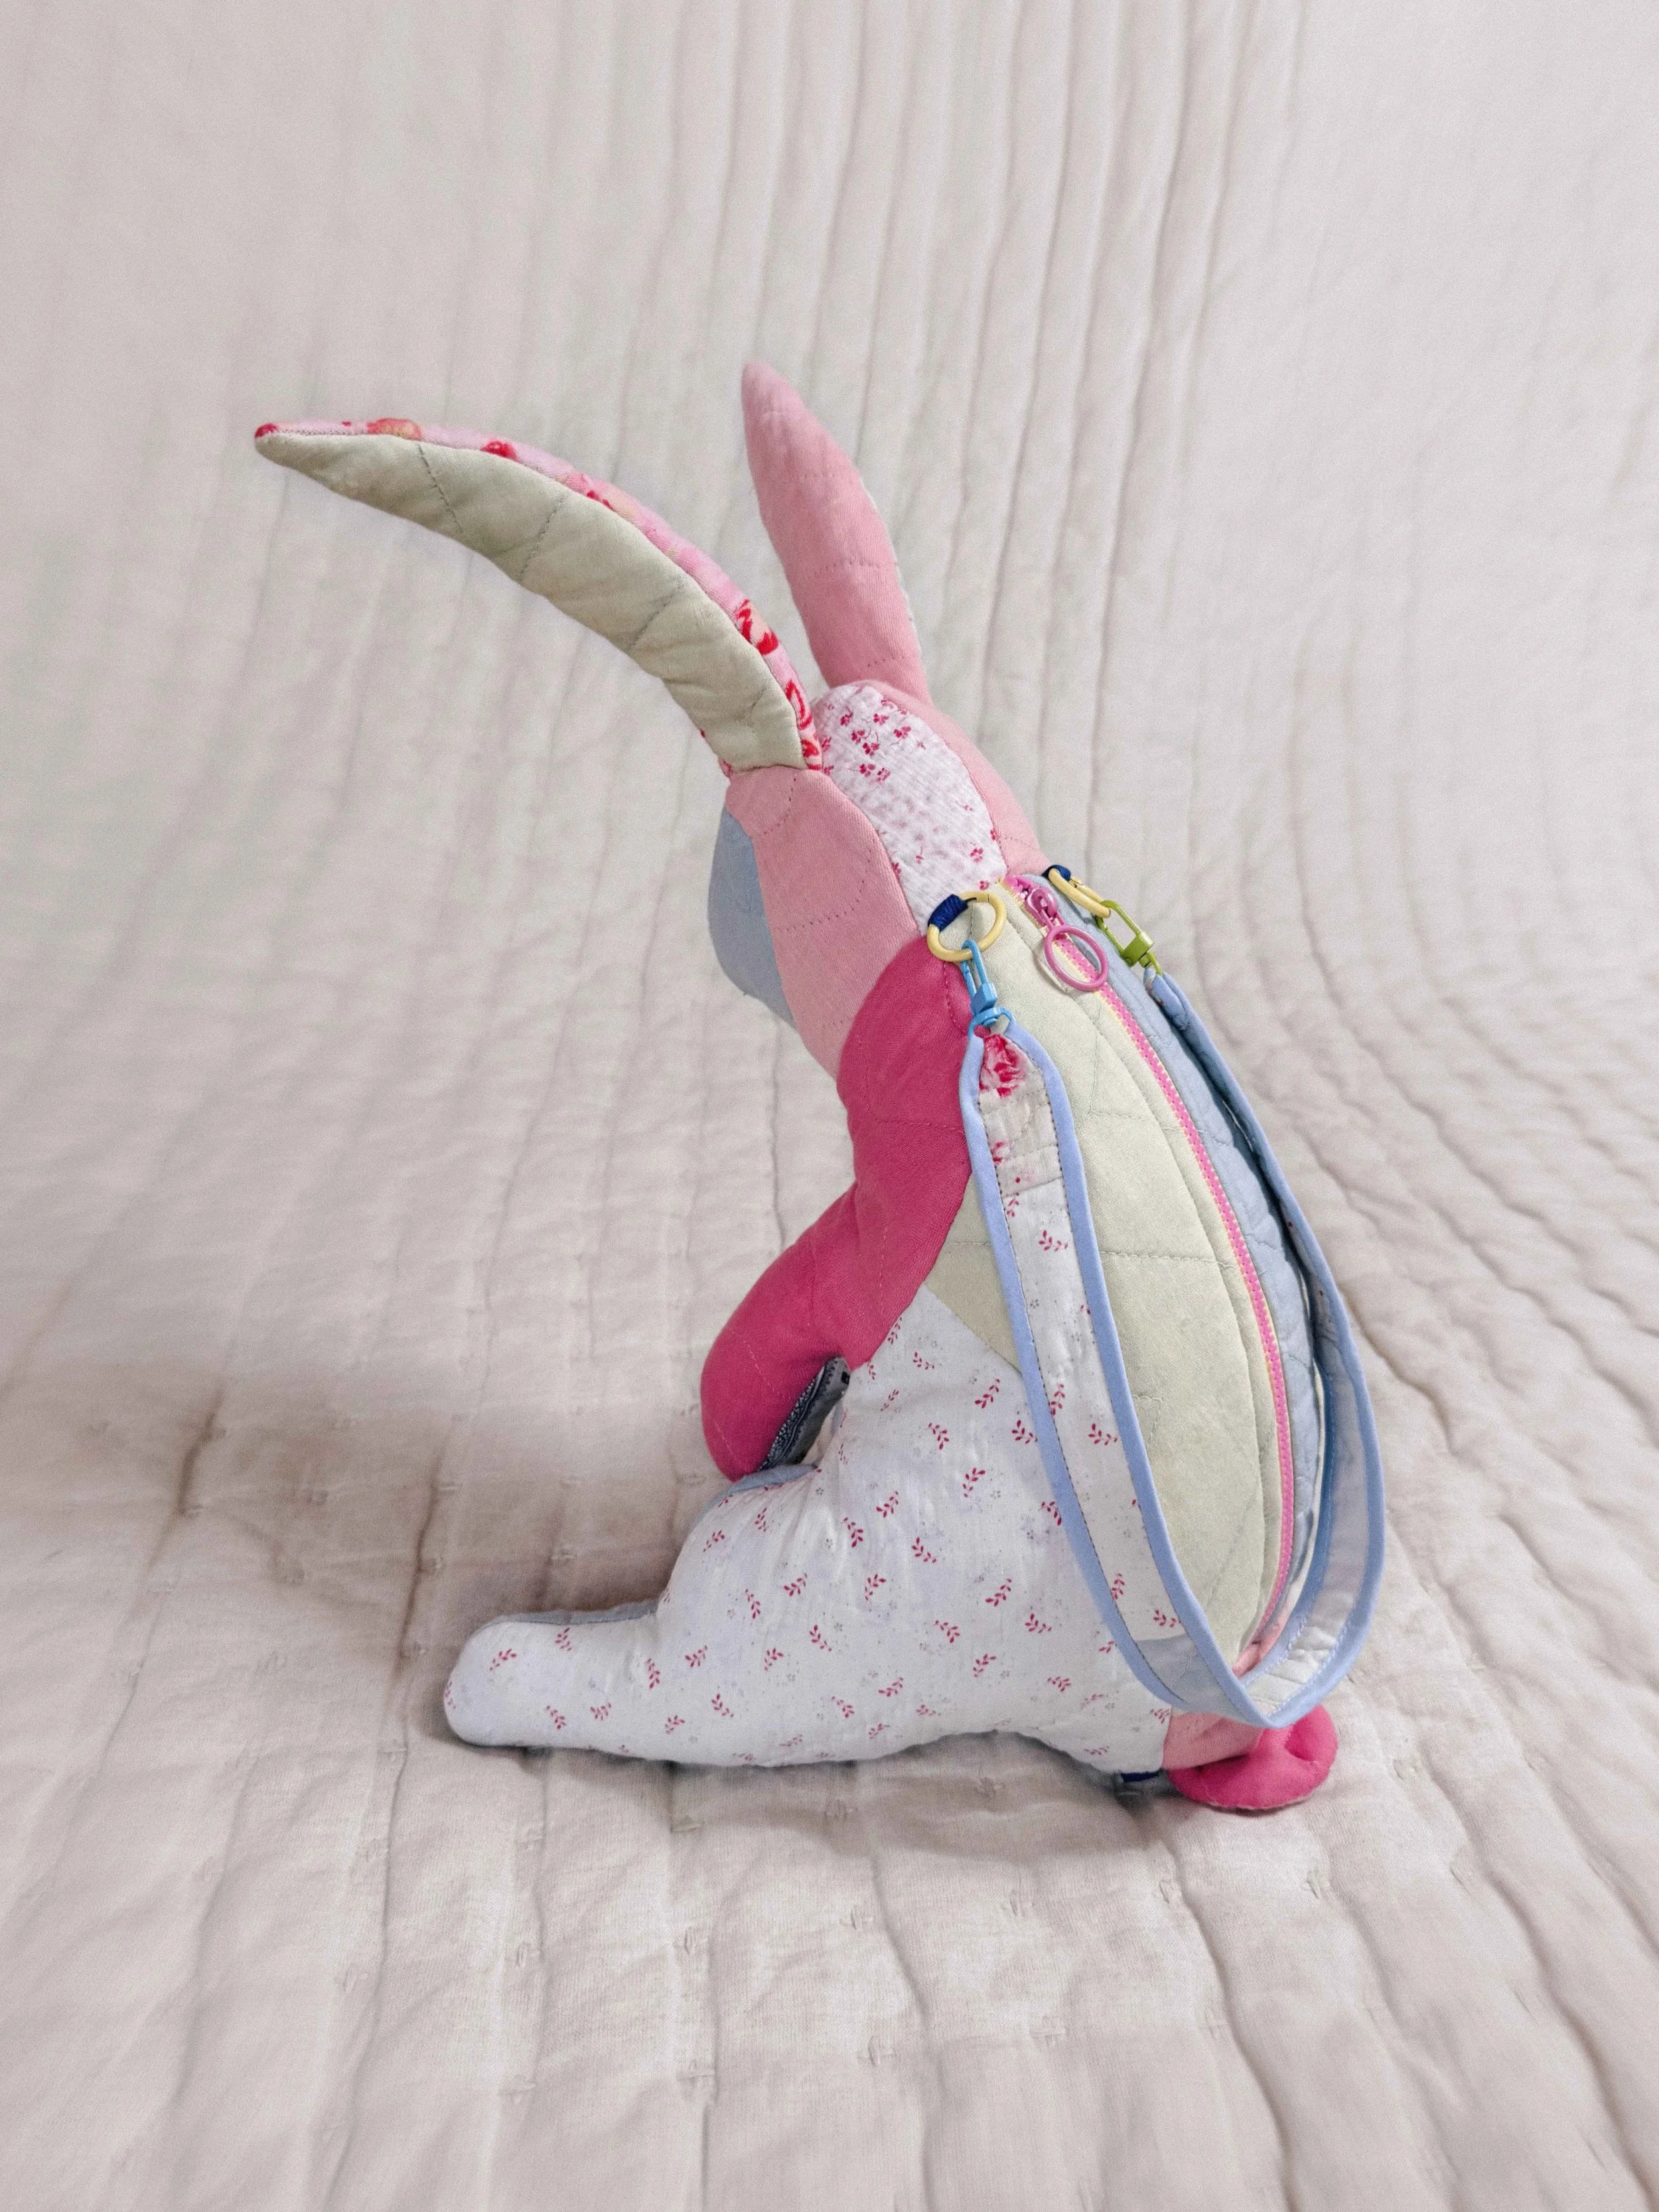
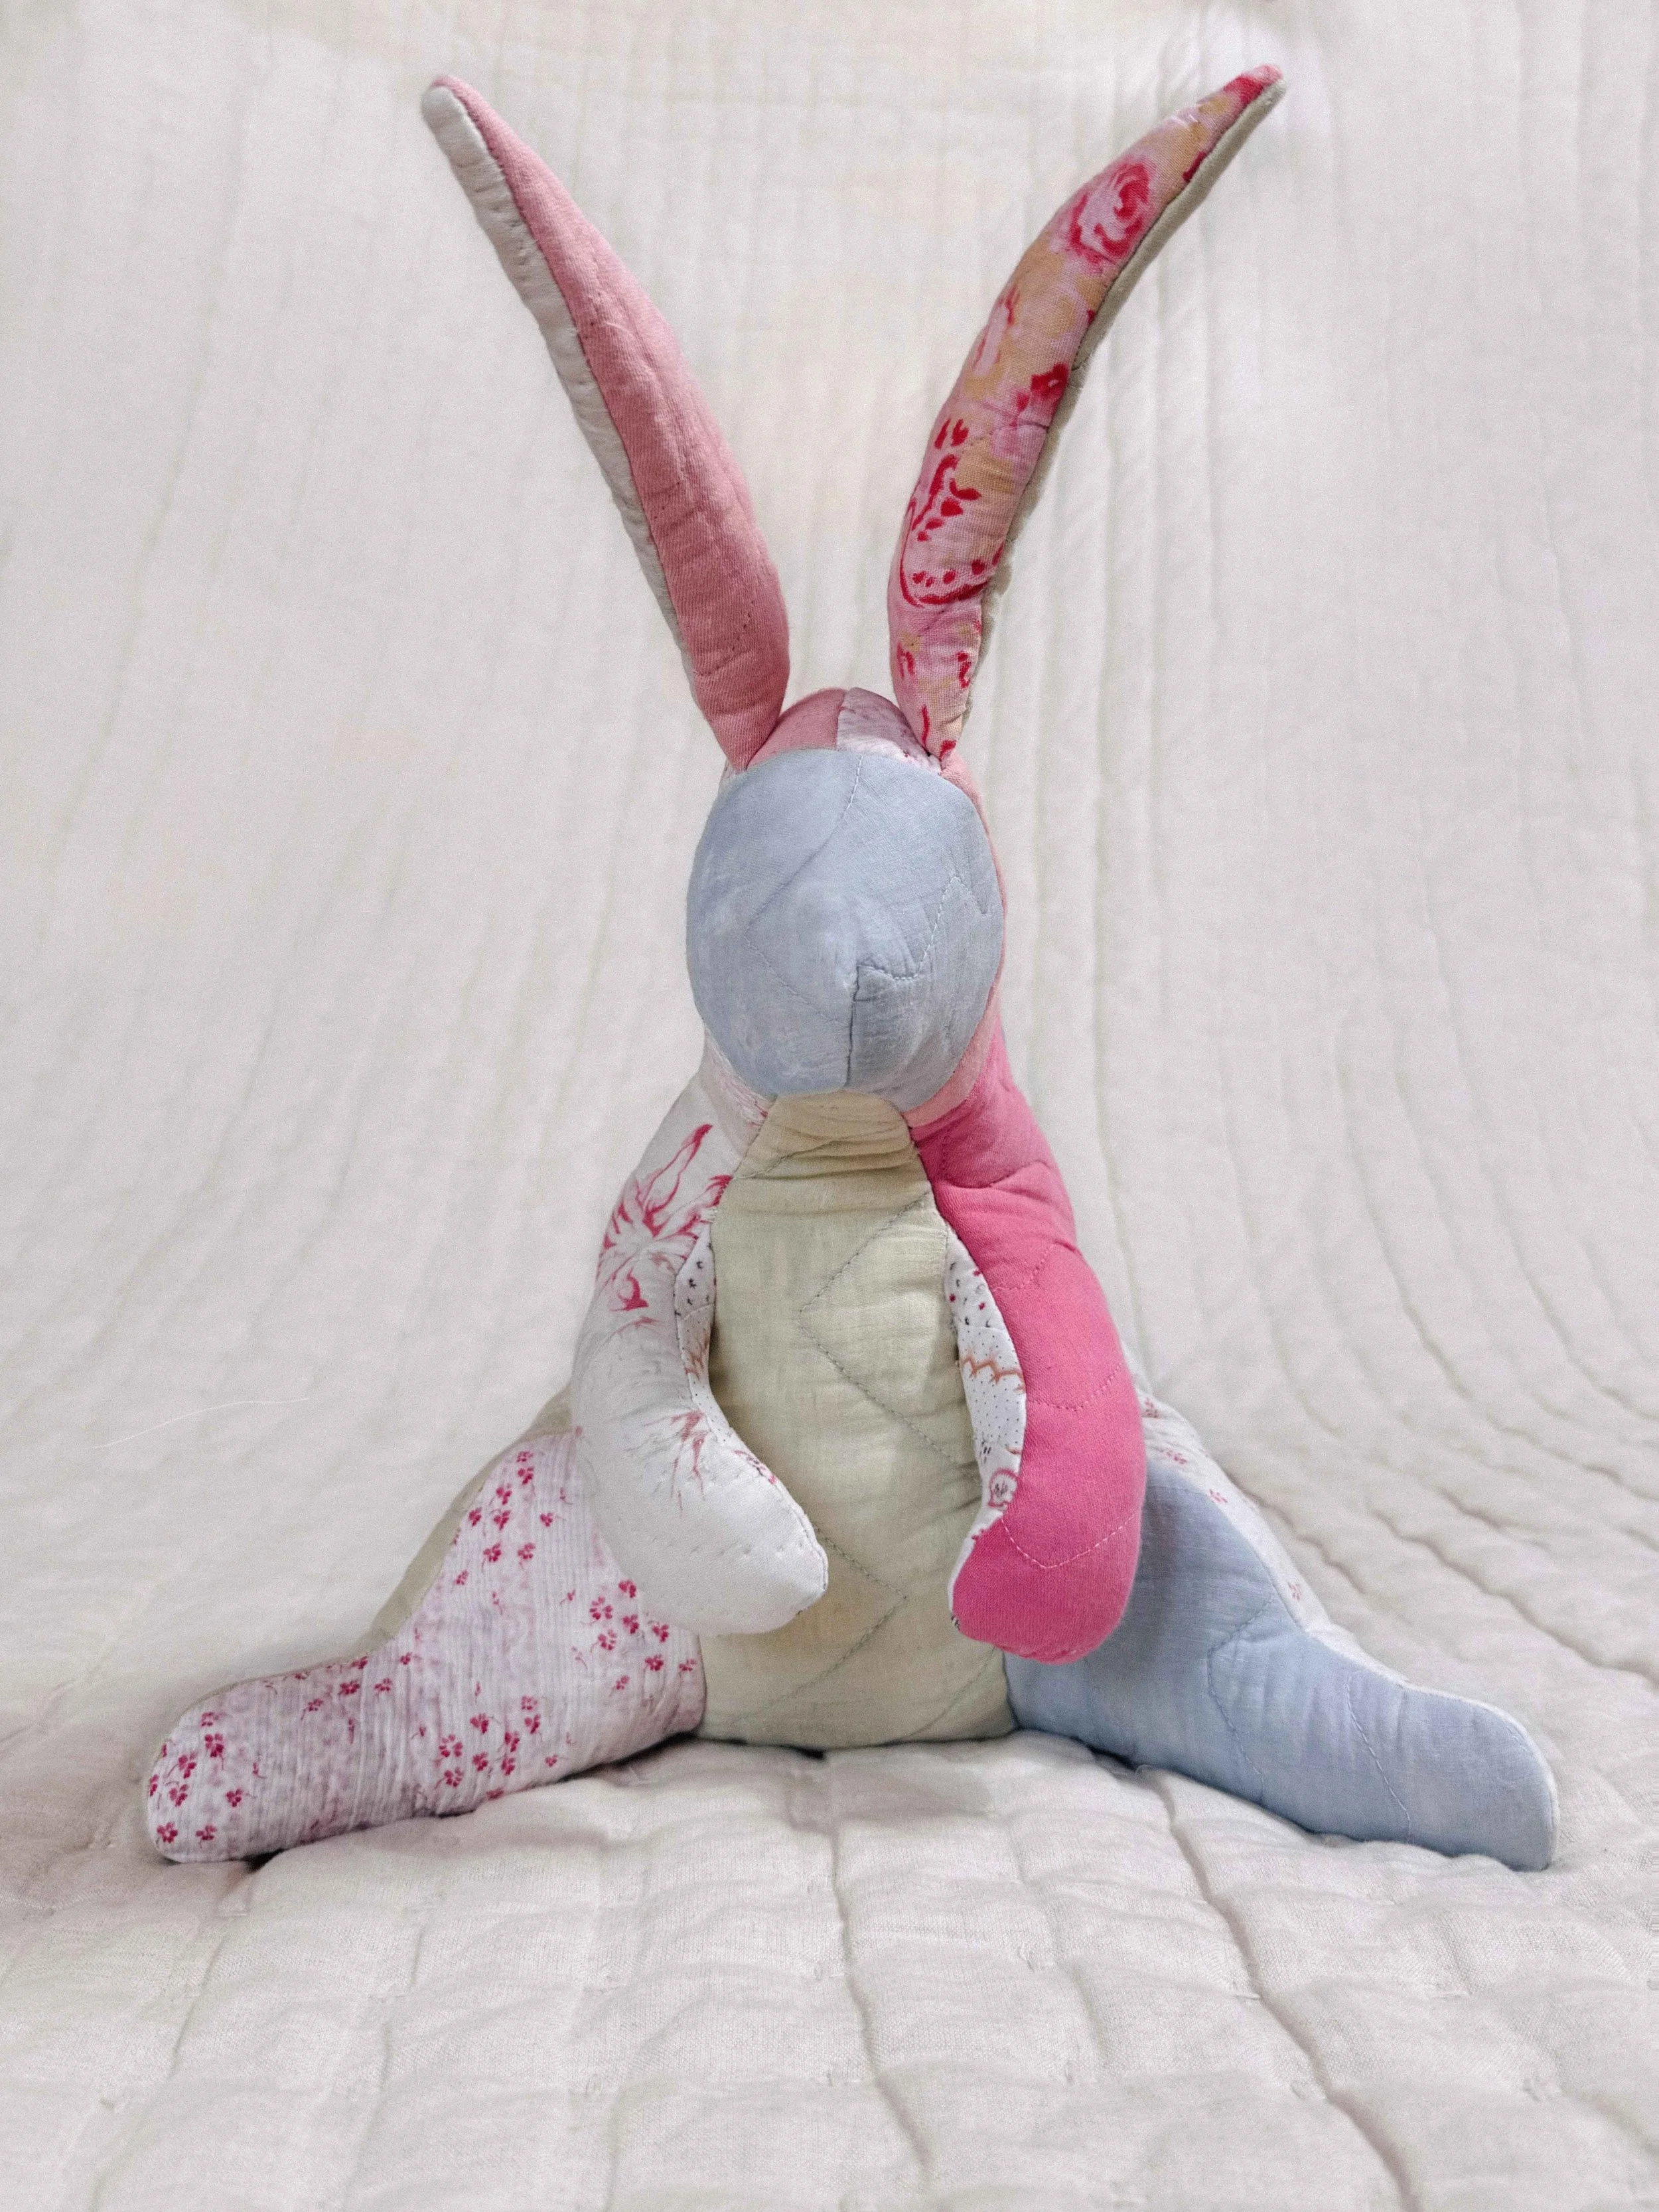
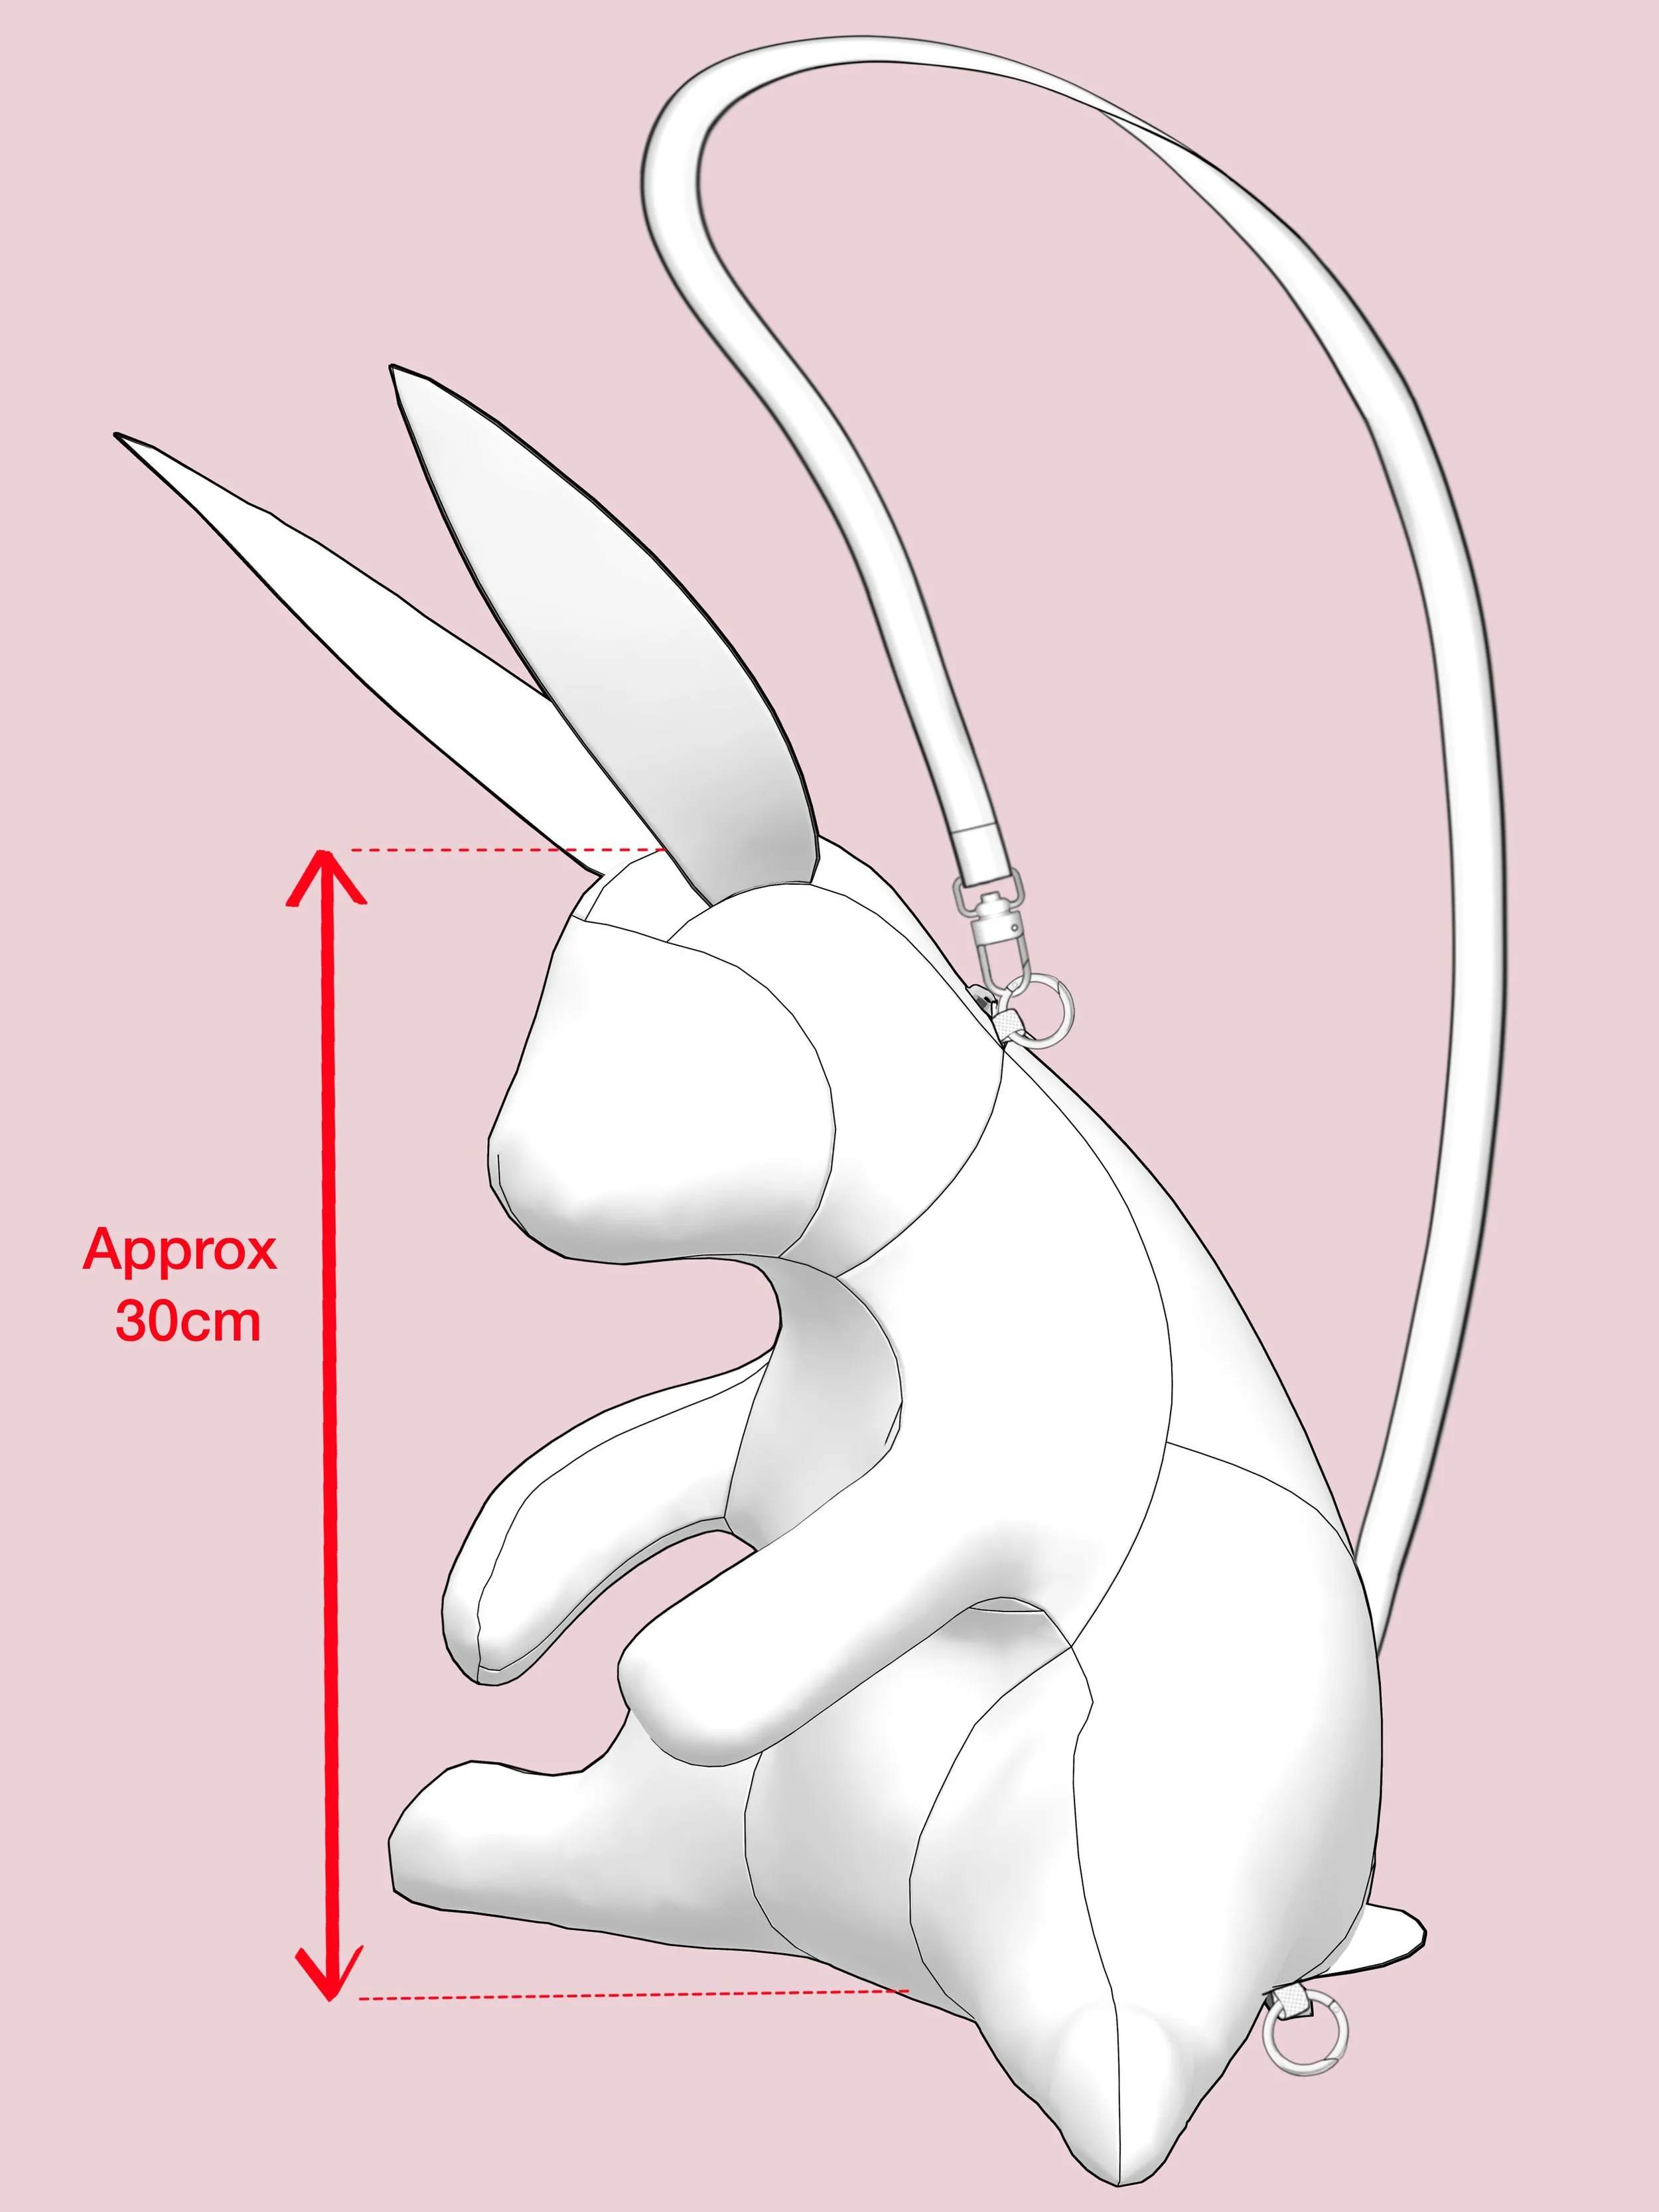
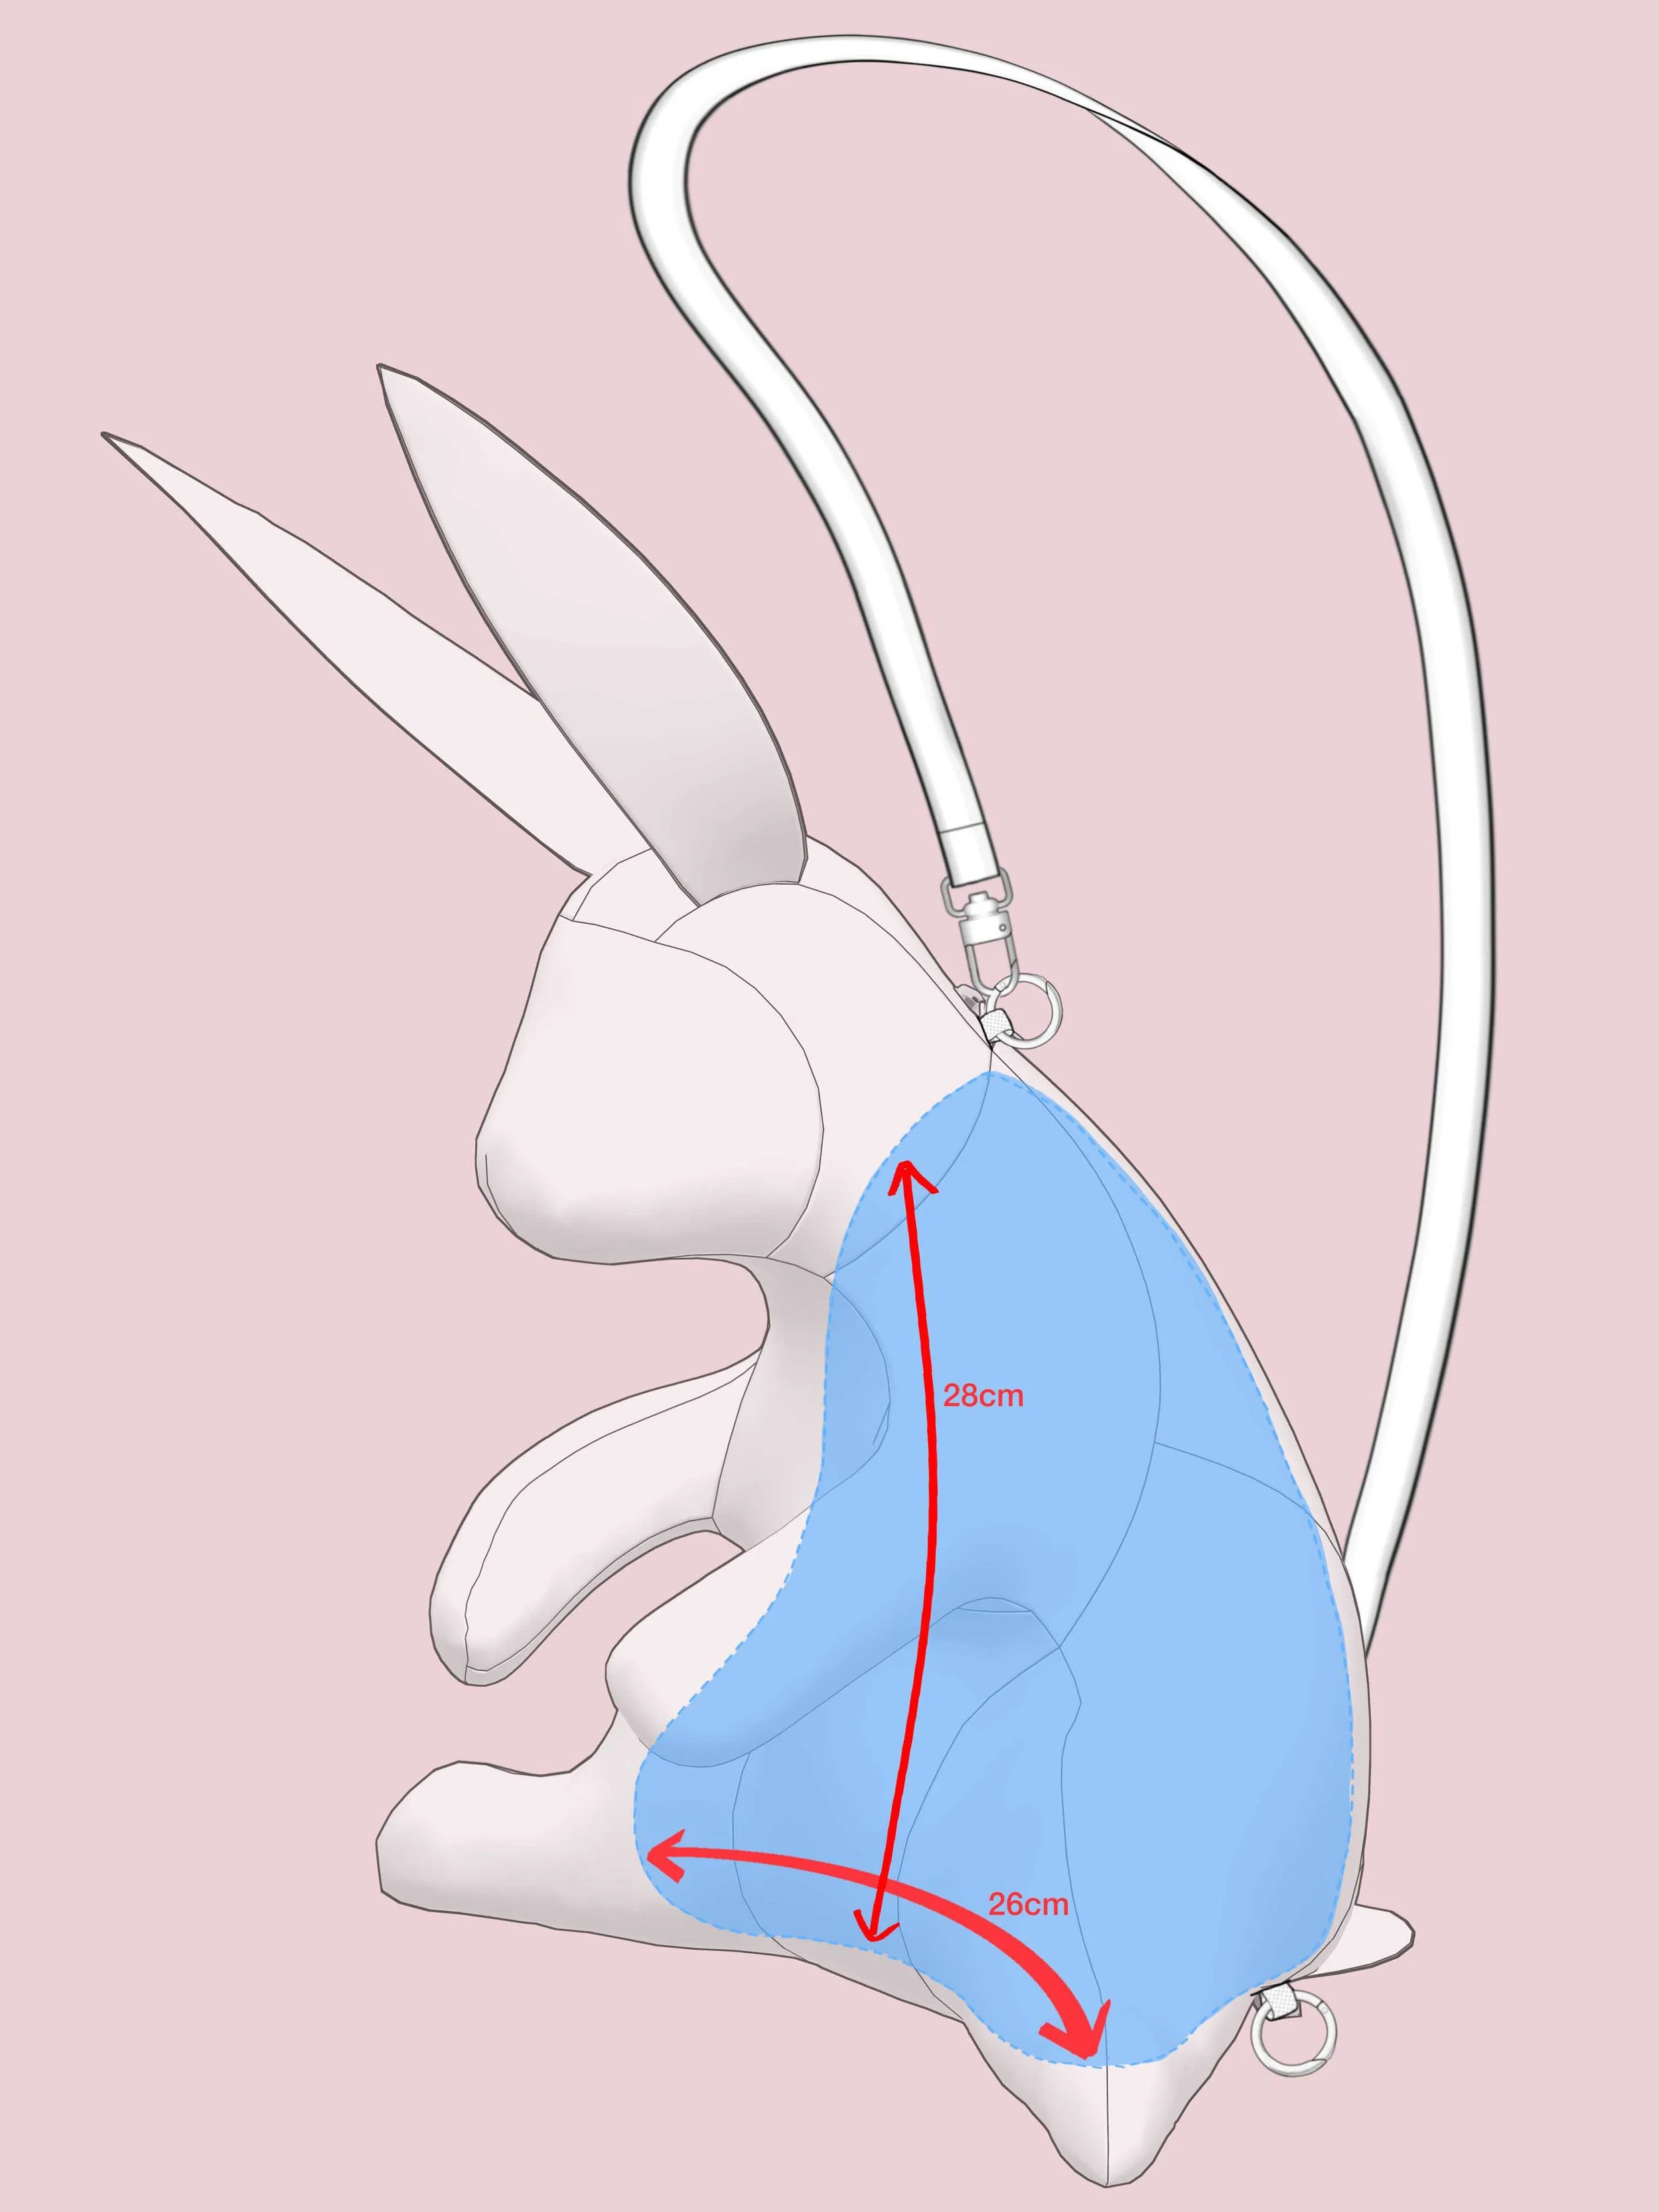
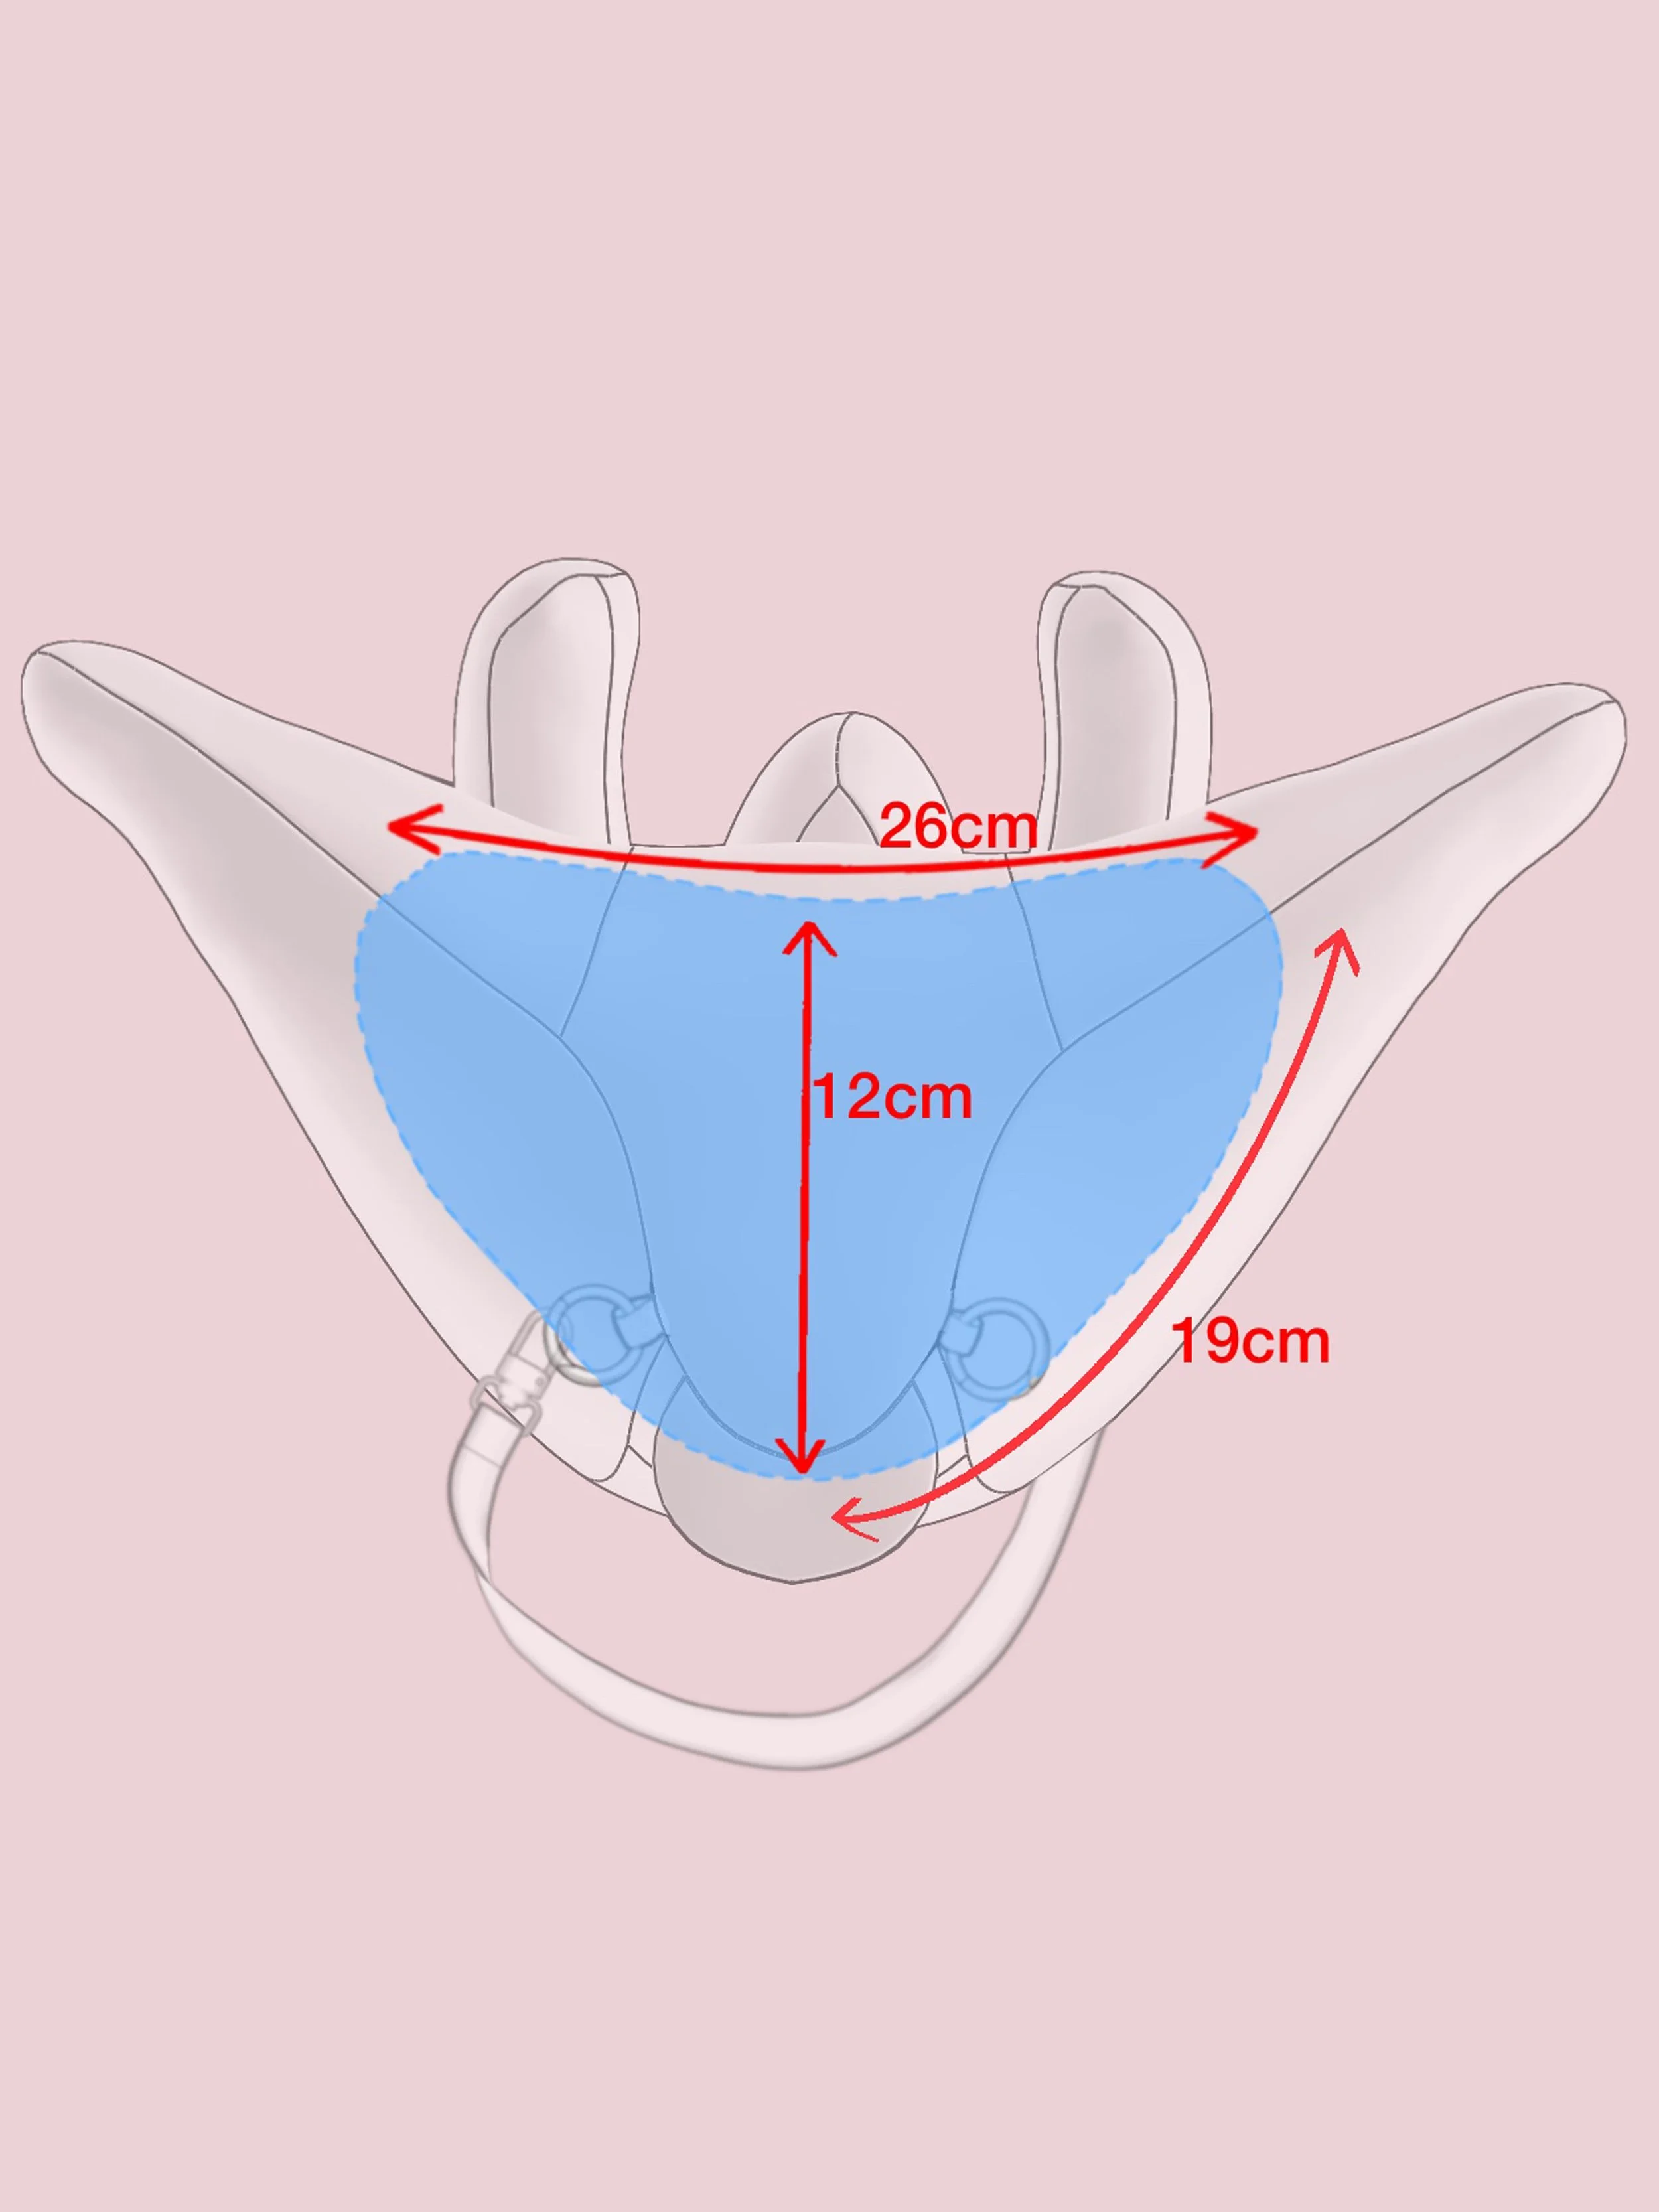
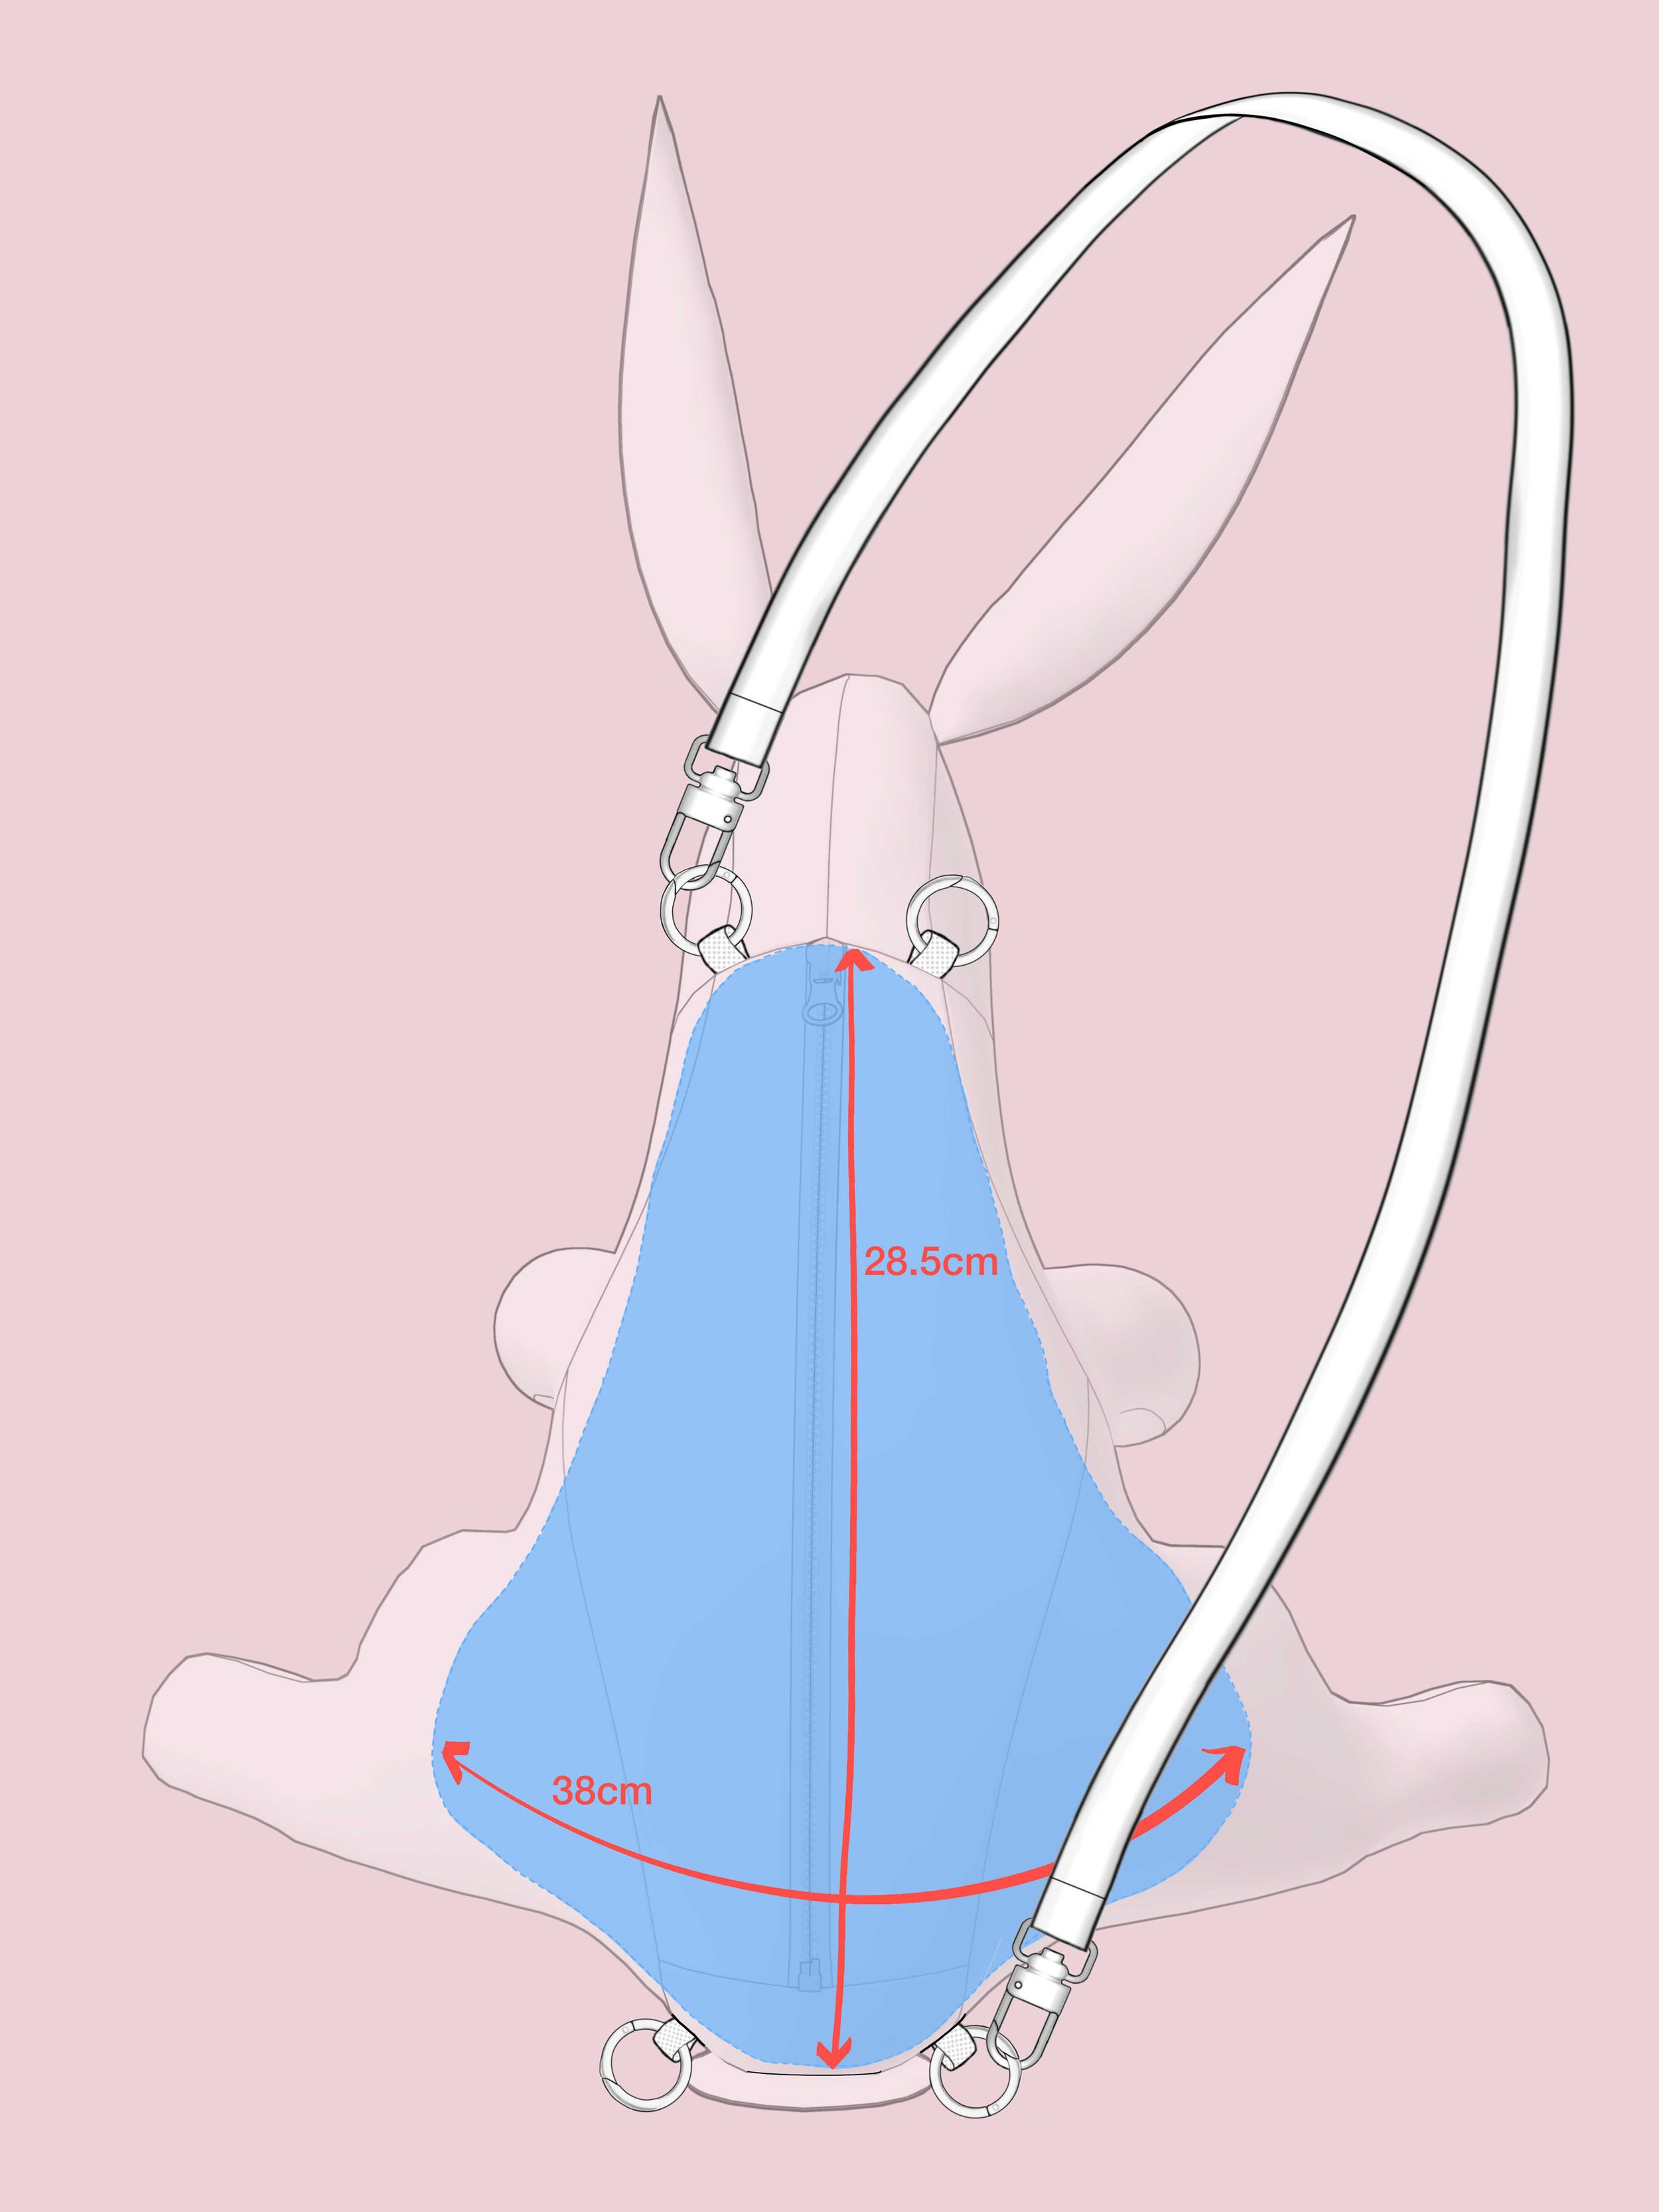
The bag consists of a whimsical 3D structured Rabbit shape, with a lined, roomy internal cavity within the body. The bag features a generous internal volume to hold your daily essentials (e.g. phone/wallet + 500ml water bottle + keys + makeup etc) . The ears, head, arms and legs are filled with stuffing as part of the construction process, whereas the body cavity is left to be filled up by the contents of the bag.
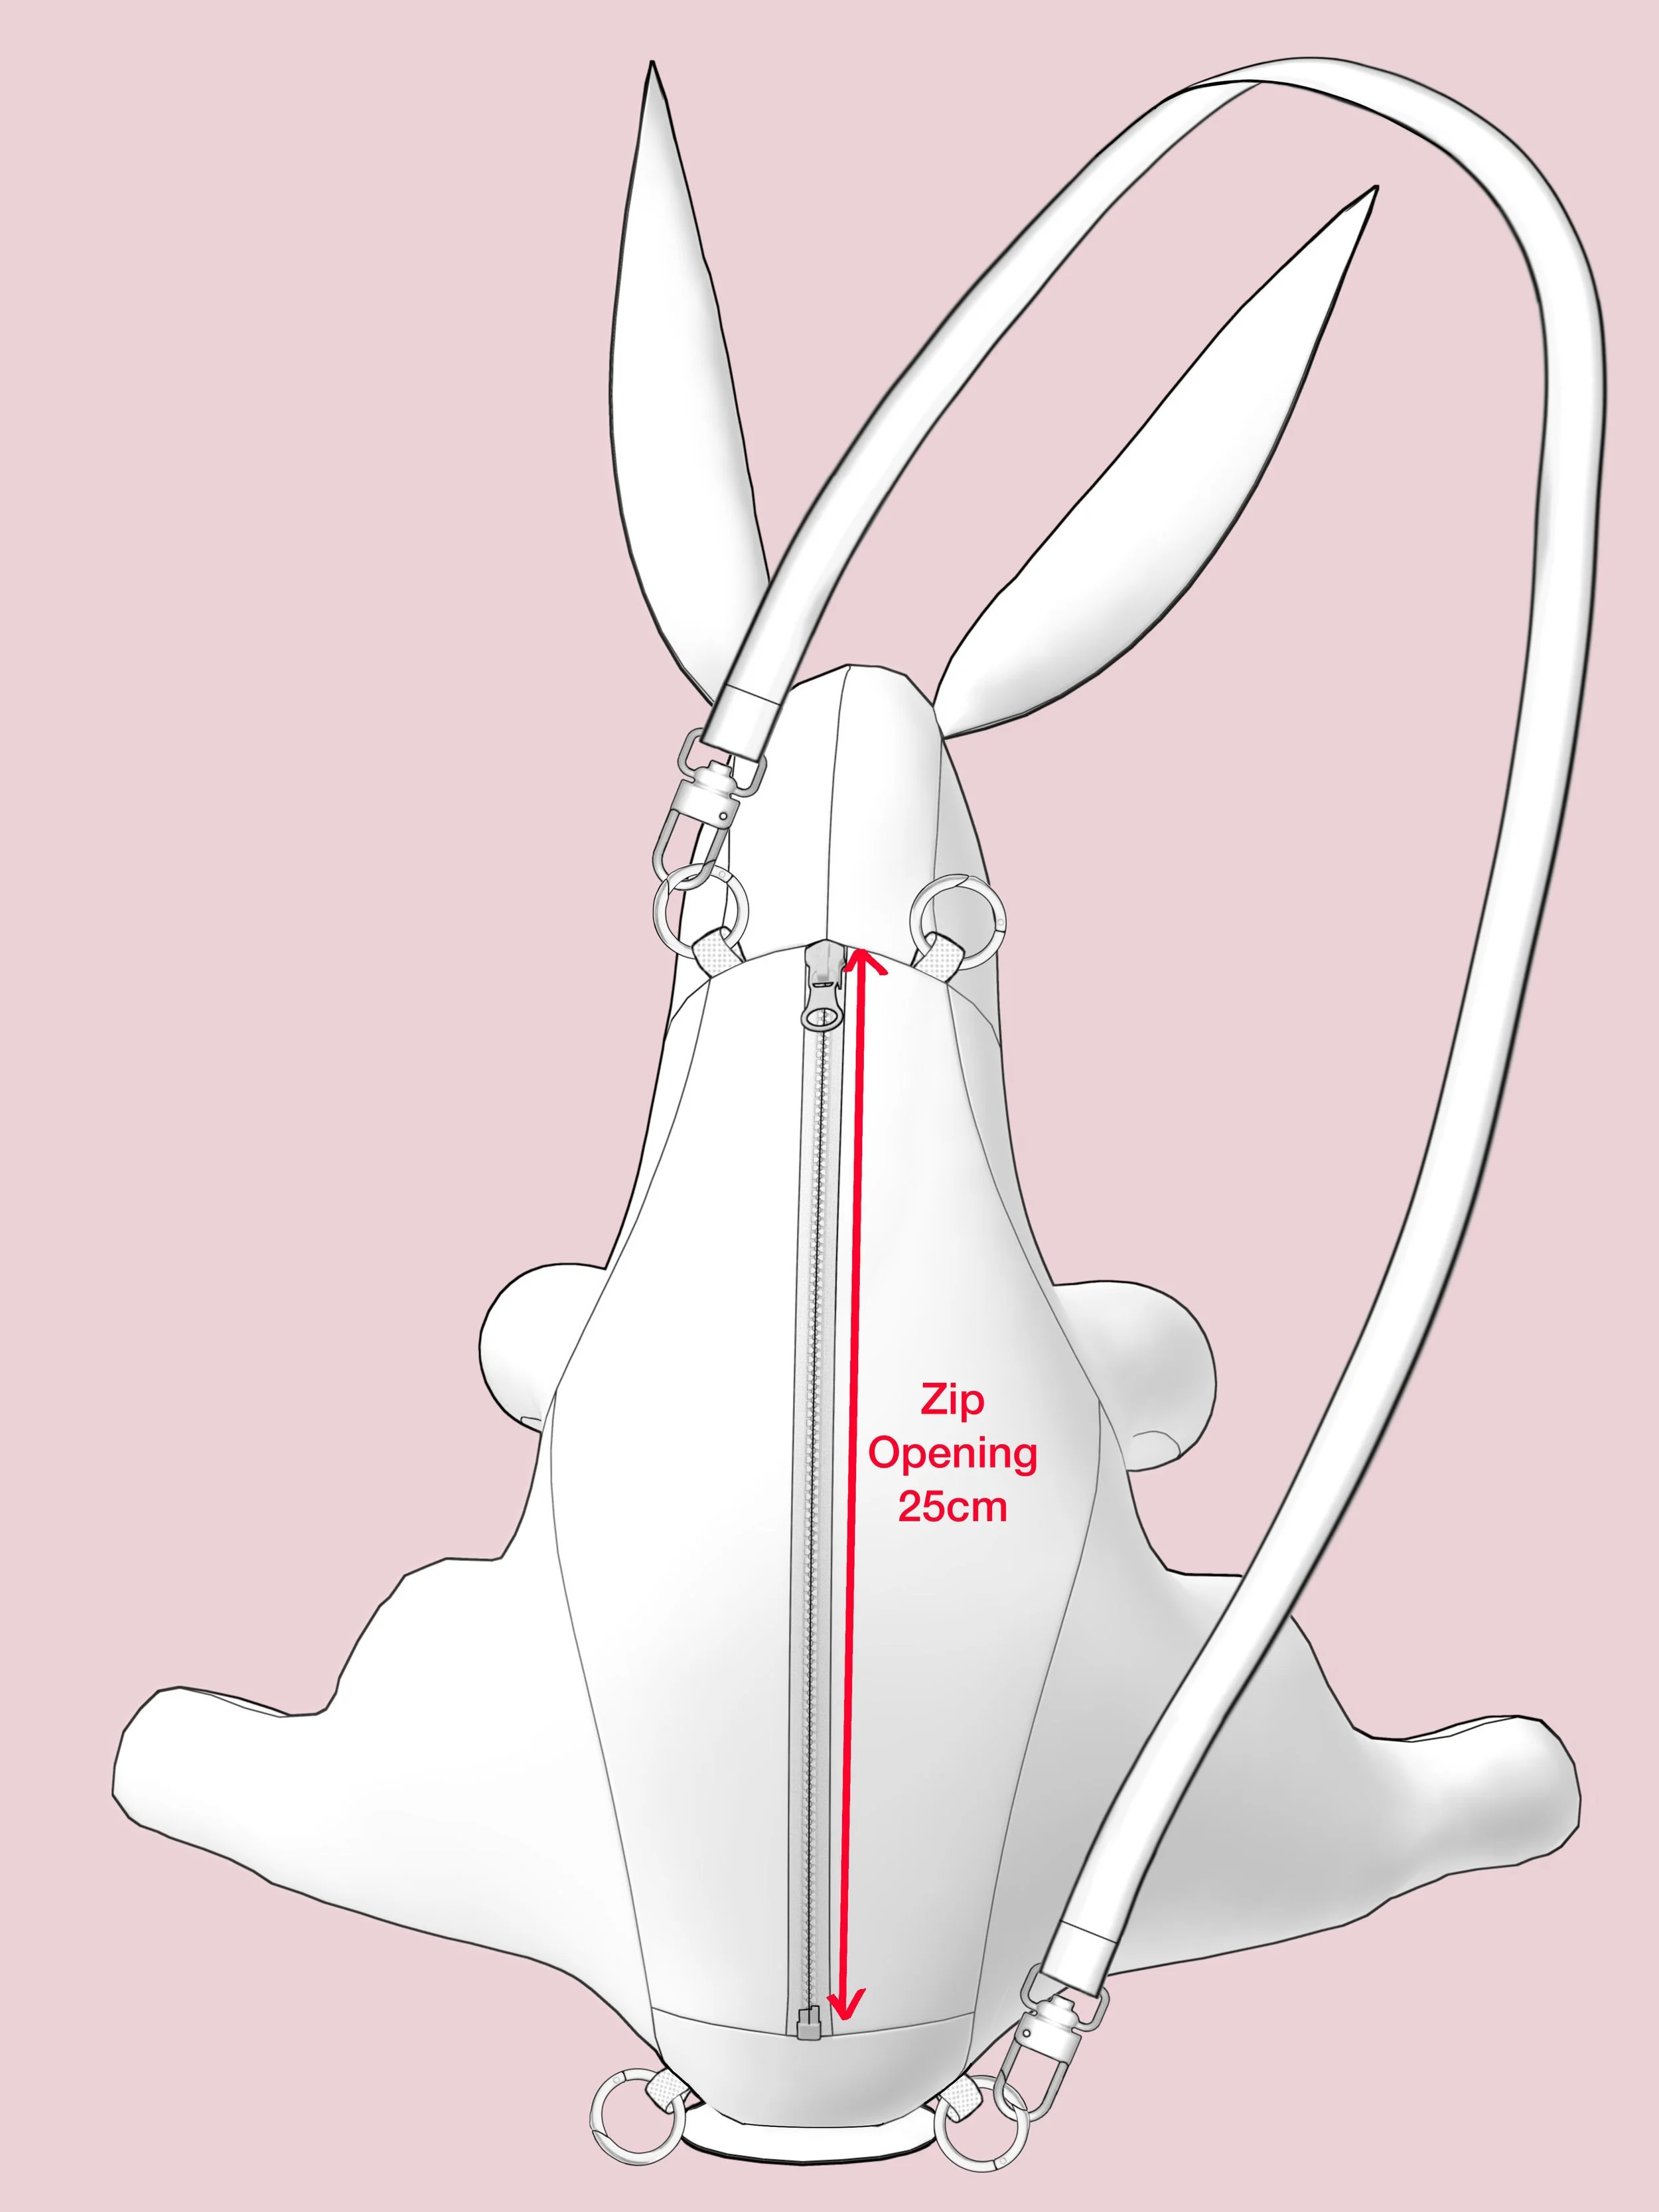
The strap ‘system’ has been designed to allow for this accessory to be adapted for different styles of wearing, from clutch to backpack to cross-body bag, depending on your preference. The strap ‘system’ consists of 4 attachment points and a strap with 2 clips, 1 on either end of the strap.
Price - £ 24.00
-
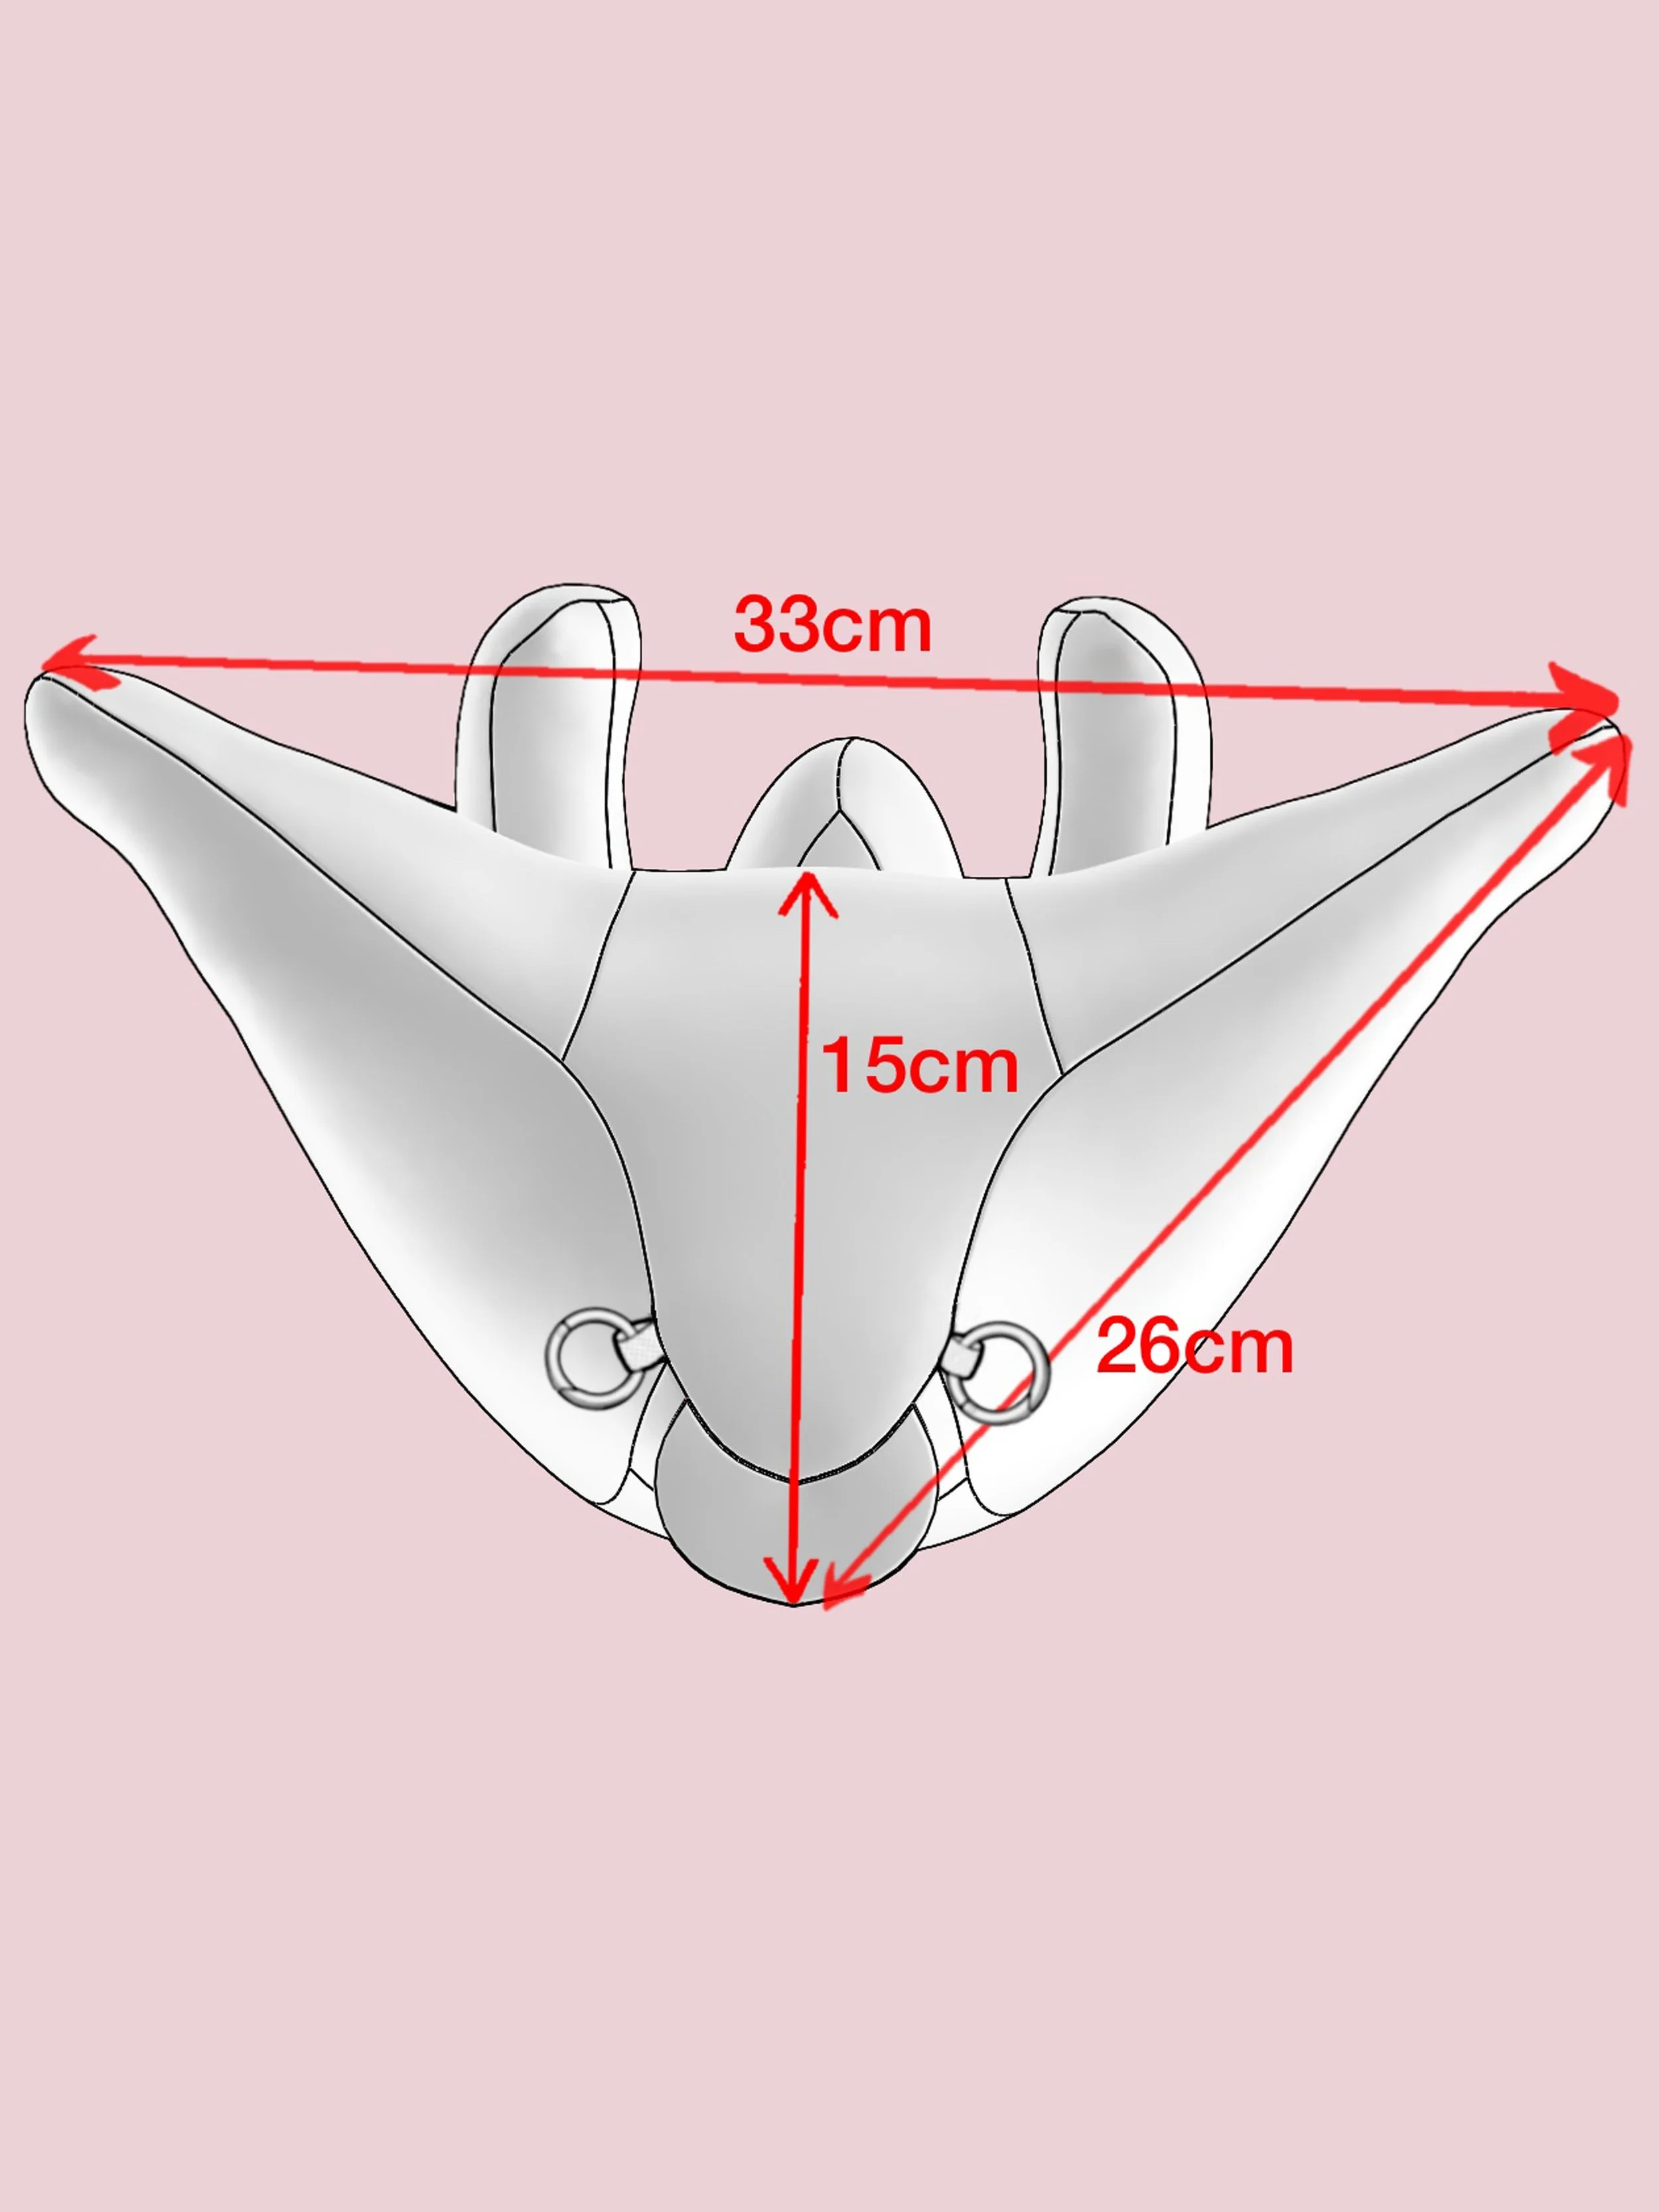
The Rabbit bag is approximately 30cm tall to the top of the head and approximately 33cm wide (at the widest part). The bag has a lined, roomy internal cavity within the body. The image carousel provides details of the approximate external and internal measurements of the bag (the lining cavity is highlighted in blue).
The Length of the strap is customisable. The download includes a pattern for a 100cm length strap and instructions on how to shorten or lengthen the Strap pattern.
The bag closes using an external style exposed zip (25cm).
-
The Rabbit Bag is designed to let the maker develop their textile experimentation skills, as well as learning about 3D object construction through the project’s clever pattern-cut details that create the 3D pose of the Rabbit. The whimsical animal design offers the maker a great opportunity to inject their creativity into the look and personality of the bag though their fabric combinations and choices - with every Rabbit being completely unique to the person who made it.
If you wouldn’t know where to start with a design like this - don’t worry - the detailed instructions (included) will take you through every step you need to learn how to make this bag.
-
As the pattern pieces are all quite small, the intention is to allow you to make use of left-over fabric from other projects. However, If you do not wish to cut the pattern from remnants / offcuts, and instead wish to cut from regular lengths of fabric, please see below for the approximate fabric usage requirements.
FABRIC USAGE
Main Fabric (all bag pieces except the lining): 45cm
Lining Fabric: 45cm
Measurements given above are based on using a 140cm wide fabric (but will vary if your fabric is wider or narrower):
NOTIONS REQUIRED:
You will need the following notions for this project:
Fusing (enough to fuse the pieces for your main fabric)
Stuffing (e.g. shredded scraps, wool, cotton or polyester) you will need enough to stuff the head, arms and legs.
25cm exposed bag zip
16cm length of 1cm wide cotton tape for the 4 Loops / Strap attachment points (4 × 4cm)
2 x Clips for the Strap (the strap measures 2cm wide)
(Optional) 4 x openable Rings (15-20mm internal diameter) - to attach to the Loops / Strap attachment points
-
This project has been designed with small pattern pieces to make use of scraps and offcuts. It can be made all in one fabric, or a combination of different colours and textures.
You will need fabric for the outer - (which we recommend fusing) and a lining fabric. All materials and notions are covered in the tab “Fabric Usage and Notions Required”.
It is important to consider that the bag requires a fair amount of structure for the Rabbit to keep its intended shape. In this design, the head and limbs are stuffed for extra structure however the body of the bag is NOT stuffed ( the body holds the lined, roomy internal cavity to hold the contents of the bag) - so the fabric you choose needs to support the 3D shape of the body.
Picking a naturally structured fabric will help the bag to keep its 3D form, however, floppy or thin fabrics can be used if backed with a structured fusing layer (this can be a stiff fusible interfacing, or fusible felt or fusible wadding).
Fabrics with texture/pile can work really well to indicate the rabbits fur, if that is the look you want. For example, re-purposed fleece, velvet, or even textured upholstery-style fabrics could work brilliantly. An alternative look that we love could be a mixture of denim offcuts for a subtly varied patchwork effect. Another use of re-purposed materials to great textural effect could be to use quilt or blanket offcuts or even reinforced knit fabric panels.
For the Lining Pieces we recommend using a lining fabric, or light-weight cotton, (most lightweight fabrics would work well). The fabric used for the lining will not be visible unless the zip is open, but you may wish to consider colour matching (or contrasting) your lining deliberately with your outer fabrics.
-
This ROBERTS | WOOD KiT project is provided as a PDF pattern with sewing instructions. It includes an A4/ US letter printable PDF pattern, which can be printed and assembled at home using any standard home printer. An A0 format pattern is also included should you wish to print it at a printers/print shop. The product includes detailed step by step instructions and diagrams.
-
Equipment required: Scissors, sellotape (if printing A4 pattern), sewing machine, zipper foot, hand sewing needle, measuring tape, chalk (or stickers for labelling fabric pieces), pins, iron.
-
Intermediate and above.
This pattern may differ from the construction stages of a traditional bag pattern you may have come across before. However we have made the construction stages as simple and fun as possible, with full step by step instructions included, so don’t be put off if you haven’t made anything quite like this before!
Although this pattern is aimed at an Intermediate level sewist and assumes knowledge of basic sewing techniques and terminology, we think it could also be a fun practice project for a patient and confident beginner with a few projects under their belt, who wants to learn new textile and sewing skills.
-
This is a challenging and fun make, without being an overwhelmingly big project. We would imagine that most people will want to complete this project over several days.
The project is split into 10 separate stages so you can work on this project one stage at a time.
For those who like a challenge and learning something new, this project is a perfect.