Tie Bow Hair Accessory (Sewing Pattern - PDF)
This ROBERTS | WOOD KiT project is provided as a PDF pattern with sewing instructions.
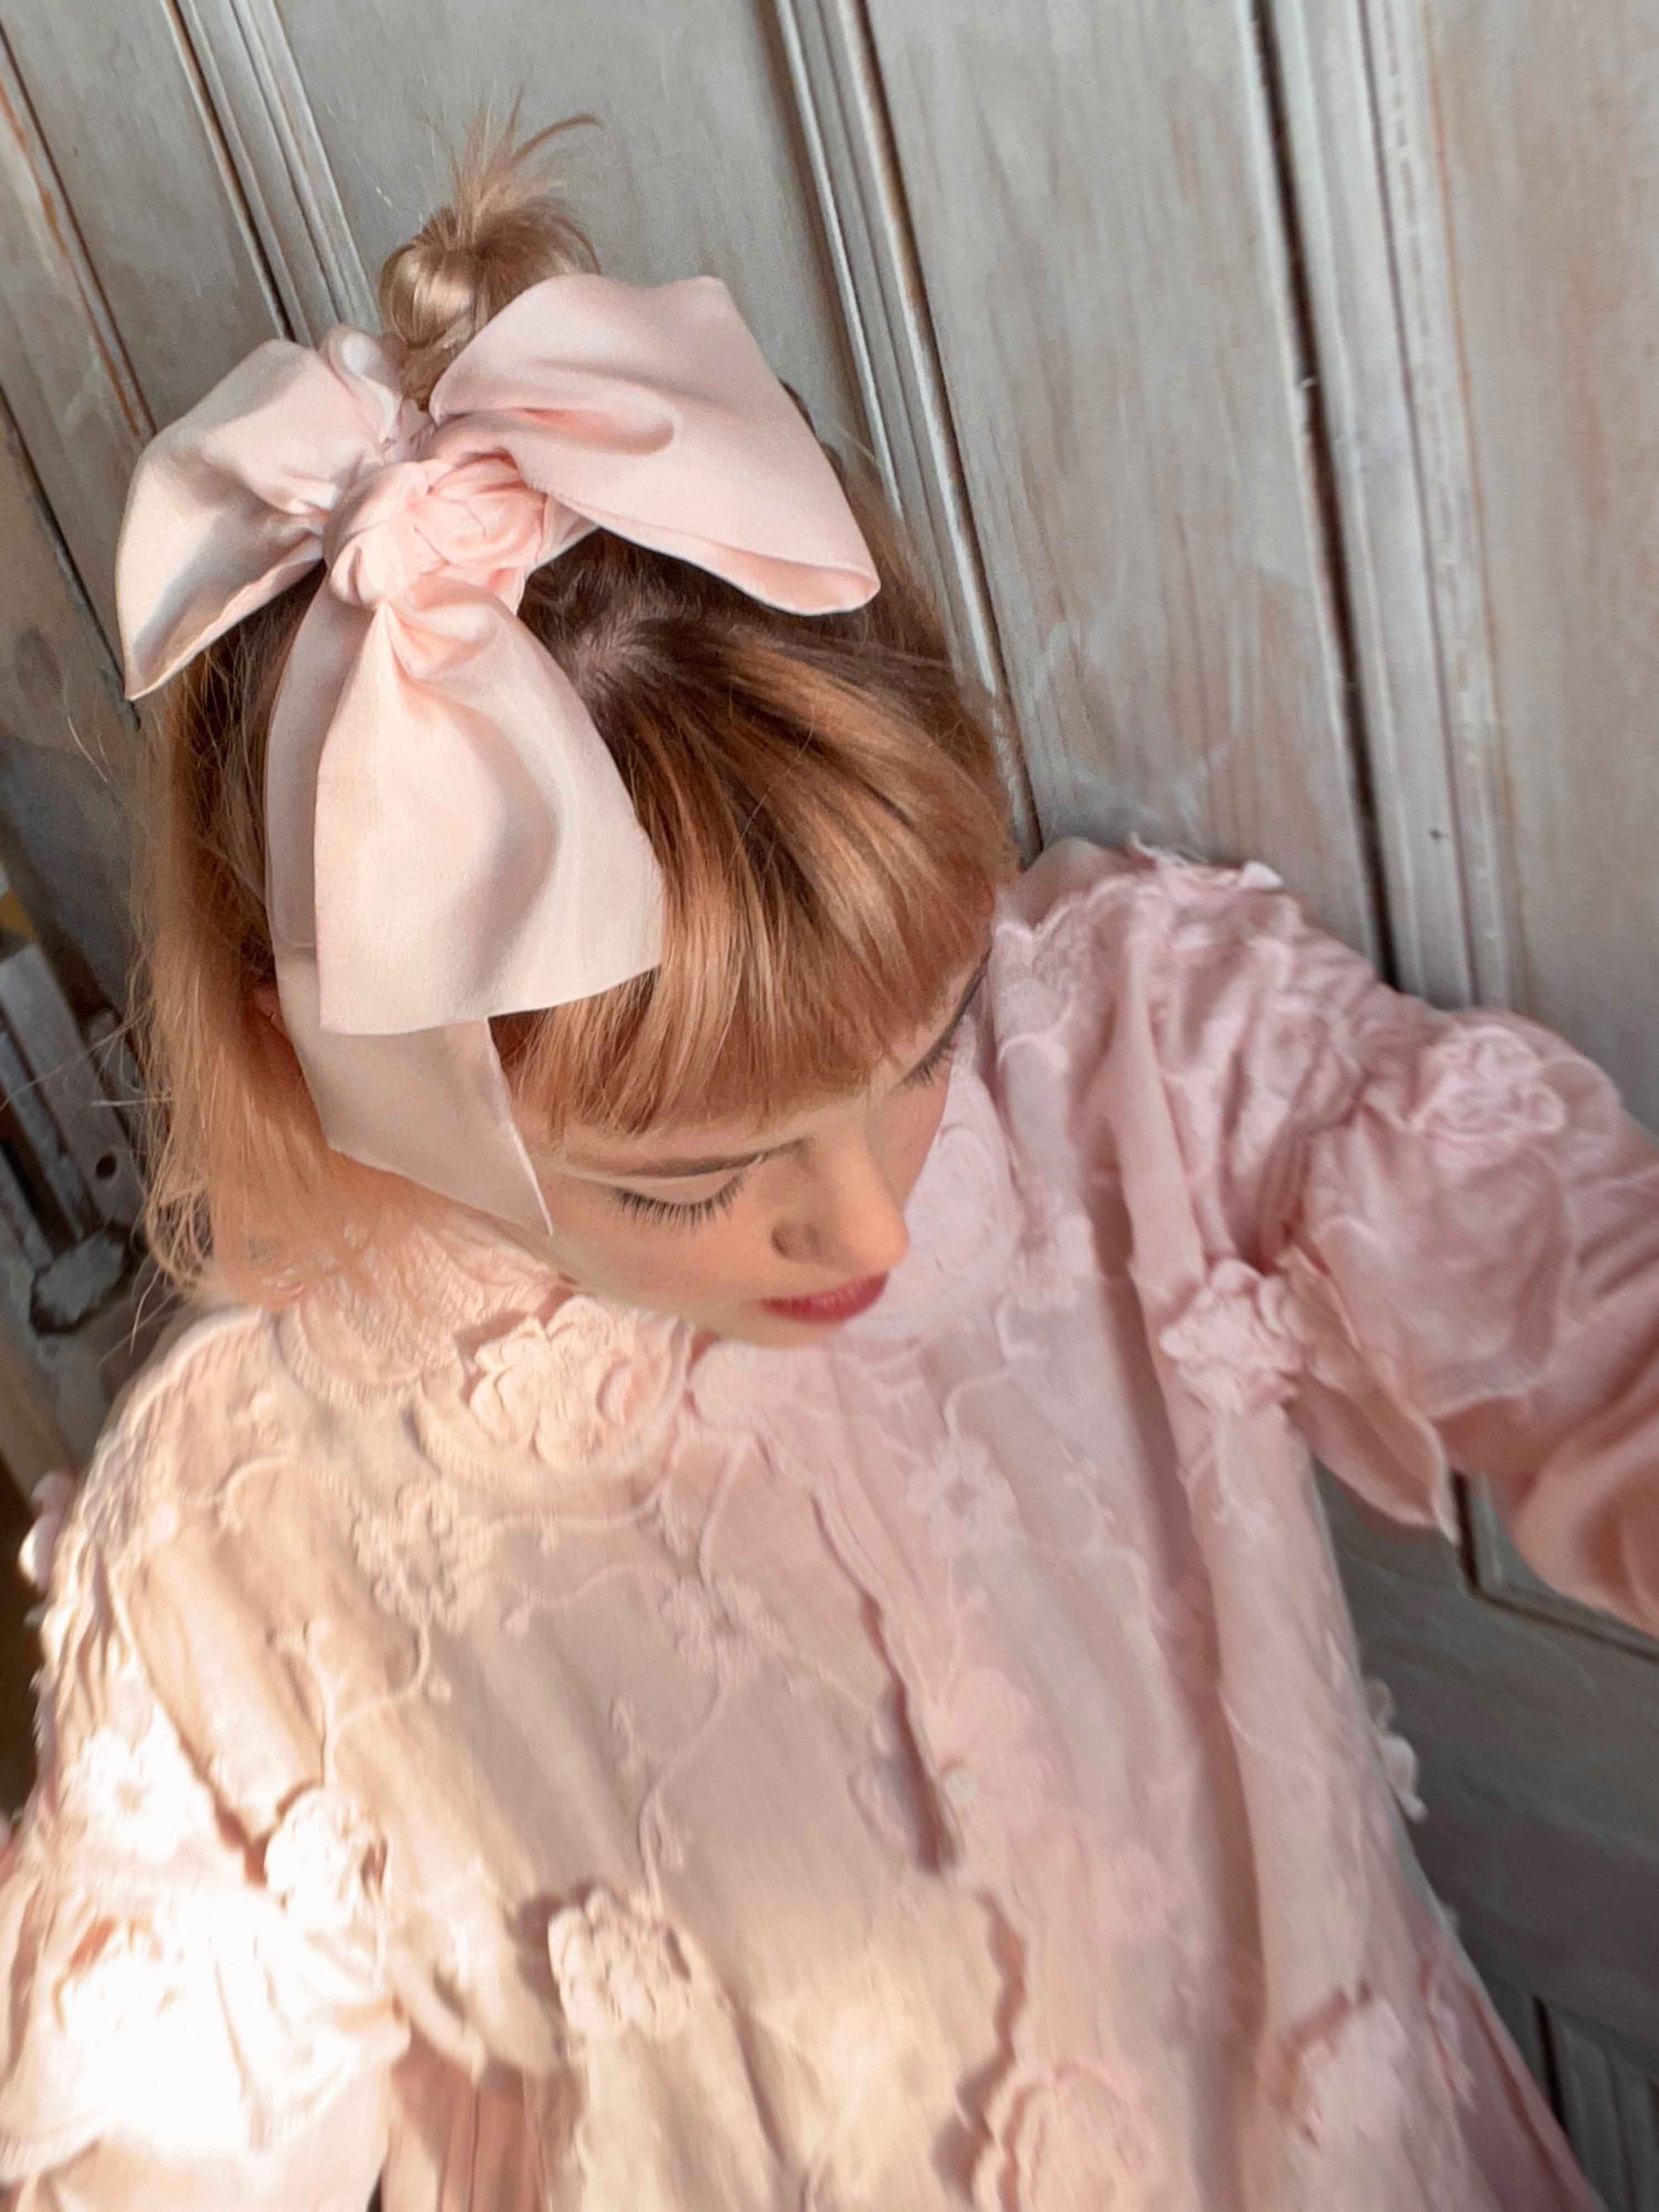
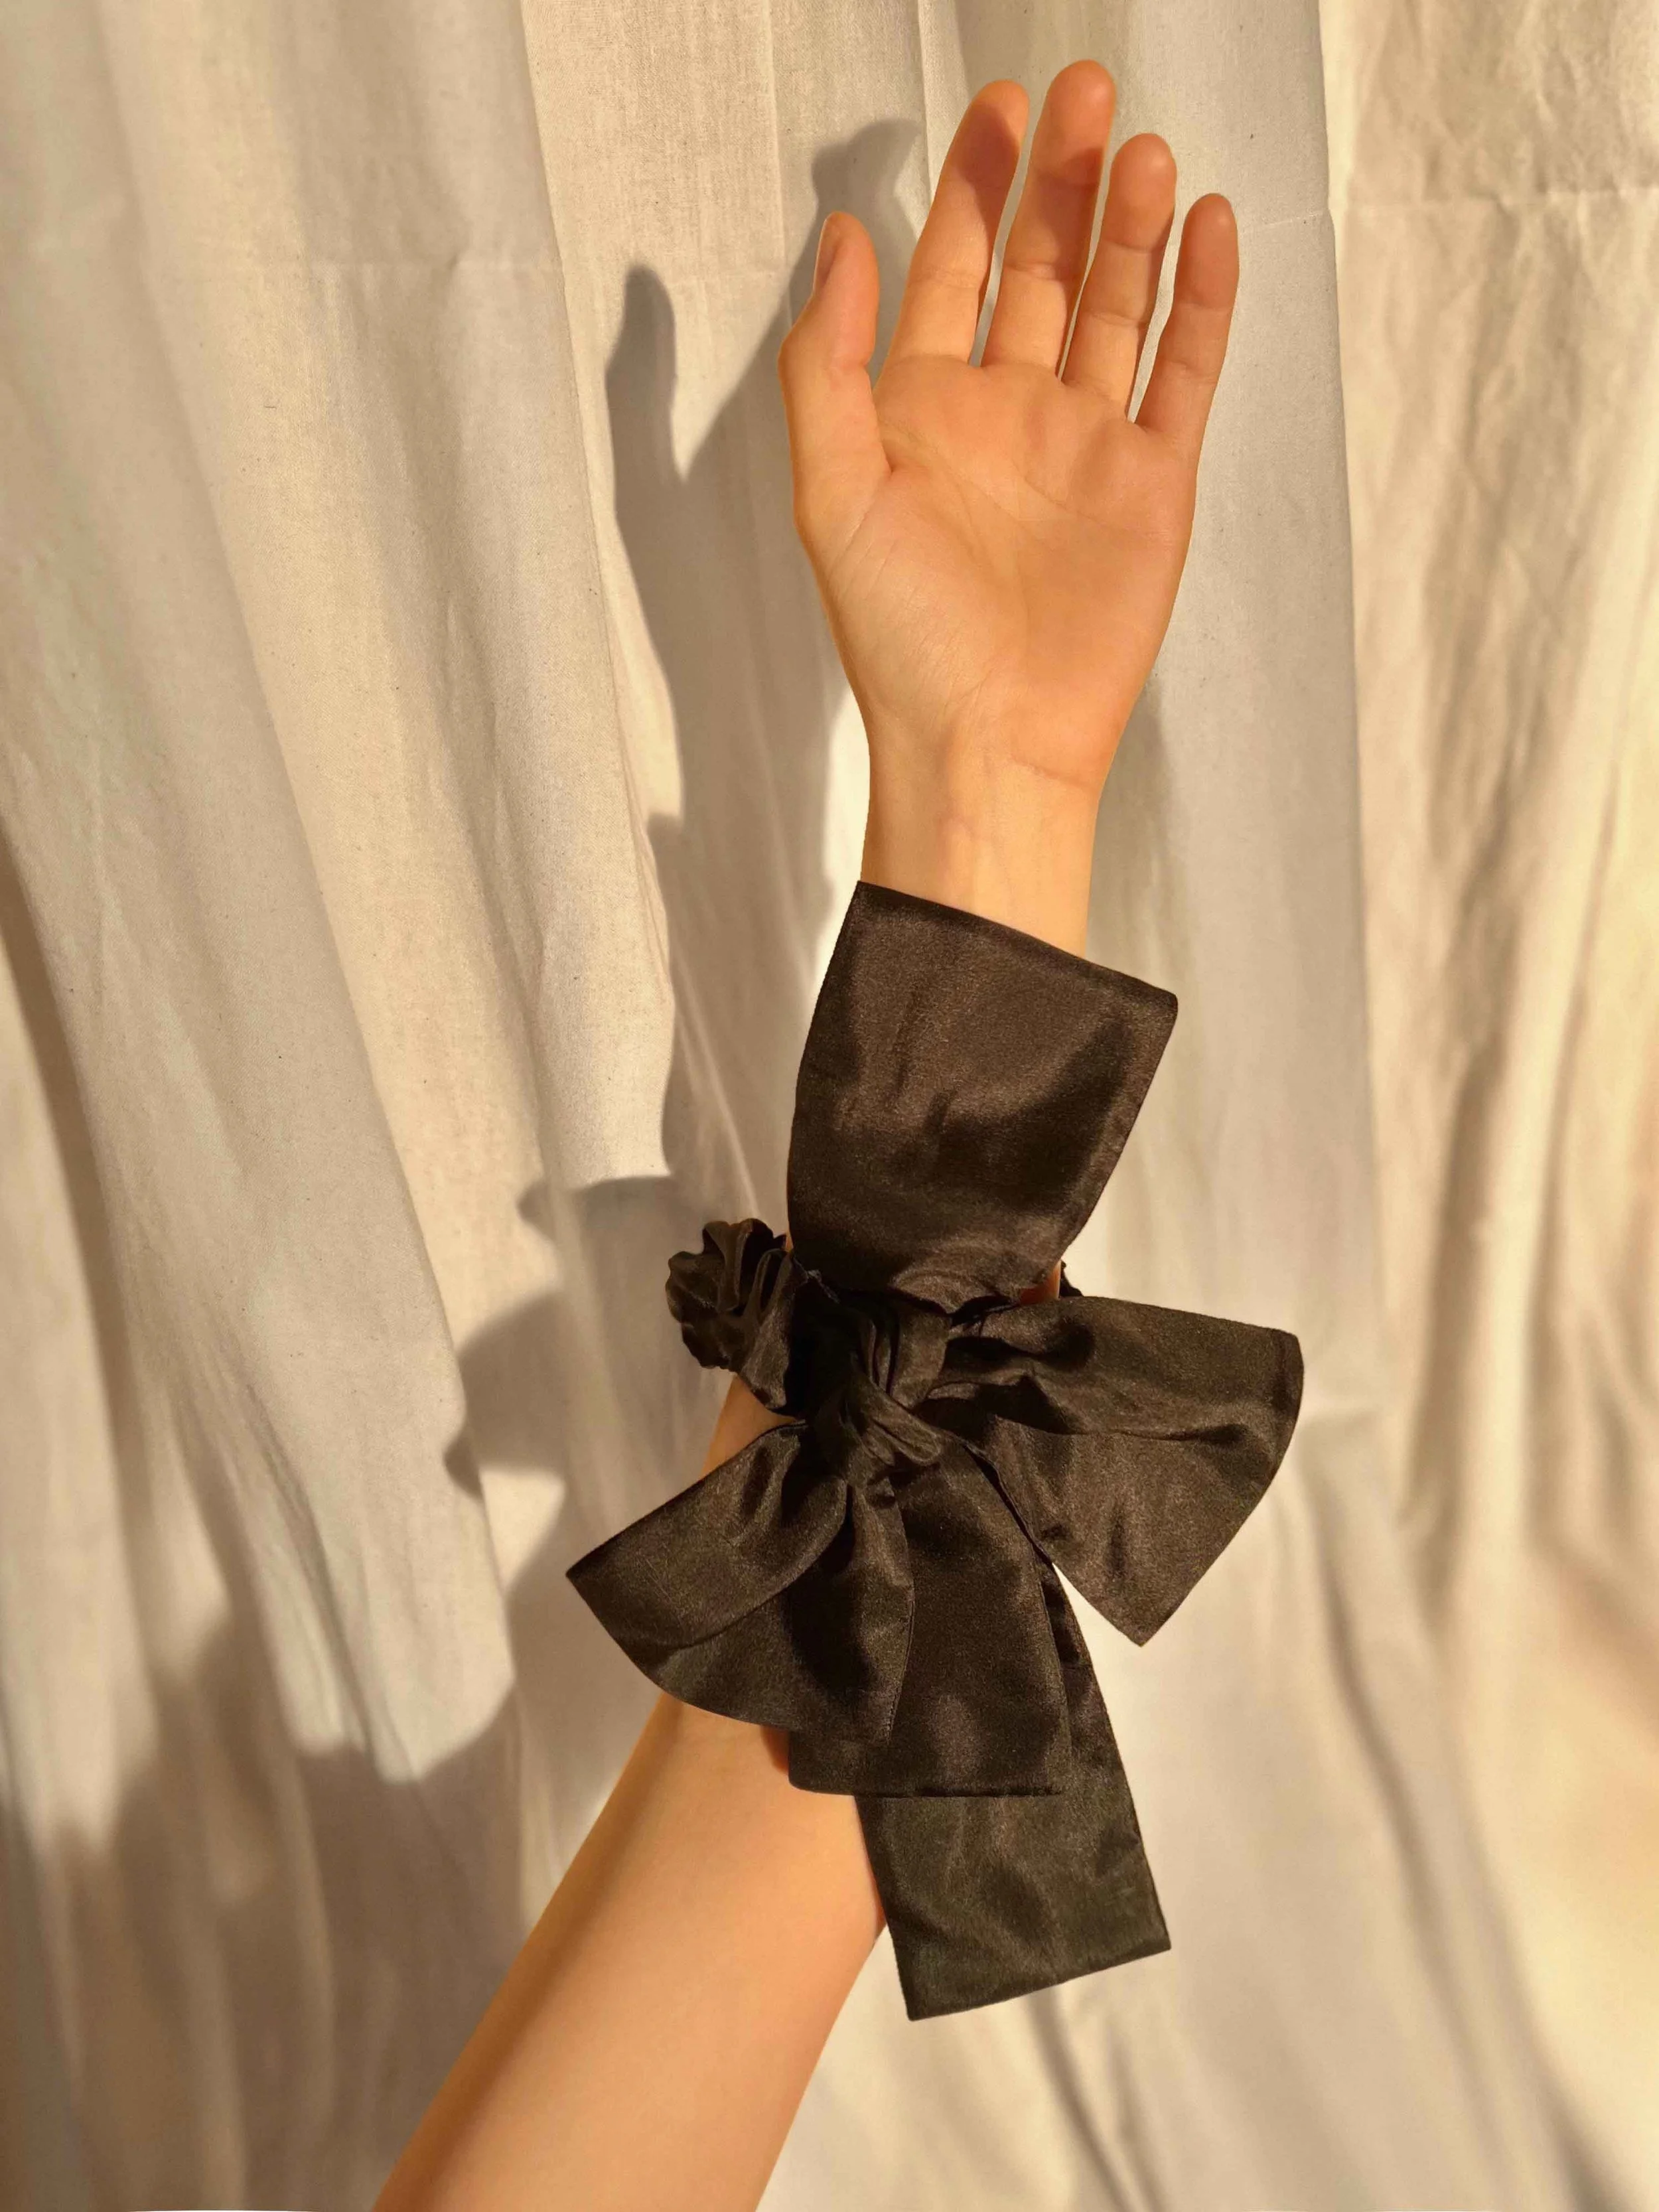
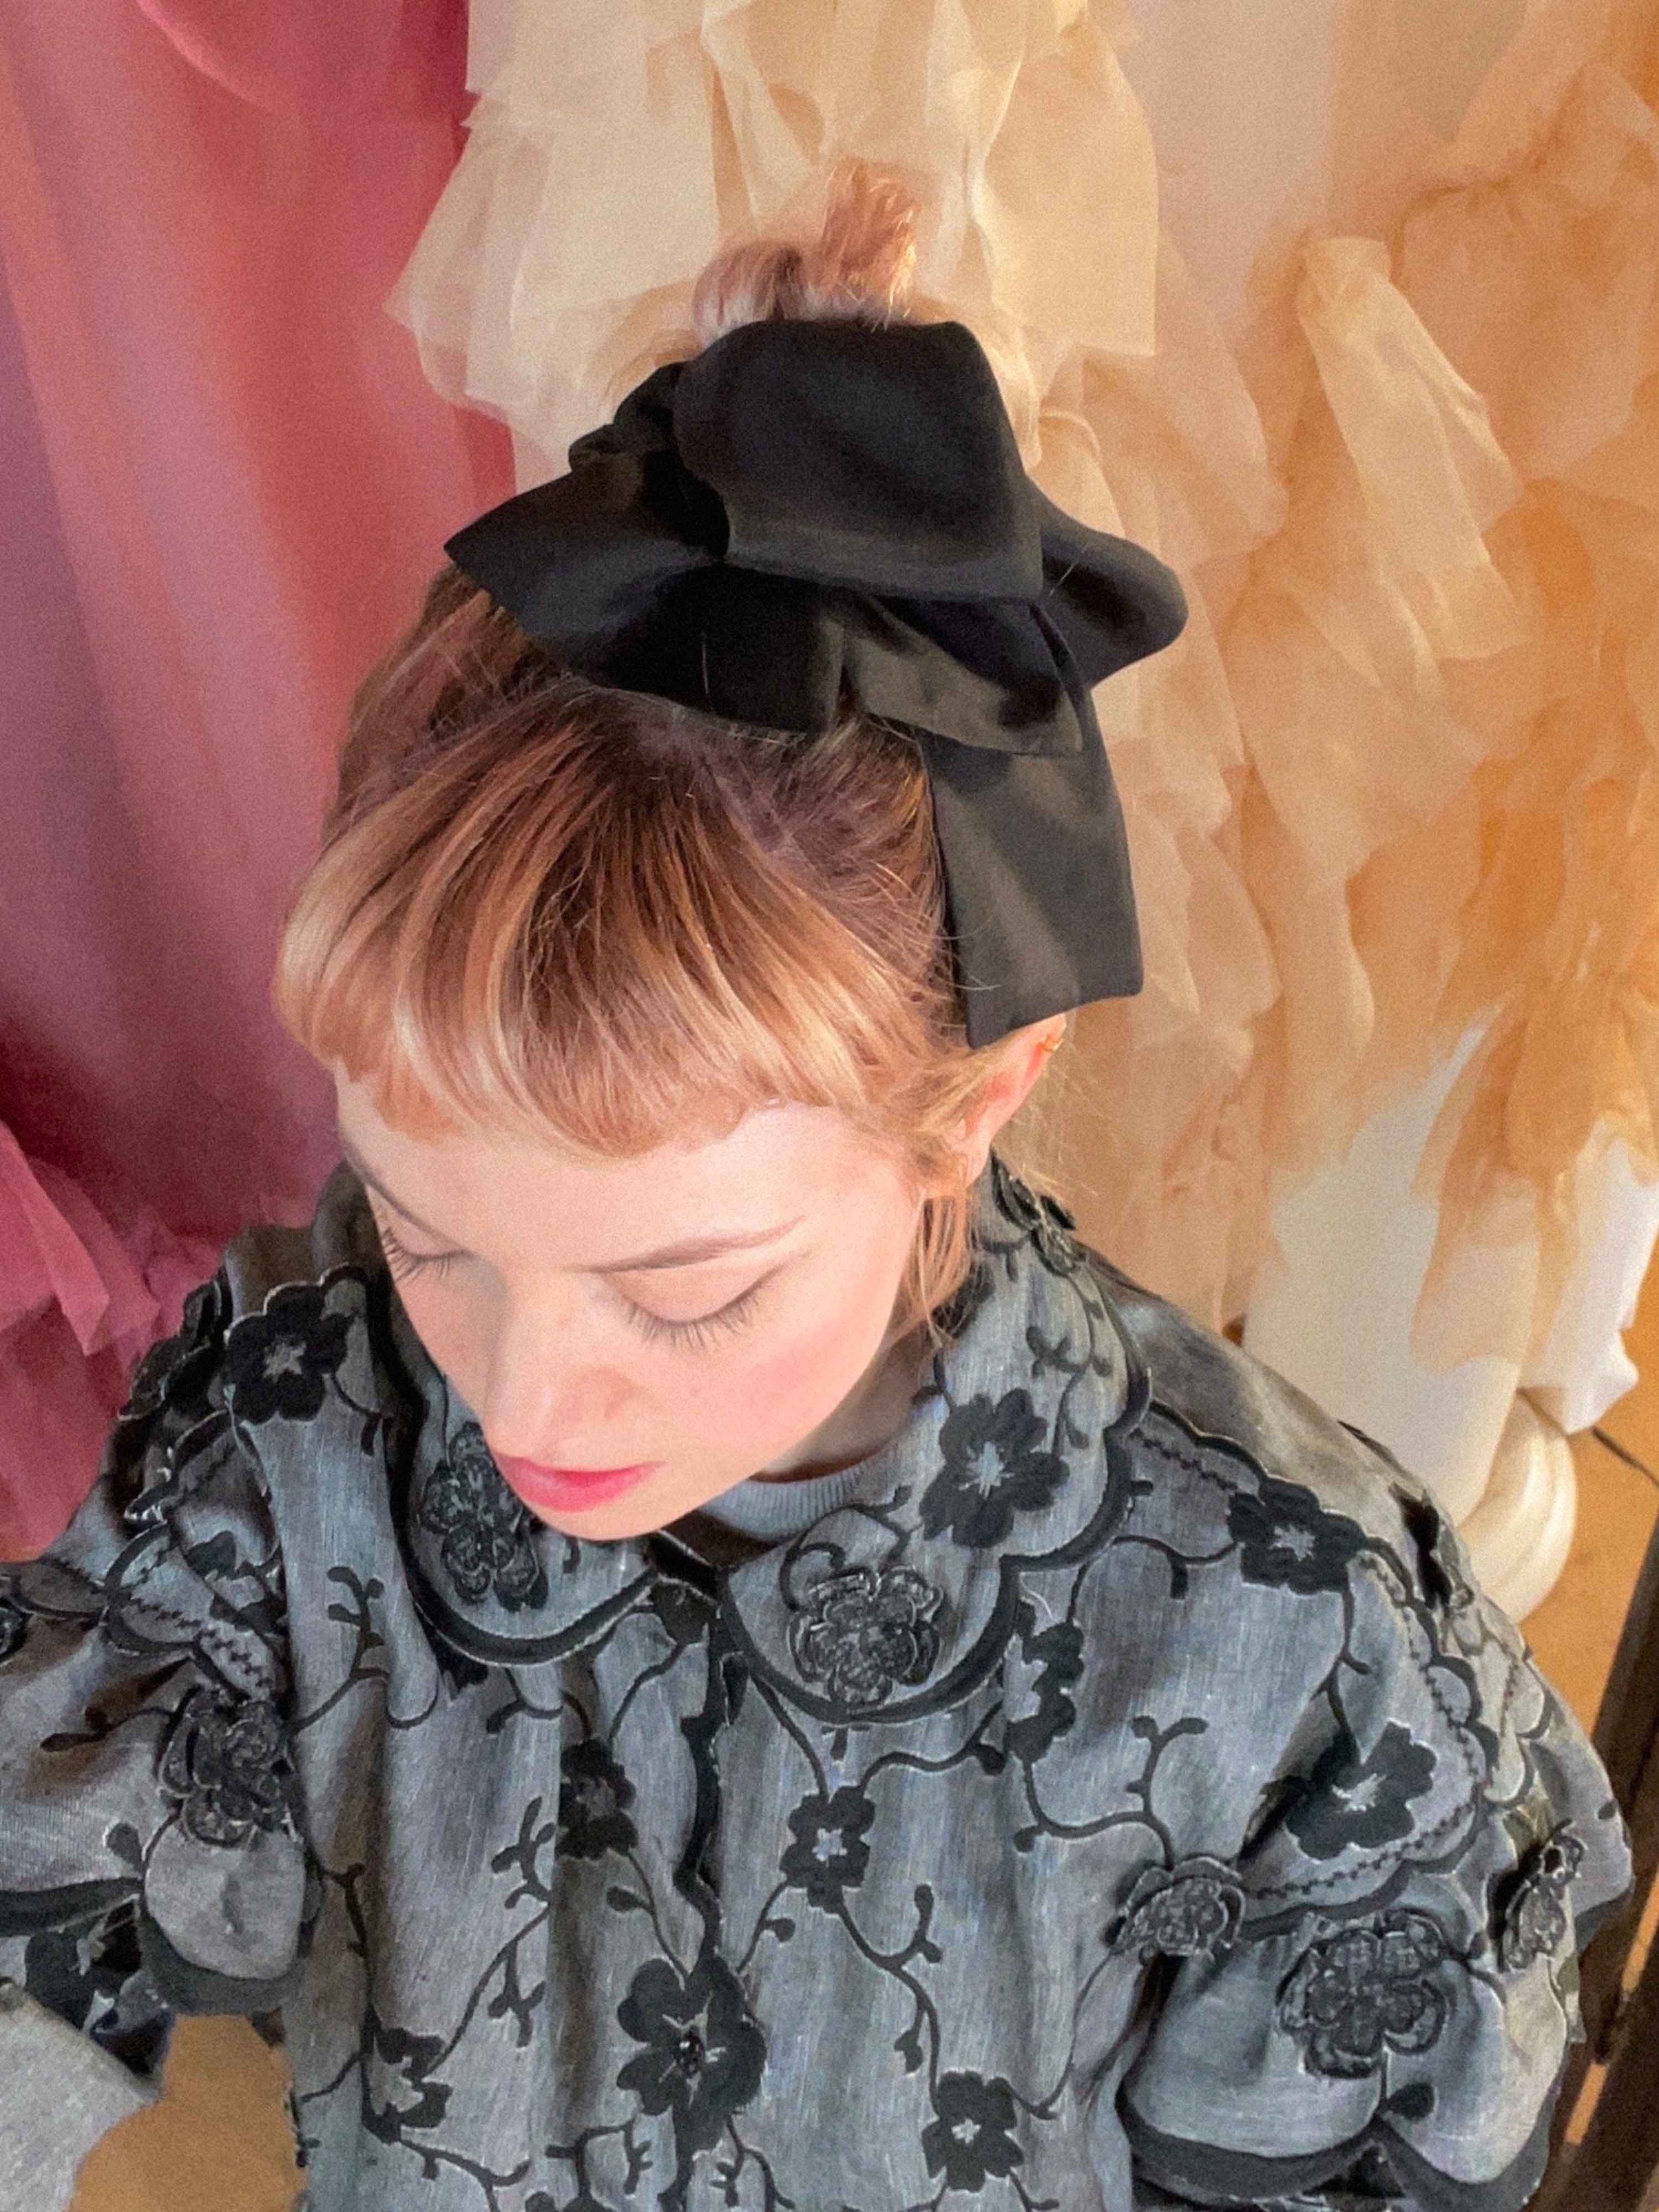
This simple project is the perfect way for beginners to try out a ROBERTS | WOOD KiT project. The design features a tied bow over a looped bow with a gathered, elasticated band which can be worn on the wrist/arm or in the hair. The ‘Tie Bow’ design is based on a design detail that ROBERTS | WOOD first used as a fastening detail in the SS18 collection ‘without bound without dimension’
This scrunchie - style accessory pattern is ideal for sewists from beginner level, upwards.

Price - £ 4.00
-
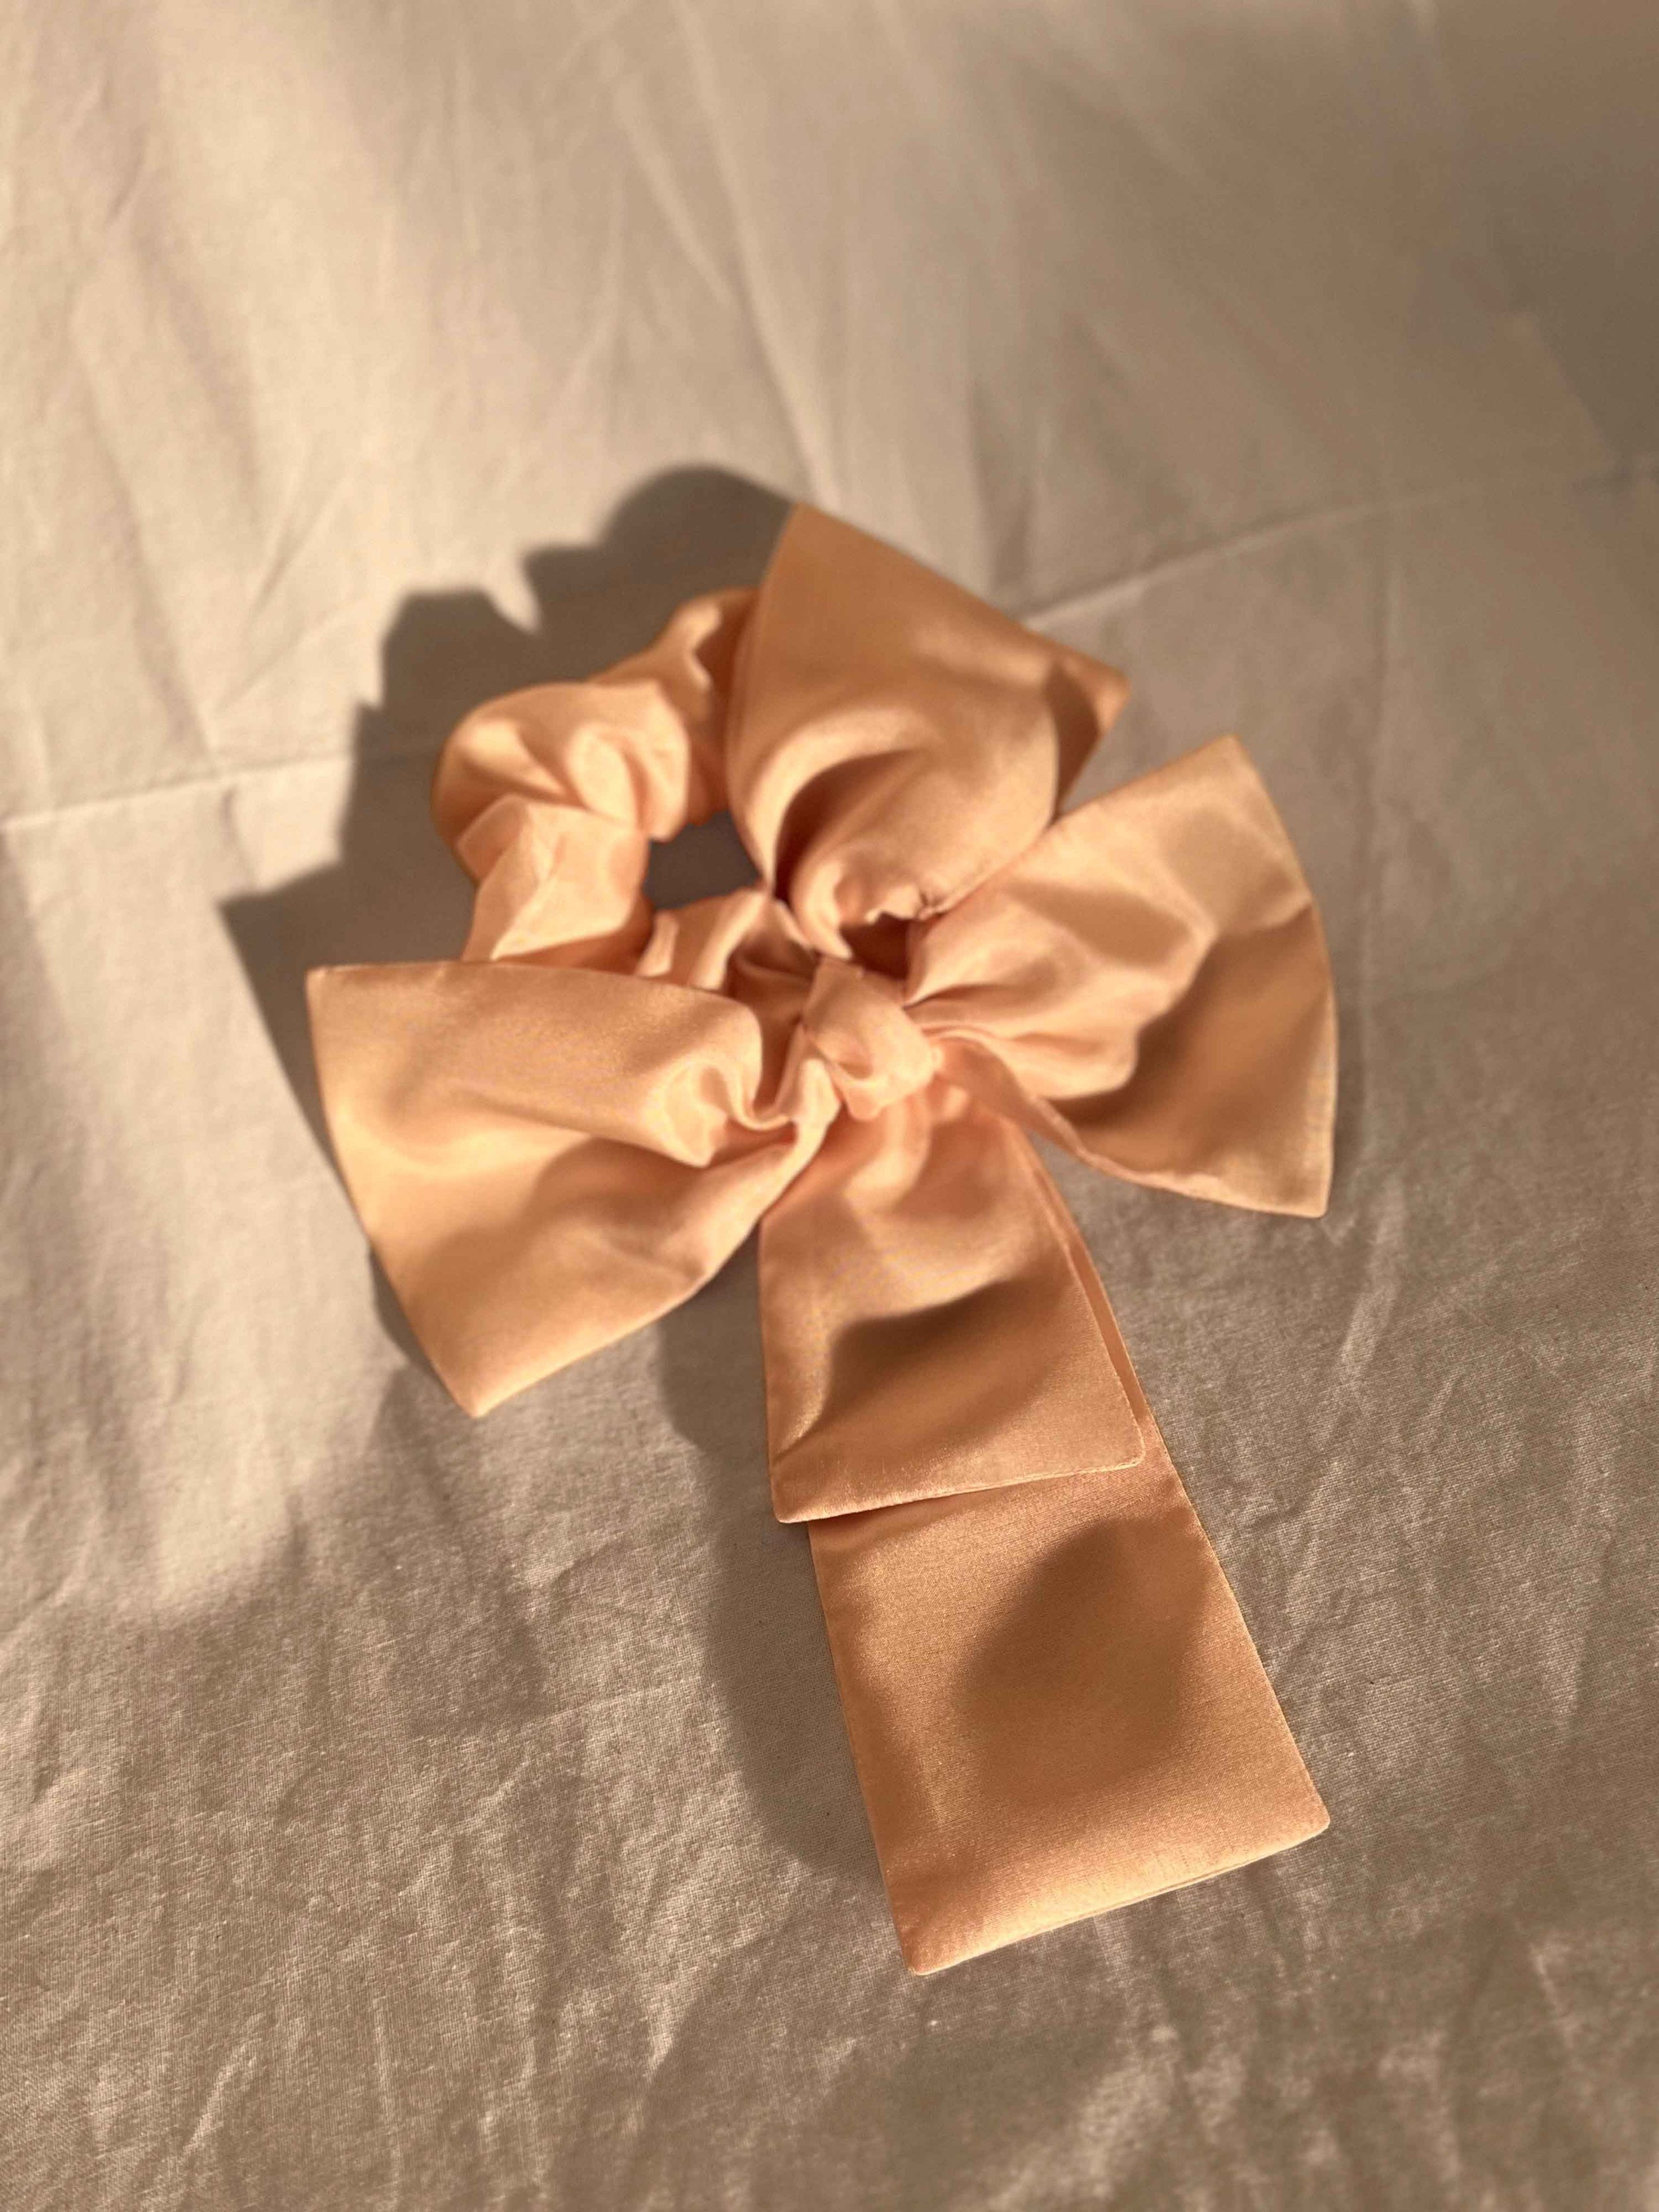
The idea behind this design is very simple - it involves creating a generous-sized vertical and horizontal bow shape, which are combined and added to a channel through which elastic is inserted. This forms a scrunchie - style loop.
The Tie Bow Accessory pattern has been specially designed as one of our entry-level projects; suitable for a confident-beginner sewist who wants to try one of our make-your-own designs. There are only three pattern pieces to cut - (two of which need to be cut x2) making this one of our most straightforward projects. This pattern has been specifically developed to make use of smaller remnants and offcuts of fabric which you might have left over from other sewing projects, or possibly from other unused textiles or clothing.
-
This pattern is one size. It features an elasticated channel which can be gathered to your desired length, depending on the length of elastic you choose to use. (Note - the circumference of the accessory includes the elasticated channel plus a 5cm non-elasticated section where the bow sits, so take this into account when calculating your desired final circumference)
Our recommendation: we have used an elastic cut-length of 12cm in our version, but you can make the elastic length to your preferences.
-
The design will work best with lightweight fabrics such as silk or cotton. You could cut the fabric pieces either from a single fabric or two or more different fabrics, for a different effect.
You can choose a medium or heavier weight fabric for a different look, (as long as your sewing machine can handle it!)
For our version of the Tie Bow accessory (examples pictured) we have used a pink and black silk lining fabric, from our studio’s in-house production cutting-table offcuts. This very lightweight silk creates a delicate and unstructured bow. A slightly heavier or stiffer fabric would create a more 3D, structured bow.
-
This pattern is intended to be cut from remnants from your other projects however if you are sourcing fabric to use, you will need a 30cm length of a 140cm-width fabric to cut the fabric pieces from.
-
This ROBERTS | WOOD KiT project is provided as a PDF pattern with full sewing instructions. It includes an A4 printable PDF pattern, which can be printed and assembled at home using any standard home printer. All our projects include detailed instructions, showing you step by step how to make the project.
-
Materials required: 1 or more different fabrics for the cut pieces, thread, 1cm wide elastic (you can also use narrower or wider elastic if you wish - max width 4cm). The length of elastic to be inserted is up to you, but we used 12cm cut length for our versions, which we think work well if you are using it as a hair accessory.
Equipment required: Paper scissors, sellotape (for assembling A4 pattern), Iron, fabric scissors, measuring tape, tailors chalk, pins, safety pin (for inserting the elastic through the channel), sewing machine.
-
Skill Level
Beginner and beyond
This pattern is suitable for anyone from beginner level and upwards. It assumes knowledge of basic sewing techniques and terminology, but we think it will be a fun project for anyone who wants to learn new textile and sewing skills and is looking for a way to get started with ROBERTS | WOOD KiT! An ideal project to build confidence before moving on to one of our more complex projects.
This is a perfect project to undertake using fabric offcuts that are otherwise going to waste. The pattern includes a step-by-step instruction in pdf form to enable you to learn how to make this piece.
Most of our other projects are intended to take several days to complete, however this ‘mini-make’ could easily be completed in single sewing session.
-
With a make-time of roughly 1 hour * depending on skill level, this is one of our shorter projects, so it’s a really satisfying make, which you will enjoy seeing come together over a short time.
*(excluding cutting time and printing and assembling the pattern)